How to Divide Hydrangea Plants?
Hydrangeas, celebrated for their vibrant blooms and lush foliage, bring a touch of elegance to any garden. These beloved shrubs can thrive for many years, but like all plants, they can sometimes benefit from division. Dividing hydrangeas not only rejuvenates mature plants but also provides you with new plants to expand your garden or share with friends. This comprehensive guide will walk you through the entire process, from determining if your hydrangea needs division to the step-by-step instructions and essential aftercare.
Why Divide Hydrangeas?
Several reasons make dividing hydrangeas a worthwhile endeavor. First, division helps to revitalize older plants. Over time, hydrangeas can become overcrowded, leading to decreased flowering and overall vigor. Dividing the plant allows each section to have more access to nutrients, water, and sunlight. Second, you can propagate new plants. Instead of buying new hydrangeas, division allows you to create clones of your existing plant, preserving its unique characteristics. Finally, division can help manage the size of your hydrangea. If your plant has outgrown its space, dividing it can help you reduce its size and maintain a more manageable form.
Signs Your Hydrangea Needs Dividing
Keep an eye out for these indicators that your hydrangea could benefit from division:
- Reduced Bloom Production: A significant decrease in the number of flowers is a primary sign.
- Overcrowding: If the center of the plant appears congested with stems and foliage, division can help.
- Stunted Growth: Noticeably slower growth than usual suggests the plant is struggling.
- Poor Air Circulation: Dense growth can restrict airflow, increasing the risk of fungal diseases.
- Age: Mature hydrangeas, typically those over 5 years old, are generally good candidates for division.
Optimal Timing for Hydrangea Division
Timing is crucial for successful hydrangea division. The best times to divide hydrangeas are in the early spring or late fall when the plant is dormant or just beginning to emerge from dormancy. Avoid dividing hydrangeas during the heat of summer or when they are actively flowering, as this can stress the plant and reduce its chances of survival.
- Early Spring: Divide before new growth emerges.
- Late Fall: Divide after the plant has gone dormant and the leaves have fallen.
For most hydrangea varieties, either spring or fall works well. Nevertheless, consider your local climate. In regions with harsh winters, spring division might be preferable, giving the new plants the entire growing season to establish before winter arrives. In milder climates, fall division can be successful as well.
Tools and Materials You’ll Need
Before you begin, gather all the necessary tools and materials to ensure a smooth and efficient process:
- Sharp Shovel or Spade: For digging around and under the hydrangea.
- Pruning Shears or Loppers: For cutting through thick roots and stems.
- Garden Fork: To help loosen the soil around the plant.
- Trowel: For planting the divided sections.
- Buckets or Tarps: To hold and transport the divided sections.
- Gardening Gloves: To protect your hands.
- Water Hose: For watering the plant before and after division.
- Compost or Well-Rotted Manure: To enrich the soil in the new planting locations.
- Rooting Hormone (Optional): To encourage root growth in the divided sections.
Step-by-Step Guide to Dividing Hydrangeas
Now, let’s delve into the detailed steps for dividing your hydrangea:
1. Prepare the Planting Site
Before you dig up the hydrangea, prepare the new planting locations. Hydrangeas generally prefer a spot with morning sun and afternoon shade. The soil should be well-draining and rich in organic matter. Dig holes that are twice as wide as the root ball of the divided sections and just as deep. Mix compost or well-rotted manure into the soil you remove from the holes to provide the new plants with a nutrient boost.
2. Water the Hydrangea Thoroughly
A day or two before you plan to divide the hydrangea, water it deeply. This will help to hydrate the plant and make it easier to dig up. Moist soil is also less likely to crumble, which can protect the roots during the division process.
3. Dig Around the Hydrangea
Using a sharp shovel or spade, dig a circle around the hydrangea, about 12-18 inches away from the base of the plant. Dig down deep enough to sever the main roots. Be careful not to damage the root ball excessively. Work your way around the plant, gradually loosening the soil.
4. Lift the Hydrangea from the Ground
Once you have loosened the soil around the hydrangea, gently lift the plant from the ground. You may need to use a garden fork to help pry the root ball loose. If the plant is very large, you might need assistance from another person. Try to keep as much of the root ball intact as possible.
5. Divide the Root Ball
With the hydrangea out of the ground, examine the root ball. Look for natural divisions where the plant can be separated into sections. Use your hands, a sharp knife, or pruning shears to carefully divide the root ball into two or more sections. Each section should have a healthy portion of roots and stems. Discard any dead or diseased roots and stems.
Tips for Dividing:
- Gentle Approach: Avoid tearing the roots. Instead, tease them apart gently.
- Sharp Tools: Use sharp, clean tools to make clean cuts, reducing the risk of disease.
- Size Matters: Ensure each division has enough roots and stems to support new growth.
6. Plant the Divided Sections
Place each divided section into the prepared planting holes. Make sure the top of the root ball is level with the surrounding soil. Backfill the holes with the amended soil, gently firming it around the roots. Water the newly planted hydrangeas thoroughly.
7. Prune the Divided Sections (If Necessary)
After planting, you may need to prune the divided sections to reduce stress on the plant. Remove any dead, damaged, or crossing branches. You can also shorten the remaining stems by about one-third to encourage new growth. The type of pruning required varies by hydrangea species; certain varieties bloom on old wood, while others bloom on new wood. Therefore, it’s vital to know your hydrangea type before pruning.
8. Mulch Around the Plants
Apply a layer of mulch around the base of the newly planted hydrangeas. Mulch helps to retain moisture, suppress weeds, and regulate soil temperature. Use organic mulch such as wood chips, shredded bark, or pine straw. Keep the mulch a few inches away from the base of the stems to prevent rot.

Hydrangea Division by Type
While the general process of dividing hydrangeas remains the same, there are nuances depending on the type of hydrangea you are working with. The most common types include:
- Bigleaf Hydrangea (Hydrangea macrophylla): Known for their large, showy blooms that can change color based on soil pH.
- Panicle Hydrangea (Hydrangea paniculata): Features cone-shaped flower clusters and is very cold-hardy.
- Smooth Hydrangea (Hydrangea arborescens): Produces large, round flower heads and blooms on new wood.
- Oakleaf Hydrangea (Hydrangea quercifolia): Distinguished by its oak-leaf-shaped foliage and peeling bark.
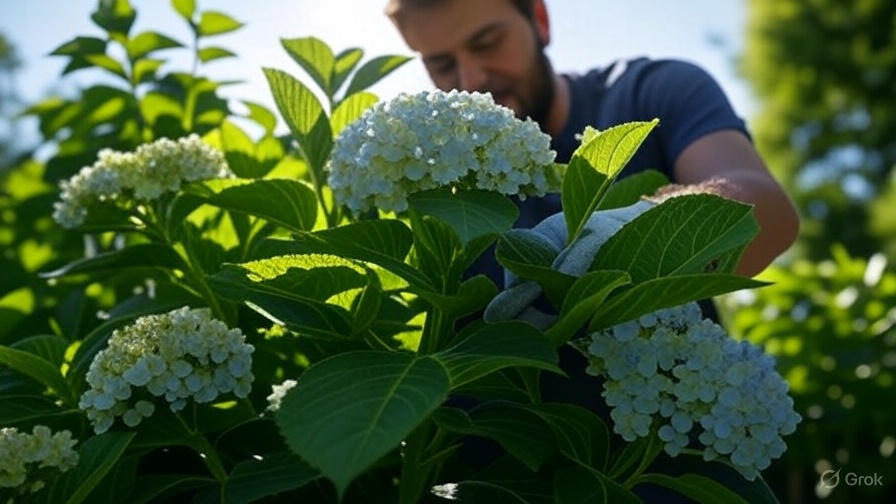
Dividing Bigleaf Hydrangeas (Hydrangea macrophylla)
Bigleaf hydrangeas are perhaps the most popular type. When dividing these, be extra careful with the buds, as they produce blooms on old wood. Avoid heavy pruning unless necessary, and protect the new divisions from late frosts.
Dividing Panicle Hydrangeas (Hydrangea paniculata)
Panicle hydrangeas are quite resilient and respond well to division. Since they bloom on new wood, you can prune them more aggressively if needed to shape the plant or remove dead wood. They also tend to have more robust root systems, making the division process somewhat easier.
Dividing Smooth Hydrangeas (Hydrangea arborescens)
Smooth hydrangeas, like ‘Annabelle’, are very forgiving. These bloom on new wood, so you can cut them back hard either before or after dividing. This encourages strong new growth and abundant blooms. They also tolerate a wider range of soil conditions, which can be beneficial when transplanting divisions.
Dividing Oakleaf Hydrangeas (Hydrangea quercifolia)
Oakleaf hydrangeas have a unique growth habit, and their root systems can be more sensitive. Be gentle when dividing and ensure the new planting location mimics their preferred conditions – well-drained soil and partial shade. Mulching well is essential to protect their roots.
Post-Division Care for Hydrangeas
Proper aftercare is vital to ensure the successful establishment of your newly divided hydrangeas. Here are some essential tips:
Watering
Keep the soil consistently moist, but not waterlogged, for the first few weeks after planting. Water deeply whenever the top inch of soil feels dry. Avoid overhead watering, which can promote fungal diseases.
Fertilizing
Wait a few weeks after planting before fertilizing the new divisions. Use a balanced, slow-release fertilizer formulated for hydrangeas. Follow the instructions on the fertilizer package carefully. Avoid over-fertilizing, which can burn the roots.
Mulching
Maintain a layer of mulch around the base of the plants to help retain moisture, suppress weeds, and regulate soil temperature. Replenish the mulch as needed.
Protection
Protect the newly divided hydrangeas from extreme weather conditions. In colder climates, provide winter protection by wrapping the plants in burlap or covering them with a thick layer of mulch. In hotter climates, provide shade during the hottest part of the day.
Pest and Disease Control
Monitor the plants regularly for signs of pests or diseases. Treat any problems promptly with appropriate organic or chemical controls. Good air circulation and proper watering practices can help prevent many common hydrangea problems.
Troubleshooting Common Issues
Even with careful planning, you might encounter some challenges when dividing hydrangeas. Here are some common issues and how to address them:
- Wilting: Wilting is common after transplanting. Ensure the plant is adequately watered and provide shade during the hottest part of the day.
- Yellowing Leaves: Yellowing leaves can indicate overwatering, nutrient deficiencies, or pest infestations. Check the soil moisture, fertilize if needed, and inspect for pests.
- Lack of Blooms: It may take a year or two for the divided hydrangeas to bloom profusely. Ensure they are getting enough sunlight and nutrients, and prune appropriately based on the type of hydrangea.
- Root Rot: Root rot is caused by poorly drained soil. Improve drainage by adding compost or other organic matter to the soil.
Conclusion
Dividing hydrangeas is a rewarding way to rejuvenate mature plants, propagate new ones, and manage their size. By following this comprehensive guide, you can successfully divide your hydrangeas and enjoy their beautiful blooms for many years to come. Remember to choose the right time of year, prepare the planting site carefully, and provide proper aftercare. With a little patience and attention, you’ll be rewarded with healthy, thriving hydrangeas that will enhance your garden for generations.