How to Remove a Yucca Plant?
Yucca plants can transform from beautiful landscape features into overwhelming problems when they outgrow their space or multiply beyond control. These hardy desert natives develop extensive root systems and produce numerous offshoots, making removal a challenging task that requires proper planning and technique.
Many homeowners discover that their once-manageable yucca has become a sprawling mass of sharp-pointed leaves and stubborn roots. The plant’s aggressive growth pattern and drought-resistant nature that make it attractive also make it notoriously difficult to eliminate completely.
This comprehensive guide walks you through every aspect of yucca removal, from initial preparation to final cleanup. You’ll learn professional techniques that ensure complete elimination while protecting your surrounding landscape and personal safety.
Why Yucca Plants Become Problematic
Yucca plants earn their reputation as landscape bullies through several characteristics that make them invasive in residential settings. These plants send out underground runners called rhizomes that can extend several feet from the main plant, creating new shoots at unexpected locations.
The root system penetrates deep into the soil, sometimes reaching depths of three to four feet. This extensive network stores water and nutrients, allowing the plant to survive harsh conditions while making complete removal extremely challenging.
Sharp, sword-like leaves pose safety hazards around walkways, play areas, and gathering spaces. The pointed tips can cause serious injuries, particularly dangerous for children and pets who might accidentally run into them.
Size becomes another major concern as mature yucca plants can spread across large areas. A single plant may eventually occupy 10 to 15 square feet, crowding out other desirable vegetation and dominating the landscape design.
Essential Tools and Safety Equipment
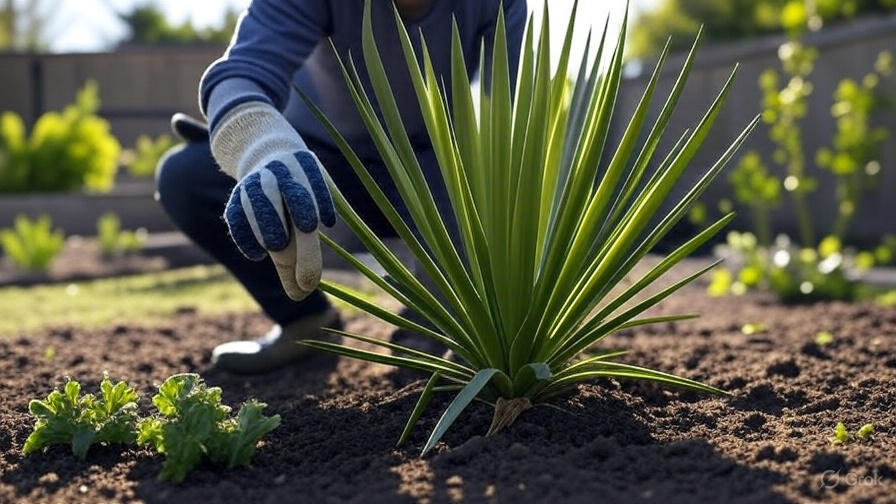
Proper equipment makes yucca removal safer and more efficient. Heavy-duty work gloves protect your hands from the plant’s razor-sharp leaves and potential splinters from the woody stems. Leather gloves work better than cloth versions for this demanding task.
Eye protection becomes critical when working around yucca plants. Safety glasses or goggles prevent leaf tips from causing eye injuries during the removal process. Even small movements can send sharp points toward your face unexpectedly.
Long-sleeved shirts and long pants shield your skin from cuts and scratches. Choose thick, durable fabrics that resist tearing. Denim or canvas materials provide better protection than lightweight clothing.
Pruning shears handle smaller stems and offshoots effectively. Bypass pruners work better than anvil types for clean cuts through fibrous yucca tissue. Keep blades sharp for easier cutting and cleaner wounds that heal faster.
A reciprocating saw or chainsaw tackles larger, mature stems that resist hand pruning. These power tools speed up the cutting process significantly but require extra caution around the plant’s dangerous leaves.
Digging tools form the backbone of root removal efforts. A sharp spade cuts through soil and smaller roots efficiently. A mattock or pickaxe breaks up compacted soil and chops through tougher root sections.
A pry bar or digging bar helps leverage stubborn root clumps from the ground. The long handle provides mechanical advantage when wrestling with deep, established root systems.
Timing Your Yucca Removal Project
Late fall through early spring provides the best window for yucca removal in most climates. During this dormant period, the plant directs less energy toward new growth, making it easier to achieve complete elimination.
Cool weather also makes the physical work more comfortable and reduces heat stress during this labor-intensive project. You’ll appreciate moderate temperatures when spending hours digging and cutting in direct sunlight.
Soil moisture affects digging difficulty significantly. Slightly moist soil works best, providing enough moisture to prevent dust while remaining firm enough to maintain its structure around root systems.
Avoid removal during extremely wet conditions when soil becomes muddy and difficult to work with. Wet soil sticks to tools and makes precise digging nearly impossible.
Dry soil creates different challenges, becoming hard and difficult to penetrate. Rock-hard ground makes root removal much more difficult and increases tool wear.
Step-by-Step Removal Process
Phase 1: Cutting Above-Ground Growth
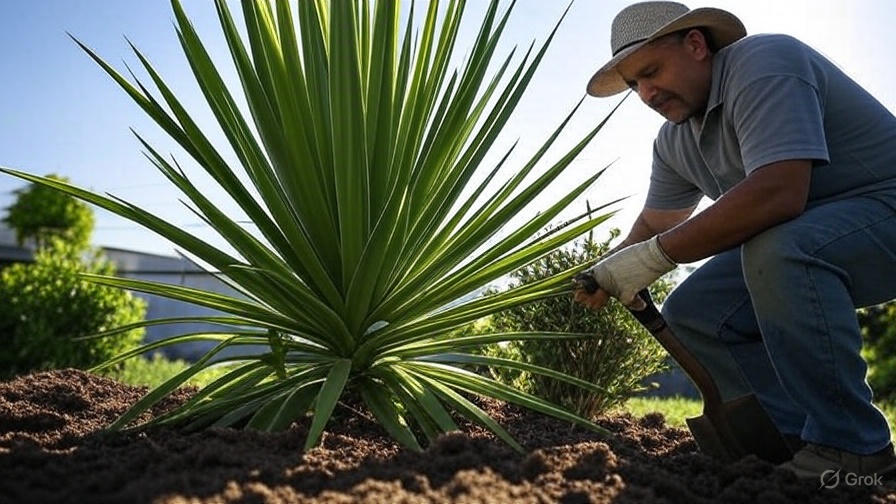
Begin removal by cutting all visible stems and leaves close to ground level. This eliminates the dangerous sharp points and reduces the plant mass you’ll need to handle during root removal.
Start with smaller offshoots around the perimeter before tackling the main plant. This approach gives you better access to the central root system while removing potential tripping hazards from your work area.
Cut stems at a slight angle to prevent water from pooling on the cut surface. Clean cuts also reduce the chance of disease or pest problems in any remaining root tissue.
Dispose of cut material immediately to prevent accidental contact with sharp edges. The leaves remain dangerous even after cutting, so handle them carefully during cleanup.
Phase 2: Exposing the Root System
Dig a wide circle around the plant, starting approximately two feet from where the stems emerged. This distance accounts for the spreading root system that extends well beyond the visible plant structure.
Remove soil gradually to expose the main root crown and major root branches. Work systematically around the plant rather than focusing on one area, which helps prevent root breakage and ensures complete removal.
Follow individual roots as they branch and spread underground. Yucca roots often take unexpected turns and may dive deeper or spread further than anticipated.
Use water to rinse soil from roots when necessary. This technique helps you see the complete root structure and identify connection points between different sections.
Phase 3: Root System Removal
Cut major roots into manageable sections using pruning shears or a saw. Smaller pieces are easier to remove and reduce the risk of leaving significant root fragments behind.
Start with smaller roots before attempting to remove the main taproot. This approach loosens the entire system and makes the central root easier to extract.
Work the spade or mattock under root sections to break their connection with surrounding soil. Rock the tool back and forth to create leverage points that help free stubborn roots.
Pull removed root sections immediately from the hole to prevent confusion with roots still attached to the main system. Keep your work area organized to ensure thorough removal.
Phase 4: Deep Root Extraction
The main taproot requires special attention as it anchors the entire plant and stores significant energy reserves. This root often extends much deeper than expected and may be several inches in diameter.
Dig around the taproot carefully to expose its full length. You may need to excavate two to three feet deep to reach the bottom of mature specimens.
Cut the taproot into sections if it proves too large or heavy to remove in one piece. Make cuts every 12 to 18 inches to create manageable pieces.
Use the pry bar to leverage root sections from their position. Apply steady pressure rather than sudden jerking motions that might break roots and leave fragments behind.
Dealing with Stubborn Roots and Offshoots
Some root sections resist removal despite your best efforts. These stubborn pieces often wedge between rocks or wrap around other plant roots, making extraction challenging.
Try approaching difficult roots from different angles. Sometimes a root that resists pulling from one direction comes free easily when approached from the opposite side.
Soak particularly stubborn areas with water to soften the surrounding soil. Let the water penetrate for 10 to 15 minutes before attempting removal again.
Cut resistant roots into smaller pieces rather than fighting with large sections. Multiple small pieces are always easier to remove than one large, unwieldy root mass.
Underground offshoots present another challenge during yucca removal. These runners can extend several feet from the main plant and may have developed their own root systems.
Follow each runner to its terminus, removing the entire length including any new shoots that have developed. Leaving even small sections of runner can result in new plant growth.
Mark the locations of underground runners with stakes or flags so you can monitor these areas for new growth in the following months.
Chemical Treatment Options
Herbicide application can help ensure complete elimination of any remaining root fragments. Systemic herbicides work best because they move throughout the plant tissue, killing roots that mechanical removal might have missed.
Apply herbicide to fresh cuts on major roots immediately after cutting. This timing allows maximum absorption into the root system before the plant can seal the wounds.
Glyphosate-based herbicides prove most effective against yucca plants. These non-selective herbicides kill the entire plant system but require careful application to avoid damaging nearby desirable plants.
Brush-on application works better than spraying for precise herbicide placement. This method reduces drift onto surrounding vegetation and allows you to treat specific root cuts individually.
Wait several weeks after herbicide application before disturbing the soil. This delay gives the chemical time to work throughout any remaining root system.
Soil Restoration After Removal
The large hole left after yucca removal needs proper backfilling to restore the landscape. Use quality topsoil rather than just replacing the excavated soil, which may be depleted from years of supporting the aggressive plant.
Amend the backfill soil with organic matter like compost or aged manure. This addition improves soil structure and provides nutrients for future plantings.
Water the backfilled area thoroughly to settle the soil and eliminate air pockets. Add more soil as needed to bring the level even with the surrounding grade.
Consider the soil’s drainage characteristics when planning future plantings. Areas that supported yucca plants typically have excellent drainage, which may not suit all plant types.
Preventing Regrowth
Monitor the removal site regularly for signs of new growth. Even tiny root fragments can regenerate into new plants, so early detection and treatment of any regrowth is crucial.
Check the area monthly during the growing season for the first year after removal. New shoots are much easier to eliminate when they’re small and haven’t developed extensive root systems.
Apply a thick layer of mulch over the removal site to suppress any potential regrowth. Organic mulches like wood chips or shredded bark work well while improving the soil as they decompose.
Consider installing landscape fabric under decorative mulch for additional growth suppression. This barrier prevents light from reaching any remaining root fragments while allowing water and air to penetrate.
Alternative Removal Methods
Mechanical removal using heavy equipment works well for large infestations or multiple plants. A small excavator can remove extensive root systems quickly, though this approach disturbs more soil and may damage nearby plants.
Rent appropriate equipment if you’re tackling multiple large plants. The cost of equipment rental often justifies itself when compared to the time and physical effort required for hand removal.
Hiring professional landscape contractors makes sense for extensive removal projects or when dealing with plants in difficult locations. Professionals have specialized tools and experience that can save time and ensure complete removal.
Get multiple quotes from contractors and verify their experience with yucca removal specifically. Not all landscapers understand the challenges these plants present.
Common Mistakes to Avoid
Leaving root fragments in the ground represents the most common and costly mistake in yucca removal. Even small pieces can regenerate into new plants, requiring you to repeat the entire removal process.
Take time to follow every root to its end rather than rushing through the excavation process. Thorough initial removal saves significant time and effort in the long run.
Failing to protect surrounding plants during removal can cause unnecessary landscape damage. Use tarps or cardboard to shield nearby vegetation from soil and debris.
Inadequate safety precautions lead to injuries that could easily be prevented. Never compromise on protective equipment, even for small or quick removal jobs.
Long-term Landscape Planning
Consider the growing conditions that allowed the yucca to thrive when planning replacement plants. The same hot, dry conditions that suited the yucca may limit your options for new plantings.
Native plants adapted to your local climate often make the best replacements. These plants require less water and maintenance while providing natural beauty and wildlife habitat.
Improve the soil with organic amendments if you plan to install plants with different requirements than the original yucca. Adding compost or other organic matter can help support a wider range of plant types.
Plan for adequate spacing between new plants to prevent overcrowding as they mature. Learn from the yucca’s aggressive growth by giving replacement plants room to develop naturally.
Conclusion
Removing a yucca plant requires patience, proper tools, and systematic approach, but complete elimination is achievable with the right techniques. The key lies in thorough root removal and consistent follow-up to prevent regrowth from any remaining fragments.
Start your removal project during the cooler months when working conditions are more comfortable and the plant is dormant. Take time to gather all necessary tools and safety equipment before beginning the work.
Remember that yucca removal is physically demanding work that may take several days to complete for large, established plants. Pace yourself and don’t hesitate to seek professional help for extensive infestations or challenging locations.
The effort invested in proper yucca removal pays dividends in reclaimed landscape space and eliminated maintenance headaches. Your yard will be safer and more enjoyable once these aggressive plants are completely eliminated and replaced with more appropriate landscape choices.