How to Propagate a Mulberry Tree?
Growing your own mulberry trees brings sweet rewards and lasting satisfaction. These hardy fruit trees produce abundant harvests while requiring minimal care once established. Many gardeners discover that propagating mulberry trees offers an economical way to expand their orchard or share these wonderful plants with friends and family.
Mulberry propagation succeeds through several proven methods, each with distinct advantages for different situations. Home gardeners can multiply their favorite varieties without purchasing expensive nursery stock. The process connects you directly with nature’s remarkable ability to regenerate and thrive.
This comprehensive guide walks you through every propagation technique, from simple cutting methods to advanced grafting procedures. You’ll learn the optimal timing, required materials, and troubleshooting tips that ensure success with your mulberry propagation projects.
The Science Behind Mulberry Propagation
Mulberry trees possess remarkable regenerative capabilities that make propagation relatively straightforward compared to many other fruit trees. These deciduous trees belong to the Moraceae family and demonstrate vigorous root development when conditions align properly.
The cambium layer beneath the bark contains meristematic cells that differentiate into new root and shoot tissue. When you take cuttings or create wounds for propagation, these cells activate and begin forming new plant structures. Understanding this biological process helps you make better decisions throughout the propagation journey.
Different mulberry species show varying levels of rooting success. White mulberries (Morus alba) typically root more easily than black mulberries (Morus nigra), while red mulberries (Morus rubra) fall somewhere between these extremes. Illinois Everbearing, Pakistani, and Shangri-La varieties demonstrate excellent propagation success rates.
Temperature, humidity, and hormonal factors influence root formation significantly. Auxin hormones naturally present in growing tips promote root development, which explains why certain cutting types work better than others. Environmental stress can either stimulate or inhibit these hormonal responses depending on the severity and duration.
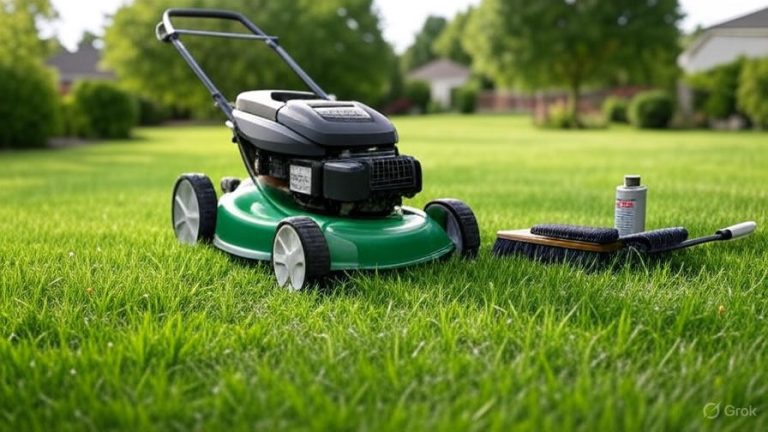
Essential Tools and Materials for Success
Successful mulberry propagation begins with gathering the right equipment and supplies. Sharp, clean tools prevent disease transmission while ensuring clean cuts that heal properly. Sterilize all cutting tools with rubbing alcohol or bleach solution before and during use.
Quality bypass pruning shears work best for taking cuttings from branches up to one inch diameter. Hand pruners with a curved blade create cleaner cuts than anvil-style pruners, which can crush stem tissue. Keep a small file or sharpening stone handy to maintain razor-sharp edges throughout your propagation sessions.
Rooting hormone powder or gel significantly improves success rates, especially with hardwood cuttings. Look for products containing indole-3-butyric acid (IBA) at concentrations between 0.1% and 0.3%. Higher concentrations may actually inhibit root formation in mulberry cuttings, so follow package directions carefully.
Well-draining potting medium provides the foundation for healthy root development. Create your own mix using equal parts peat moss, vermiculite, and perlite. This combination retains adequate moisture while preventing waterlogged conditions that cause root rot. Commercial seed-starting mixes also work well for mulberry propagation.
Small pots or containers with drainage holes house individual cuttings during the rooting phase. Four-inch pots provide sufficient space for initial root development without encouraging excessive top growth. Clean containers thoroughly with diluted bleach solution to eliminate potential pathogens.
A humidity dome or clear plastic covering maintains the high moisture levels that promote successful rooting. Large clear storage containers or plastic bags supported by wire frames create effective mini-greenhouses. Proper ventilation prevents fungal problems while maintaining optimal humidity levels.
Softwood Cutting Propagation Method
Softwood cutting propagation takes advantage of the rapid cell division occurring in young, actively growing shoots. This method works exceptionally well during late spring and early summer when mulberry trees produce vigorous new growth.
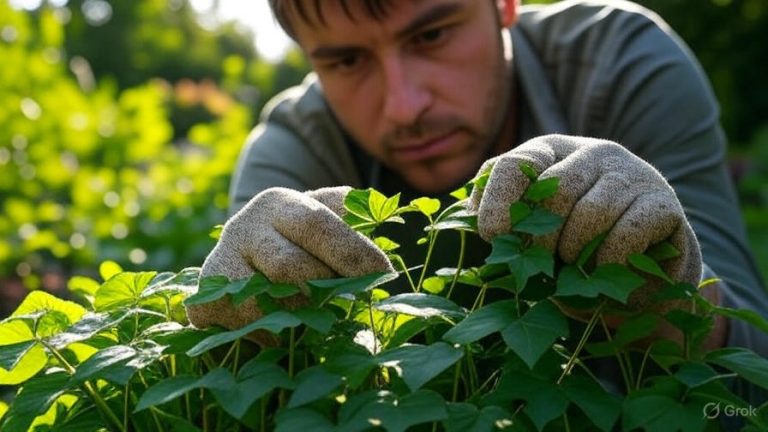
Take softwood cuttings early in the morning when plant tissues contain maximum moisture content. Select healthy shoots that are 6 to 8 inches long with several sets of leaves. The ideal cutting feels flexible but snaps cleanly when bent sharply, indicating proper maturity level.
Make your cut just below a leaf node using sharp, clean pruning shears. Remove all leaves from the bottom half of the cutting while leaving 2 to 4 leaves at the top. Large leaves may be cut in half to reduce water loss through transpiration. This leaf reduction helps the cutting focus energy on root development rather than supporting excessive foliage.
Dip the cut end immediately into rooting hormone powder, tapping off any excess material. Insert the cutting into your prepared potting medium deep enough to cover at least two leaf nodes. Firm the soil gently around the cutting to eliminate air pockets that could dry out developing roots.
Water the newly planted cuttings thoroughly and place them under your humidity dome or plastic covering. Maintain temperatures between 70 and 75 degrees Fahrenheit for optimal root development. Bright, indirect light provides energy for photosynthesis without stressing the vulnerable cuttings.
Check soil moisture daily and mist the cuttings if humidity levels drop. Roots typically begin forming within 2 to 3 weeks, with visible growth appearing after 4 to 6 weeks. Gently tug on the cuttings after a month to check for root resistance, which indicates successful rooting.
Hardwood Cutting Propagation Technique
Hardwood cutting propagation offers excellent results during the dormant season when mulberry trees have shed their leaves and entered winter rest. This method requires patience since root formation occurs more slowly in dormant wood, but success rates often exceed those of other propagation methods.
Collect hardwood cuttings during late winter or early spring while trees remain fully dormant. Cold weather helps maintain cutting viability during storage and preparation. Select pencil-thick branches from the previous year’s growth, avoiding older wood that roots poorly.
Cut 8 to 12-inch sections from healthy branches, making your cuts just above and below leaf nodes or buds. Each cutting should contain at least 3 to 4 buds that will develop into shoots once rooting occurs. Bundle the cuttings together and store them in slightly moist sand or peat moss in your refrigerator for 4 to 6 weeks.
This cold stratification period encourages callus formation at the cut surfaces while breaking bud dormancy. Check the cuttings occasionally and lightly mist them if they appear to be drying out. Proper moisture balance prevents both dehydration and rot during the stratification period.
Plant the stratified cuttings in your prepared potting medium with only the top bud exposed above soil level. Water thoroughly and place containers in a cool, bright location such as an unheated greenhouse or cold frame. Soil temperatures around 50 to 60 degrees Fahrenheit promote steady root development without encouraging premature shoot growth.
Root formation typically takes 6 to 10 weeks with hardwood cuttings. New shoot growth indicates successful rooting, though you should wait until roots are well-established before transplanting. This method produces robust plants with excellent survival rates once moved to permanent locations.
Air Layering for Guaranteed Results
Air layering provides nearly foolproof propagation results since the developing roots receive continuous nutrition from the parent plant. This technique works particularly well for difficult-to-root mulberry varieties or when you want to produce larger plants more quickly.
Select a healthy branch approximately 1/2 to 3/4 inch in diameter from the current or previous year’s growth. Make two parallel cuts around the branch about 1 to 2 inches apart, then carefully remove the bark between these cuts to expose the cambium layer. This wound stimulates root formation while preventing nutrients from traveling beyond the cut.
Apply rooting hormone to the exposed cambium tissue, covering all surfaces evenly. Wrap moist sphagnum moss around the wounded area, creating a ball approximately 3 to 4 inches in diameter. The moss should be damp but not dripping wet to prevent rot problems.
Cover the moss ball with plastic wrap, securing both ends with electrical tape or twist ties. Make sure the wrapping is watertight to maintain consistent moisture levels around the developing roots. Check periodically and add water if the moss begins drying out.
Roots typically become visible through the moss within 6 to 12 weeks, depending on environmental conditions and the specific mulberry variety. Once you observe substantial root development, cut the rooted section below the root ball and pot it up immediately.
Keep newly separated air layers in a protected environment for several weeks while they adjust to independent existence. Gradual exposure to normal growing conditions helps prevent transplant shock and ensures long-term success.

Grafting Mulberry Trees Successfully
Grafting allows you to combine the best characteristics of different mulberry varieties while ensuring rapid fruit production. This advanced technique requires more skill and patience but produces superior results when performed correctly.
Whip and tongue grafting works exceptionally well for mulberry trees, creating strong unions that last for decades. Collect scion wood during late winter from healthy, disease-free trees. The scion should be pencil-thick with several strong buds, cut from the previous year’s growth.
Store scion wood in slightly moist peat moss or sand in your refrigerator until grafting time in early spring. Keep rootstock plants well-watered and growing vigorously to ensure good sap flow during the grafting process. Poor rootstock condition significantly reduces grafting success rates.
Make matching cuts on both the scion and rootstock, creating interlocking tongues that fit together precisely. The cambium layers must align perfectly for successful grafting union formation. Practice these cuts on spare wood until you can create perfect matches consistently.
Wrap the graft union with grafting tape or parafilm, covering all cut surfaces to prevent moisture loss and pathogen entry. Apply grafting wax to any exposed areas for additional protection. Support the grafted tree with a stake if necessary to prevent movement that could disrupt the developing union.
Monitor grafted trees carefully for signs of compatibility problems or disease. New growth from the scion indicates successful grafting, though complete union formation takes an entire growing season. Remove any growth below the graft union to prevent rootstock competition.
Timing Your Propagation Efforts
Successful mulberry propagation depends heavily on proper timing that aligns with the tree’s natural growth cycles. Each propagation method has optimal windows that maximize success rates while minimizing stress on both parent plants and developing propagules.
Softwood cutting propagation works best during late spring through early summer when trees produce vigorous new growth. Late May through July typically provides ideal conditions in most climate zones. Avoid periods of extreme heat or drought that stress parent trees and reduce cutting viability.
Hardwood cutting collection should occur during late winter while trees remain fully dormant. January through March offers the best window for most regions, though exact timing varies with local climate patterns. Take cuttings after the coldest weather has passed but before buds begin swelling.
Air layering can be performed throughout the growing season, though spring timing produces the fastest results. Begin air layering projects in early to mid-spring when sap flow increases and cell division accelerates. This timing allows roots to develop and establish before winter dormancy.
Grafting success peaks during early spring when rootstock trees begin active growth but before leaves fully emerge. The brief window between bud break and full leaf development provides optimal conditions for graft union formation. Temperature fluctuations during this period can affect timing significantly.
Regional climate variations require adjustments to these general timing guidelines. Southern gardeners may begin propagation activities earlier, while northern regions need later starting dates. Local frost dates and temperature patterns provide better guidance than calendar dates alone.
Creating Optimal Growing Conditions
Environmental factors play crucial roles in propagation success, influencing everything from initial root formation to long-term plant establishment. Creating and maintaining optimal conditions requires attention to temperature, humidity, light, and air circulation.
Temperature control affects both root development speed and overall success rates. Most mulberry propagation methods perform best with soil temperatures between 65 and 75 degrees Fahrenheit. Bottom heat from heating mats or warm locations can improve rooting speed significantly.
Air temperatures should remain slightly cooler than soil temperatures to prevent excessive top growth before roots establish. This temperature differential encourages energy allocation toward root development rather than shoot production. Sudden temperature fluctuations stress developing plants and reduce survival rates.
Humidity levels need careful management throughout the propagation process. High humidity prevents cutting dehydration while promoting root formation, but excessive moisture encourages fungal diseases. Target humidity levels around 80 to 90 percent for optimal results.
Light requirements vary with propagation method and development stage. Bright, indirect light provides energy for photosynthesis without causing heat stress or excessive water loss. Direct sunlight can quickly kill vulnerable cuttings, especially during the initial rooting period.
Air circulation prevents stagnant conditions that promote disease while helping regulate temperature and humidity levels. Gentle air movement strengthens developing stems and reduces fungal problems. Avoid strong drafts that cause excessive moisture loss from tender plant tissues.
Troubleshooting Common Problems
Even experienced propagators encounter challenges that can derail mulberry propagation projects. Recognizing and addressing problems quickly often means the difference between success and failure. Most issues stem from environmental factors, contamination, or poor technique.
Cutting rot appears as blackened, mushy stem tissue that spreads upward from the base. This problem typically results from excessive moisture, poor drainage, or contaminated tools and materials. Remove affected cuttings immediately and improve growing conditions for remaining propagules.
Leaf drop on cuttings indicates transplant shock or environmental stress. Some leaf loss is normal during the adjustment period, but complete defoliation usually signals impending failure. Increase humidity, reduce light levels, and check soil moisture to address the underlying causes.
Slow or absent root formation frustrates many propagators, especially with hardwood cuttings. Cold soil temperatures, inadequate hormones, or poor cutting quality often contribute to this problem. Be patient with dormant season propagation while ensuring optimal environmental conditions.
Fungal diseases manifest as fuzzy growth on stems, leaves, or soil surfaces. Gray mold, damping-off, and other pathogens thrive in warm, humid conditions with poor air circulation. Reduce humidity, improve ventilation, and apply fungicide treatments if necessary.
Premature flowering on young propagated plants wastes energy that should support root and vegetative development. Remove flower buds immediately to redirect growth hormones toward establishing strong root systems and framework branches.
Caring for Newly Propagated Plants
Successfully rooted mulberry propagules require careful attention during their first few months of independent growth. This transition period determines long-term plant health and productivity. Gradual acclimatization prevents shock while encouraging robust development.
Transplant rooted cuttings into larger containers once root systems fill their initial pots. Use well-draining potting soil enriched with compost or slow-release fertilizer. Avoid disturbing roots excessively during the transplanting process to prevent setbacks.
Watering frequency increases as plants grow larger and develop more extensive root systems. Check soil moisture daily during warm weather, watering when the top inch feels dry. Deep, infrequent watering encourages deep root growth better than frequent shallow applications.
Fertilizer applications support vigorous growth in young mulberry trees. Balanced, slow-release fertilizers provide steady nutrition without promoting excessive soft growth. Organic options like compost tea or fish emulsion work well for container-grown plants.
Pruning young plants shapes their future growth habit while encouraging branching. Remove weak or crossing branches early to establish good structure. Light pruning also stimulates lateral shoot development that increases fruit production potential.
Pest monitoring becomes increasingly important as plants mature and attract insect attention. Aphids, scale insects, and mites commonly affect young mulberry trees. Early detection and treatment prevent serious infestations that weaken developing plants.
Transplanting to Permanent Locations
Moving successfully propagated mulberry trees to their permanent growing locations requires careful planning and execution. Site selection, soil preparation, and timing all influence establishment success and long-term productivity.
Site evaluation should consider mature tree size, sun exposure, and soil drainage characteristics. Mulberry trees prefer full sun locations with well-draining soil that doesn’t remain waterlogged after heavy rains. Allow adequate space for the eventual canopy spread of 15 to 25 feet for most varieties.
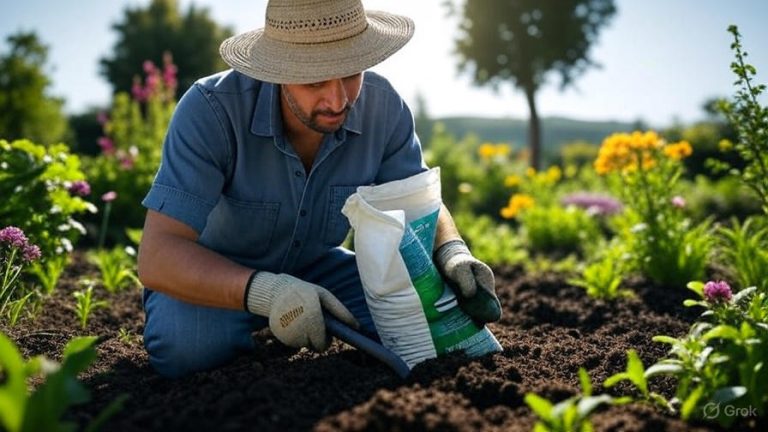
Soil preparation improves growing conditions and provides young trees with the best possible start. Dig planting holes twice as wide as the root ball but no deeper than the container depth. Amend heavy clay soils with compost or aged manure to improve drainage and soil structure.
Transplant timing should coincide with dormant season conditions when possible. Late fall or early spring transplanting allows root establishment before summer heat stress. Avoid transplanting during active growth periods or extreme weather conditions.
Planting depth affects long-term tree health and stability. Set plants at the same depth they grew in containers, avoiding both shallow planting that exposes roots and deep planting that buries the trunk base. Proper depth prevents many future problems.
Initial care after transplanting includes regular watering, mulching, and protection from environmental stresses. Water newly transplanted trees deeply once or twice weekly during their first growing season. Organic mulch conserves moisture while suppressing competing weeds.
Long-term Success Strategies
Establishing productive mulberry trees from propagated stock requires ongoing attention to their developing needs. Proper care during the first few years determines fruit production capacity and overall tree longevity.
Training young trees establishes the framework for future fruit production and tree maintenance. Remove competing leaders and encourage well-spaced scaffold branches. Open center training works well for mulberries, promoting good light penetration and air circulation.
Annual pruning maintains tree health while optimizing fruit production. Remove dead, diseased, or crossing branches during dormant seasons. Light pruning also prevents trees from becoming overly large and difficult to harvest.
Fertility management supports consistent fruit production without encouraging excessive vegetative growth. Annual soil testing guides fertilizer applications based on actual nutrient needs. Organic matter additions improve soil structure while providing slow-release nutrition.
Pest and disease monitoring prevents serious infestations that reduce productivity and threaten tree health. Regular inspection during growing seasons allows early intervention when problems first appear. Integrated pest management approaches minimize pesticide use while maintaining effective control.
Harvest timing affects fruit quality and storage life. Mulberries ripen over several weeks, requiring frequent picking for best quality. Proper harvesting techniques prevent tree damage while maximizing yield from your propagation efforts.
Your propagated mulberry trees will reward years of patient care with abundant harvests of sweet, nutritious fruit. The satisfaction of growing trees from cuttings or grafts adds special meaning to every bite of fresh mulberries. Start your propagation project today and enjoy homegrown mulberries for decades to come.