How to Sharpen Lawn Mower Blades?
Your lawn mower blade cuts through thousands of grass stems every time you mow. Over time, this constant contact with grass, dirt, rocks, and debris dulls the blade’s cutting edge. A sharp blade creates clean cuts that heal quickly and keep your grass healthy. Dull blades tear and shred grass, leaving brown, frayed edges that invite disease and pests.
Learning how to sharpen lawn mower blades saves money on professional sharpening services and keeps your mower performing at its best. This comprehensive guide walks you through every step of the blade sharpening process, from recognizing when blades need attention to maintaining them for years of reliable service.
Signs Your Mower Blade Needs Sharpening
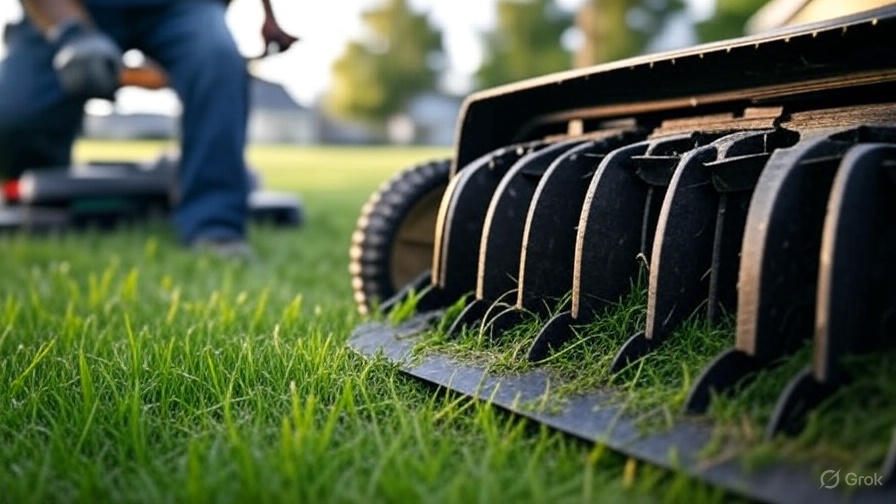
Several clear indicators tell you when your mower blade has lost its cutting edge. Grass tips turn brown or yellow after mowing instead of staying green. This browning happens because dull blades crush and tear grass rather than making clean cuts. Healthy grass heals quickly from sharp cuts, but damaged grass struggles to recover from torn edges.
Your mower starts requiring multiple passes over the same area to cut grass effectively. Sharp blades slice through grass in one pass, but dull blades push grass down and require several attempts to achieve an even cut. This inefficiency wastes time and fuel while stressing your mower’s engine.
Grass clippings become longer and more uneven after mowing. Sharp blades create uniform clippings that decompose quickly and feed your lawn. Dull blades produce ragged clippings that clump together and may smother grass underneath.
Examining the blade directly reveals obvious signs of dullness. The cutting edge appears rounded rather than sharp. Nicks, chips, and gouges interrupt the smooth cutting surface. Metal appears worn away along the cutting edge. Any of these visual signs indicate the blade needs immediate attention.
Essential Tools and Materials for Blade Sharpening
Gathering the right tools before starting makes blade sharpening safer and more efficient. A socket wrench set removes the blade bolt, though the specific size varies by mower model. Most residential mowers use 15mm, 5/8-inch, or 13/16-inch bolts.
Safety equipment protects you during the sharpening process. Work gloves prevent cuts from sharp edges. Safety glasses shield your eyes from metal filings and sparks. Ear protection reduces noise exposure when using power tools.
A bench grinder provides the fastest and most consistent results for blade sharpening. Choose a grinder with a 6-inch or 8-inch wheel for best results. Fine-grit wheels between 60 and 100 grit work well for lawn mower blades. Coarse wheels remove metal too quickly and may overheat the blade.
Hand filing offers more control but requires more time and effort. A 10-inch mill bastard file works effectively on most mower blades. This file size provides good coverage while maintaining precise control over the sharpening angle.
A blade balancing tool ensures your sharpened blade runs smoothly. You can purchase a commercial blade balancer or make one using a nail or screwdriver mounted horizontally in a wall or workbench.
Other helpful supplies include penetrating oil for stubborn bolts, a wire brush for cleaning, and a permanent marker for marking the blade’s orientation before removal.
Safety Precautions Before Starting
Blade sharpening involves sharp tools and spinning equipment that can cause serious injuries. Taking proper safety precautions protects you throughout the process.
Disconnect the spark plug wire before working on any part of your mower. This prevents accidental starting while your hands are near the blade. Remove the spark plug entirely if you plan extensive work.
Allow the engine to cool completely before beginning work. Hot engine components can cause burns, and warm oil flows more easily if accidentally spilled.
Work in a well-ventilated area when using power tools. Grinding produces metal dust and sparks that need adequate air circulation. Outdoor work spaces or open garages provide sufficient ventilation.
Secure your work area by removing flammable materials from the vicinity of grinding operations. Metal sparks can ignite paper, leaves, gasoline, and other combustible materials.
Inspect all tools before use. Ensure grinder wheels are properly mounted and show no cracks or damage. Check that file handles are secure and free from splinters. Replace any damaged tools before proceeding.
Step-by-Step Blade Removal Process
Proper blade removal requires careful attention to safety and technique. Start by positioning your mower on a level surface and engaging the parking brake if equipped.
Tilt the mower to access the blade, keeping the air filter and carburetor side elevated. This prevents oil and fuel from entering the air filter or flooding the carburetor. Place blocks or stands under the mower deck to maintain this position safely.
Clean debris from around the blade bolt and surrounding area. Grass clippings and dirt can hide the bolt head and make removal difficult. A stiff brush or compressed air removes most debris effectively.
Apply penetrating oil to the blade bolt if it appears corroded or difficult to turn. Allow the oil to work for several minutes before attempting removal. Some bolts may require heat from a propane torch to break free, but use caution to avoid damaging nearby plastic components.
Mark the blade’s orientation before removal. Draw an arrow or make a mark indicating which side faces down toward the ground. This marking ensures proper reinstallation and prevents installing the blade upside down.
Hold the blade firmly while loosening the bolt. Many mower blades have a keyway or shaped hole that prevents rotation, but some rotate freely and require restraint. Use a block of wood against the blade or enlist a helper to hold the blade steady.
Remove the bolt, washer, and blade as a unit. Some mowers use multiple washers or spacers, so pay attention to their order and orientation for proper reassembly.
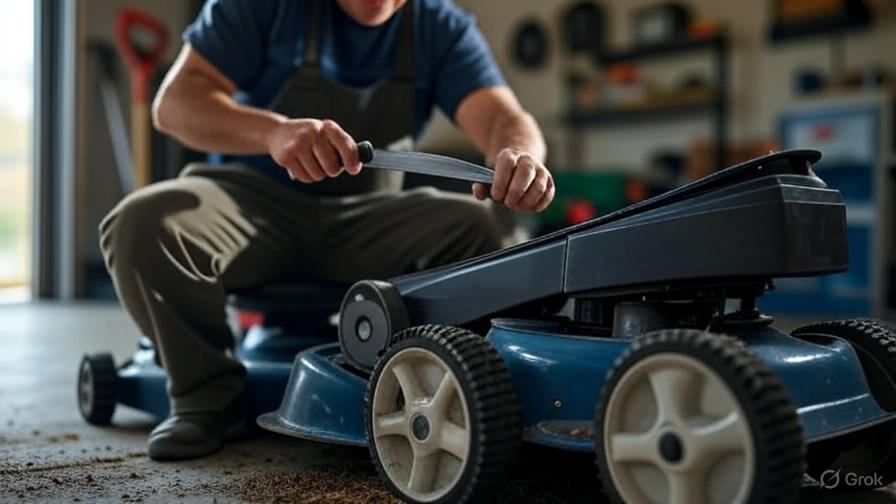
Manual Sharpening with a File
Hand filing gives you complete control over the sharpening process and works well for blades that need minor touch-ups. This method takes more time but reduces the risk of overheating or removing too much metal.
Secure the blade in a sturdy vise with the cutting edge exposed and easily accessible. Position the blade so you can file along its entire length comfortably. A good vise grip prevents the blade from moving during filing.
Clean the cutting edge thoroughly before sharpening. Wire brushes remove rust, grass stains, and built-up debris that can interfere with effective filing. A clean surface allows you to see the blade’s condition clearly and achieve better results.
Maintain the original cutting angle while filing. Most mower blades have a 45-degree cutting angle, though some vary between 30 and 60 degrees. Match your filing angle to the existing bevel rather than guessing at the correct angle.
File in smooth, consistent strokes along the entire cutting edge. Start at one end and work systematically to the other end. Apply moderate pressure and let the file do the work. Excessive pressure can gouge the metal or cause uneven sharpening.
Count your file strokes to ensure even sharpening on both ends of the blade. Most mower blades cut on both ends, so each end needs equal attention. Uneven sharpening creates vibration and poor cutting performance.
Check your progress frequently by running your finger lightly along the cutting edge. A properly sharpened blade feels uniformly sharp without nicks or flat spots. The edge should be smooth and consistent along its entire length.
Using a Bench Grinder for Faster Results
Bench grinders remove metal quickly and create precise cutting angles when used properly. This method works best for blades with significant damage or those needing major resharpening.
Mount the grinder securely to a sturdy workbench or stand. An unstable grinder creates safety hazards and produces poor results. Ensure the grinder runs smoothly without excessive vibration before beginning work.
Adjust the tool rest to match your blade’s cutting angle. Most grinders have adjustable rests that support the blade during grinding. Set the rest approximately 1/8 inch from the grinding wheel to prevent the blade from catching.
Start the grinder and allow it to reach full speed before contacting the blade. Approach the grinding wheel slowly and maintain light, consistent pressure. Heavy pressure overheats the metal and can ruin the blade’s temper.
Move the blade smoothly across the grinding wheel surface. Avoid staying in one spot too long, as this creates uneven grinding and heat buildup. Keep the blade moving to distribute heat evenly and maintain consistent metal removal.
Dip the blade in cool water frequently during grinding. Overheating changes the metal’s properties and reduces the blade’s ability to hold a sharp edge. The metal should never become too hot to touch with bare hands.
Grind equal amounts from both cutting edges to maintain balance. Mark your starting point and count passes to ensure even material removal. An unbalanced blade causes vibration that can damage your mower’s engine and deck.
Professional Sharpening vs DIY Methods
Professional sharpening services offer convenience and expertise but come with ongoing costs. Most lawn mower shops charge $10 to $20 per blade and can usually complete the work within a few days. Professional services have specialized equipment that produces consistent results and can repair damaged blades that might be beyond DIY capabilities.
DIY sharpening saves money over time and gives you complete control over the process. The initial tool investment pays for itself after sharpening just a few blades. You can sharpen blades on your schedule without waiting for shop availability.
Time considerations favor different approaches depending on your situation. Professional sharpening takes minimal effort but requires transportation and waiting time. DIY sharpening demands more immediate time investment but eliminates travel and scheduling constraints.
Quality results depend more on technique than location. Professional services guarantee consistent results but may not exceed what careful DIY work achieves. Many homeowners develop excellent sharpening skills with practice and proper tools.
Consider your comfort level with tools and mechanical work. Some people enjoy hands-on maintenance tasks, while others prefer professional services. Neither approach is inherently superior – the best choice depends on your preferences, skills, and available time.
Checking and Maintaining Blade Balance
A balanced blade spins smoothly and cuts evenly across your entire mowing width. Unbalanced blades create vibration that stresses your mower’s engine, deck, and other components. This vibration also produces uneven cuts and can lead to premature component failure.
Test blade balance using a simple balancing tool or improvised setup. Hang the blade from its center hole on a nail, screwdriver, or commercial blade balancer. A properly balanced blade hangs level without tilting toward either end.
If one end drops lower than the other, that end is heavier and needs additional material removal. Remove small amounts of metal from the heavy end until the blade balances properly. Focus on removing metal from the back of the blade rather than the cutting edge to maintain sharpness.
File or grind conservatively when correcting balance issues. Remove small amounts of material and retest frequently. It’s easier to remove more metal than to add it back if you go too far.
Some slight imbalance is acceptable for residential mowing applications. Commercial mowers and high-speed applications require more precise balance, but typical homeowner mowers tolerate minor imbalance without problems.
Recheck balance after any sharpening session, even if the blade was balanced before sharpening. The material removal process can shift weight distribution and create new balance issues.
Proper Blade Installation and Torque
Installing your newly sharpened blade correctly ensures safe operation and optimal cutting performance. Improper installation can cause blade failure, equipment damage, or personal injury.
Clean the blade mounting area thoroughly before installation. Remove grass clippings, dirt, and old grease from the spindle and mounting surfaces. A clean mounting area prevents contamination and ensures proper blade seating.
Install the blade in its original orientation using the marks you made during removal. The cutting edge should face the direction of mower travel, and any stamped part numbers should be visible from above. Installing the blade upside down prevents proper cutting and may damage your mower deck.
Replace washers and spacers in their original positions and orientations. These components distribute clamping forces and position the blade correctly. Missing or incorrectly installed washers can cause blade loosening or failure.
Apply the manufacturer’s specified torque to the blade bolt. Most residential mowers require 30 to 50 foot-pounds of torque, but consult your owner’s manual for exact specifications. Under-torquing allows blade loosening during operation, while over-torquing can strip threads or break the bolt.
Use a torque wrench for accurate bolt tightening. This tool ensures consistent clamping force and prevents over-tightening damage. If you don’t own a torque wrench, tighten the bolt firmly with a standard wrench plus an additional quarter turn.
Check blade tightness after the first few uses following installation. New installations may settle slightly and require retightening. Make this check part of your regular mower maintenance routine.
Maintenance Schedule and Blade Longevity
Regular maintenance extends blade life and ensures consistent cutting performance throughout the mowing season. Develop a maintenance schedule based on your mowing frequency and grass conditions.
Inspect blades monthly during active mowing season. Look for chips, nicks, and obvious dullness signs. Catching problems early prevents minor issues from becoming major repairs.
Sharpen blades at least twice per mowing season for average residential use. Heavy use or difficult conditions may require more frequent sharpening. Spring preparation and mid-season maintenance keep blades performing optimally.
Clean blades after each use to prevent corrosion and buildup. A simple spray with the garden hose removes most grass clippings and debris. Stubborn buildup may require scraping with a putty knife or wire brush.
Store mowers in dry locations to prevent blade rust and corrosion. Moisture accelerates metal deterioration and makes future sharpening more difficult. Apply a light coat of oil to blades before long-term storage.
Replace blades when sharpening no longer restores cutting performance. Severely worn blades lose too much material to hold a proper cutting angle. Cracked or damaged blades require immediate replacement for safety reasons.
Keep spare blades on hand for quick changes during busy mowing periods. Having sharp replacement blades available eliminates downtime when your primary blade needs sharpening.
Troubleshooting Common Sharpening Problems
Several problems can occur during the blade sharpening process. Recognizing and addressing these issues ensures successful results and prevents blade damage.
Overheating during grinding changes the metal’s temper and reduces its ability to hold a sharp edge. Overheated metal often turns blue or purple and becomes softer than normal. Prevent overheating by using light pressure, frequent cooling, and taking breaks to let the metal cool completely.
Uneven sharpening creates an inconsistent cutting edge that produces poor results. This problem usually stems from inconsistent hand pressure or inadequate tool setup. Maintain steady pressure and check your progress frequently to catch uneven areas early.
Nicks and gouges in the cutting edge prevent smooth cutting and may worsen with use. Small nicks can be filed out during normal sharpening, but deep gouges may require professional repair or blade replacement.
Excessive material removal weakens the blade and shortens its lifespan. Remove only enough metal to restore a sharp cutting edge. Most residential mower blades can withstand several sharpenings before requiring replacement.
Improper cutting angles reduce cutting efficiency and may cause grass tearing. Match the original blade angle rather than guessing at the correct bevel. Most manufacturers stamp the recommended angle on the blade or include it in the owner’s manual.
Balance problems create vibration and uneven cutting. Always check balance after sharpening and correct any issues before installation. Remember that small imbalances are acceptable for most residential applications.
Cost Analysis: DIY vs Professional Services
The financial aspects of blade maintenance vary significantly between DIY and professional approaches. Understanding these costs helps you make informed decisions about your blade sharpening strategy.
Initial tool investment for DIY sharpening ranges from $50 to $200 depending on your chosen method. A basic file setup costs around $20, while a quality bench grinder runs $100 to $150. These tools last for years and handle multiple blades, making the per-sharpening cost very low after initial purchase.
Professional sharpening typically costs $10 to $20 per blade plus transportation time and fuel. Annual costs for twice-yearly sharpening reach $20 to $40 per blade. Over five years, professional services cost $100 to $200 per blade – more than the initial investment in DIY tools.
Time investments differ significantly between approaches. DIY sharpening requires 30 to 60 minutes per blade including removal, sharpening, and reinstallation. Professional services need minimal hands-on time but include travel and waiting periods that may total several hours.
Quality considerations affect long-term costs. Properly executed DIY sharpening matches professional results and may exceed them since you control every aspect of the process. Poor DIY technique can damage blades and increase replacement costs, while professional services provide consistent but potentially less personalized results.
Consider your total blade needs when calculating costs. Multiple mowers or frequent blade changes favor DIY approaches, while single-mower households with minimal maintenance requirements may find professional services more convenient.
Seasonal Blade Care and Storage
Proper seasonal care extends blade life and ensures optimal performance year after year. Different seasons present unique challenges that require specific maintenance approaches.
Spring preparation begins with thorough blade inspection after winter storage. Look for rust, corrosion, and damage that may have occurred during storage. Clean off protective oil and debris before sharpening and installation.
Summer maintenance focuses on frequent cleaning and damage prevention. Hot, dry conditions create more dust and debris that can dull blades quickly. Wet conditions promote rust and corrosion that requires prompt attention.
Fall preparation includes final sharpening before winter storage. Sharp blades cut through fallen leaves more effectively and reduce strain on your mower’s engine. Clean blades thoroughly and apply protective oil before storage.
Winter storage requires attention to corrosion prevention. Clean blades completely and apply a light coat of oil or spray lubricant to all metal surfaces. Store mowers in dry locations away from moisture and temperature extremes.
Humidity control in storage areas prevents rust and corrosion damage. Use dehumidifiers or moisture absorbers in enclosed storage spaces. Avoid storing mowers directly on concrete floors where moisture can accumulate.
Temperature considerations affect metal expansion and blade mounting. Extreme temperature changes can affect bolt torque and blade positioning. Check blade tightness at the beginning of each mowing season regardless of winter storage conditions.
Sharp lawn mower blades make the difference between a healthy, attractive lawn and one that struggles with disease and poor appearance. Regular blade maintenance saves money, improves cutting performance, and extends your mower’s life. The techniques described in this guide provide everything needed to keep your blades performing at their best.
Success with blade sharpening comes from practice and attention to detail. Start with conservative approaches and develop your skills over time. Remember that safety always comes first – proper protective equipment and careful technique prevent injuries and ensure successful results.
Your lawn will thank you for the effort invested in blade maintenance. Sharp blades create clean cuts that heal quickly and promote healthy grass growth. The time spent sharpening blades pays dividends in improved lawn appearance and reduced long-term maintenance requirements.