How to Winterize Your Sprinkler System?
Winter brings freezing temperatures that can destroy your irrigation system if you don’t prepare it properly. Water left inside pipes and sprinkler heads expands when it freezes, causing cracks, breaks, and expensive repairs. A blown sprinkler system can cost thousands of dollars to fix, but you can prevent this damage with proper winterization.
This guide walks you through every step of preparing your lawn irrigation system for cold weather. You’ll learn three proven methods to drain your system, find out when to start the process, and discover professional tips to protect your investment.
Why Winterizing Your Irrigation System Matters
Frozen water expands by roughly 9% in volume. This expansion creates immense pressure inside pipes, valves, and sprinkler heads. Even a small amount of trapped water can crack PVC pipes or damage the backflow preventer. Once spring arrives, you’ll turn on your system only to find geysers erupting from split pipes and broken components.
The damage goes beyond visible pipes. Water trapped in underground lines, valve boxes, and backflow devices freezes solid during winter. These components hide below ground, making damage hard to spot until you activate the system in spring. By then, repairs become urgent and costly.
Proper winterization removes water from every part of your system. This simple maintenance step extends the life of your irrigation equipment and saves you from emergency repair bills when warm weather returns.
Best Time to Winterize Sprinkler Systems
Start the winterization process before the first hard freeze hits your area. A hard freeze means temperatures drop to 28°F or below for several hours. This cold snap causes water to freeze solid inside your irrigation lines.
Most regions need winterization between late September and early November. Your local climate determines the exact timing. Northern states require earlier preparation, sometimes as early as mid-September. Southern regions might wait until late October or early November.
Check your local weather forecast regularly as fall progresses. Once nighttime temperatures consistently dip into the 30s, schedule your winterization. Don’t wait for the first freeze warning – by then, it might be too late.
Tools and Materials You’ll Need
Gathering the right equipment beforehand makes the winterization process smooth and efficient. Here’s what you need:
For Manual Drain Method:
- Screwdriver or valve key
- Bucket or towels
- Work gloves
For Blow-Out Method:
- Air compressor (minimum 10 CFM output)
- Quick-connect coupler for mainline connection
- Safety glasses
- Teflon tape
For Automatic Drain Method:
- Inspection flashlight
- Small tools for valve access
All three methods require access to your system’s main shut-off valve and control panel. Locate these before you start working.
Method 1: Manual Drain Winterization
The manual drain method works best for smaller systems or those specifically designed with drain valves. This approach costs nothing and requires minimal equipment.
Step 1: Turn Off the Water Supply
Find your main irrigation shut-off valve. This valve connects your sprinkler system to your home’s water supply. It usually sits in the basement, crawl space, or utility room. Turn the valve clockwise until it stops. This cuts off water flow to the entire irrigation system.
Some homes have the shut-off valve in an underground box near the water meter. Open the box and turn the valve completely off.
Step 2: Shut Down the Controller
Head to your sprinkler timer or controller. Switch it to “rain” or “off” mode. This prevents the system from trying to run during winter. Some controllers have a specific “winterize” setting – use that if available.
Don’t unplug the controller completely. Many systems use the controller to maintain time settings and programming. You want to preserve these settings for spring startup.
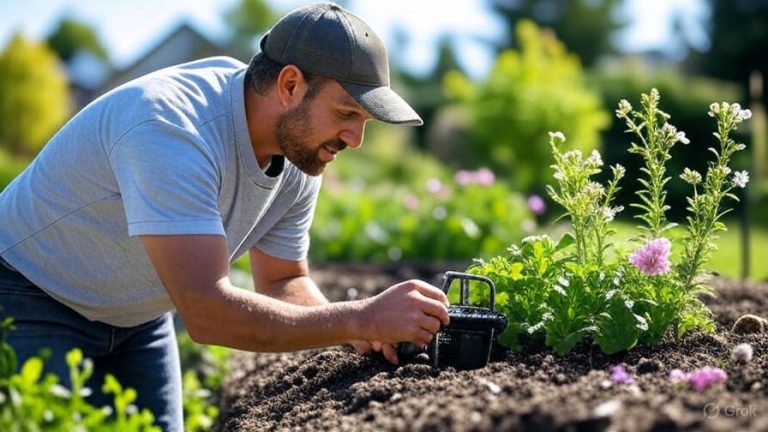
Step 3: Open Manual Drain Valves
Manual drain valves sit at low points throughout your irrigation system. These valves automatically open when water pressure drops, but you should manually check each one.
Locate all drain valves in your system. They’re typically in valve boxes or at the end of irrigation zones. Open each valve manually by turning the cap counter-clockwise. Water will drain out, so have buckets or towels ready.
Let the water drain completely. This might take 30 minutes to an hour depending on your system size.
Step 4: Drain Backflow Preventer
The backflow preventer protects your home’s drinking water from contamination. This device holds water and needs special attention.
Open the test cocks on the backflow preventer. These small valves let trapped water escape. Most backflow devices have two or four test cocks. Open all of them.
Loosen the main valve caps slightly. Don’t remove them completely – just crack them open to release pressure and remaining water. Leave everything open for the winter.
Step 5: Insulate Exposed Components
Wrap the backflow preventer and any exposed pipes with insulation. Use foam pipe insulation or insulated bags designed for backflow devices. Secure the insulation with weatherproof tape.
Pay special attention to above-ground components. These freeze first and suffer the most damage.
Method 2: Compressed Air Blow-Out Method
The blow-out method uses compressed air to push water from irrigation lines. This technique removes more water than manual draining and works for all system types. Many professionals consider it the most thorough winterization method.
Step 1: Prepare the Air Compressor
You need a compressor with at least 10 cubic feet per minute (CFM) capacity. Larger systems require 20-25 CFM. The compressor should deliver 40-80 PSI for residential systems.
Rent an appropriate compressor from a tool rental shop if you don’t own one. Tell them you’re winterizing a sprinkler system so they recommend the right size.
Step 2: Connect to the System
Turn off the main water supply to your irrigation system. Shut down the controller.
Locate the mainline or a quick-connect port on your system. Many modern systems include a blow-out port for winterization. This threaded connection sits near the main valve.
Attach the compressor hose using a quick-connect coupler. Wrap threads with Teflon tape for a secure, leak-free connection. Make sure the connection sits tight.
Step 3: Activate One Zone at a Time
Put on safety glasses before starting. Sprinkler heads shoot water and debris during blow-out.
Turn on the compressor and build pressure to 40-50 PSI for PVC pipes or 50-80 PSI for polyethylene pipes. Never exceed 80 PSI on residential systems.
Manually activate one sprinkler zone at the controller. Watch the sprinkler heads in that zone. They’ll spray water, then a mix of water and air, then pure air.
Let compressed air run through each zone for about two minutes after only air comes out. This ensures complete water removal.
Step 4: Move Through All Zones
Turn off the current zone. Activate the next zone at the controller.
Repeat the process for each zone in your system. Work methodically through every zone, giving each one adequate blow-out time.
Never run a zone for more than two minutes after water stops coming out. Excessive air can damage seals and diaphragms in sprinkler heads.
Step 5: Disconnect and Secure
After completing all zones, turn off the compressor. Release pressure from the hose before disconnecting it from the system.
Remove the quick-connect coupler. Cap or plug the connection point to keep dirt and debris out during winter.
Open the backflow preventer test cocks and main valve caps as described in the manual method. Insulate exposed components.
Method 3: Automatic Drain Valve Winterization
Some irrigation systems come equipped with automatic drain valves. These spring-loaded valves open automatically when water pressure drops, draining pipes without manual intervention.
Step 1: Verify Automatic Drain Valves
Not all systems have automatic drain valves. Check your installation manual or contact your installer to confirm.
Automatic drain valves install at low points in the irrigation system. They look like small cylinders with a cap on top.
Step 2: Shut Off Water and Controller
Turn off the main water supply valve to your irrigation system. Set the controller to “off” or “rain” mode.
Step 3: Let the System Drain
The pressure drop causes automatic drain valves to open. Water flows out through these valves into the surrounding soil.
Wait at least an hour for complete drainage. The process happens automatically, but it takes time.
Step 4: Inspect Drain Valves
After the system drains, locate and inspect each automatic drain valve. Make sure the cap isn’t stuck closed. Clean any debris from around the valves.
Some automatic valves need manual opening the first time each winter. Check your system’s manual for specific instructions.
Step 5: Protect Above-Ground Components
Drain the backflow preventer using the test cocks. Insulate all exposed pipes and components.
Even with automatic drain valves, backflow preventers need manual draining and protection.
Protecting Your Backflow Preventer
The backflow preventer deserves special attention during winterization. This critical safety device costs several hundred dollars to replace.
After draining test cocks and cracking valve caps, consider these protection methods:
Cover the entire backflow assembly with an insulated bag or jacket specifically designed for these devices. These covers trap heat and prevent freezing.
Build a small enclosure around the backflow preventer using foam insulation boards. Leave ventilation gaps to prevent condensation buildup.
Some people use heat tape or heating cables wrapped around the backflow preventer. These electrical heating elements prevent freezing during extreme cold. Only use products rated for outdoor use and follow manufacturer instructions carefully.
Never wrap the backflow preventer in plastic bags or tarps without ventilation. Trapped moisture causes corrosion and damage.
Winterizing Sprinkler Heads and Valves
Individual sprinkler heads and control valves need attention during winterization. These components trap water even after line drainage.
After draining your system by any method, manually check sprinkler heads. Push down on pop-up heads to ensure they’ve drained. Some heads have built-in check valves that trap water. These need extra attention.
Remove drain caps from valve boxes if your valves have them. This allows any trapped water to escape and prevents pressure buildup if ice forms.
Clean debris from around valve boxes. Remove leaves, dirt, and vegetation that could trap moisture or block drainage.
Common Winterization Mistakes to Avoid
Many homeowners make simple errors that compromise their winterization efforts.
Waiting Too Long
Don’t procrastinate until the first freeze warning. Winterize at least two weeks before expected freezing temperatures. Last-minute winterization often happens too late.
Skipping the Backflow Preventer
The backflow device holds water in multiple chambers. These must drain completely. Many people focus on pipes and forget this expensive component.
Using Too Much Air Pressure
Excessive PSI damages seals, diaphragms, and gaskets in sprinkler heads and valves. Stick to recommended pressure levels – 50 PSI for most residential systems.
Incomplete Zone Coverage
Every zone needs attention. Missing even one zone leaves pipes vulnerable to freeze damage. Work through each zone systematically.
Leaving the Controller On
A controller left in “run” mode might activate during a warm winter day. This sends water into partially drained lines, causing problems when temperatures drop again.
Professional Winterization vs. DIY
You can handle winterization yourself with the right tools and knowledge. The manual drain and automatic drain methods require minimal equipment and skill.
The blow-out method needs more expertise and equipment. Improper air pressure damages systems. If you’re unsure about using compressed air, hire a professional.
Professional winterization costs between $75 and $150 for most residential systems. This service includes blow-out, valve inspection, and backflow protection. Professionals carry insurance and know proper techniques for different system types.
Consider professional help if:
- You own a large or complex irrigation system
- Your system uses expensive components
- You’re uncomfortable working with compressed air
- You don’t have access to an appropriate compressor
- Your system has had problems in past winters
Spring Startup After Winter
Come spring, reversing the winterization process requires care. Rushing startup can damage your system.
Start by closing all drain valves you opened during winterization. Replace caps on backflow preventer test cocks and main valves.
Turn on the main water supply slowly. This gradual pressure increase helps prevent water hammer damage.
Activate zones manually at the controller one at a time. Check each zone for leaks, broken heads, or other damage. Look for geysers or wet spots that indicate broken pipes.
The first run-through after winter often reveals winterization mistakes or damage that occurred despite your efforts. Address problems immediately before setting the controller to automatic mode.
Regional Considerations for Winterization
Different climates require different approaches to sprinkler winterization.
Northern Climates (Zones 3-5)
These regions experience hard freezes from October through April. Complete winterization by mid-September. Use the blow-out method for most thorough water removal. Heavy insulation on all above-ground components becomes critical.
Mid-Climate Regions (Zones 6-7)
Freeze risk runs from November through March. Winterize by late October. The blow-out method works best, but manual draining suffices for smaller systems. Moderate insulation protects exposed components.
Southern Climates (Zones 8-10)
Occasional freezes occur, but sustained cold is rare. Winterize only if temperatures below 28°F are forecast. Simple manual draining often provides adequate protection. Focus insulation on the backflow preventer.
Desert Climates
Cold nights even in warm climates can freeze irrigation systems. Winterize before overnight temperatures consistently drop below freezing. Drain the system but full insulation might not be necessary.
System-Specific Winterization Tips
Drip Irrigation Systems
Drip systems use low-pressure water delivery. These systems still need winterization but respond well to manual draining. Open the end caps on drip lines to let water escape. Remove and store filters indoors. Flush the system one final time before winter shutdown.
Systems with Booster Pumps
Irrigation pumps need special winterization. Drain the pump housing completely. Remove drain plugs from the pump body. Store small pumps indoors if possible. Larger pumps need weatherproof covers and insulated protection.
Systems with Rain Sensors
Leave rain sensors in place during winter. These devices handle cold weather without damage. Clean debris from the sensor before winter. Check the battery if your sensor uses one.
Smart Controllers
WiFi-enabled controllers should stay plugged in during winter. These devices need power to maintain settings and receive weather updates. Set them to “off” mode but don’t disconnect them.
Troubleshooting Winter Damage
Despite best efforts, damage sometimes occurs. Recognize these common problems:
Cracked PVC Pipes
Spring startup reveals geysers shooting from underground. These indicate split pipes from ice expansion. Mark the location and call a repair professional. You’ll need excavation and pipe replacement.
Broken Sprinkler Heads
Heads that won’t pop up or spray incorrectly suffered freeze damage. Replace damaged heads with matching models. Most homeowners can handle this repair.
Leaking Backflow Preventer
Water dripping from test cocks or valves indicates damaged seals. Internal components may have cracked. This repair requires a certified backflow tester. Don’t use the system until inspection and repair.
Zone Valve Failures
If zones won’t activate in spring, zone valves may have frozen. These valves sit in underground boxes where water sometimes accumulates. Replace damaged solenoids or entire valves as needed.
Cost Analysis: Winterization Investment
Understanding winterization costs helps you make informed decisions about DIY versus professional service.
DIY Costs:
- Compressor rental: $40-75 per day
- Quick-connect fittings: $15-25
- Insulation materials: $20-50
- Total: $75-150 one time
Professional Service:
- Standard winterization: $75-150
- Large systems: $150-250
- Annual contracts: Often include spring startup
Repair Costs Without Winterization:
- Burst pipe repair: $200-500 per break
- Backflow preventer replacement: $300-800
- Sprinkler head replacement: $15-30 each
- Complete system overhaul: $1,500-5,000+
The small investment in winterization saves significant money on spring repairs. Even one avoided pipe break pays for several years of winterization.
Maintaining Records
Keep a winterization log for your irrigation system. Note the date you complete winterization each year. Record which method you used and any issues you encountered.
Take photos of your backflow preventer and valve setup before and after winterization. These images help with spring startup and provide reference if you hire professionals later.
Store your irrigation system manual in a safe place. Include notes about drain valve locations, zone layouts, and any system quirks you’ve noticed.
This documentation becomes valuable when problems arise or when you sell your home. New owners benefit from detailed system information.
Final Thoughts on Sprinkler Winterization
Winterizing your irrigation system ranks among the most important seasonal maintenance tasks for homeowners. This relatively simple process prevents thousands of dollars in damage and extends your system’s lifespan by many years.
The time investment is small – most homeowners complete winterization in 1-2 hours. The peace of mind knowing your system is protected through winter makes the effort worthwhile.
Start planning your winterization now. Check weather forecasts, gather necessary materials, and mark your calendar for completion before the first hard freeze. Your irrigation system and your wallet will thank you when spring arrives and everything works perfectly.
Remember that every system is different. Your specific irrigation setup might need adjustments to these general guidelines. When in doubt, consult your system manual or contact a professional irrigation specialist. The small cost of expert advice beats expensive spring repairs.
Take action today to protect your lawn irrigation investment. Winter will arrive before you know it, and proper preparation makes all the difference between a smooth spring startup and a costly repair project.