How to Grow Potatoes in a Container?
Growing potatoes in containers is one of the smartest gardening decisions you’ll ever make. You don’t need a massive backyard or acres of farmland to enjoy fresh, homegrown potatoes. A simple container on your balcony, patio, or deck can produce a surprising harvest.
I’ve been growing potatoes in containers for years, and I can tell you it’s easier than most people think. You’ll save space, avoid many common soil problems, and harvest your spuds without breaking your back digging through hard ground.
Why Container Growing Makes Sense
Container gardening for potatoes solves so many problems at once. You get complete control over the soil quality, drainage, and growing conditions. Pests like wireworms and grubs can’t reach your plants as easily. You won’t deal with weeds competing for nutrients.
The best part? Harvesting becomes incredibly simple. Just tip over the container and collect your potatoes. No digging, no damaged tubers, no missing any that hide in the ground.
Small spaces become productive food sources. Apartment dwellers can grow their own vegetables. People with poor native soil can still enjoy gardening success. Seniors and anyone with mobility issues can garden at a comfortable height.
Picking the Right Container for Your Potato Plants
Size matters when it comes to potato containers. You need at least 2.5 gallons of soil per plant, but bigger is always better. A 5-gallon bucket works for one plant. A 10-gallon container can handle two plants. Large grow bags holding 15-20 gallons will give you the best yields.
The container must have drainage holes at the bottom. Potatoes hate waterlogged soil. Too much moisture leads to rot and disease. Drill several half-inch holes if your container doesn’t have them already.
Material choices include plastic pots, fabric grow bags, wooden boxes, or even sturdy trash cans. Fabric grow bags have become my favorite option. They provide excellent drainage and air circulation. The roots can breathe better, and the fabric prevents the soil from becoming too compacted.
Dark-colored containers heat up faster in spring, which helps your potatoes grow. However, they can get too hot in summer. Light-colored containers stay cooler but take longer to warm up. You can always place a dark container inside a light-colored one for temperature control.
Height is important too. Look for containers at least 16 inches deep. Deeper is better because you’ll be adding soil as the plants grow. This technique, called hilling, encourages more potato formation along the buried stems.
The Best Potato Varieties for Container Growing
Not all potato varieties perform equally well in containers. Early season varieties mature quickly and work perfectly for limited space. They develop in 70-90 days and don’t need as much room for tuber development.
‘Yukon Gold’ produces buttery, golden potatoes with smooth skin. This variety adapts well to containers and resists many common diseases. The medium-sized tubers have excellent flavor for roasting, mashing, or boiling.
‘Red Pontiac’ gives you beautiful red-skinned potatoes with white flesh. This variety handles container life well and produces consistent yields. The potatoes store nicely and taste great in potato salads.
‘Kennebec’ is a reliable white potato that thrives in containers. It resists several diseases and produces smooth, round tubers. This variety works well for baking and frying.
‘Fingerling’ varieties like ‘Russian Banana’ or ‘French Fingerling’ are perfect for containers. These small, elongated potatoes don’t need as much space. They have rich, nutty flavors that chefs love.
‘All Blue’ or ‘Purple Majesty’ bring colorful fun to your container garden. These blue and purple varieties are loaded with antioxidants. Kids especially enjoy the novelty of colored potatoes.
Start with certified seed potatoes from a garden center or seed supplier. Never use grocery store potatoes. Those have been treated to prevent sprouting. They often carry diseases that will ruin your harvest.
Creating the Perfect Soil Mix
Potatoes need loose, well-draining soil that holds moisture without becoming soggy. Regular garden soil is too heavy for containers. It compacts easily and doesn’t drain well enough.
Make your own mix using equal parts:
- High-quality potting soil
- Compost or aged manure
- Perlite or vermiculite
This combination provides nutrients, retains moisture, and ensures proper drainage. The organic matter feeds your plants throughout the growing season. The perlite keeps everything light and airy.
You can also use a commercial container mix and add compost. Aim for a ratio of three parts container mix to one part compost. This gives your potatoes a nutrient boost without making the soil too heavy.
Avoid using garden soil or topsoil in containers. These compact too much and drain poorly. Your potatoes will struggle in dense soil.
Check the pH level if possible. Potatoes prefer slightly acidic soil between 5.0 and 6.5. Most commercial potting mixes fall within this range. If you’re making your own mix with garden compost, consider testing it.
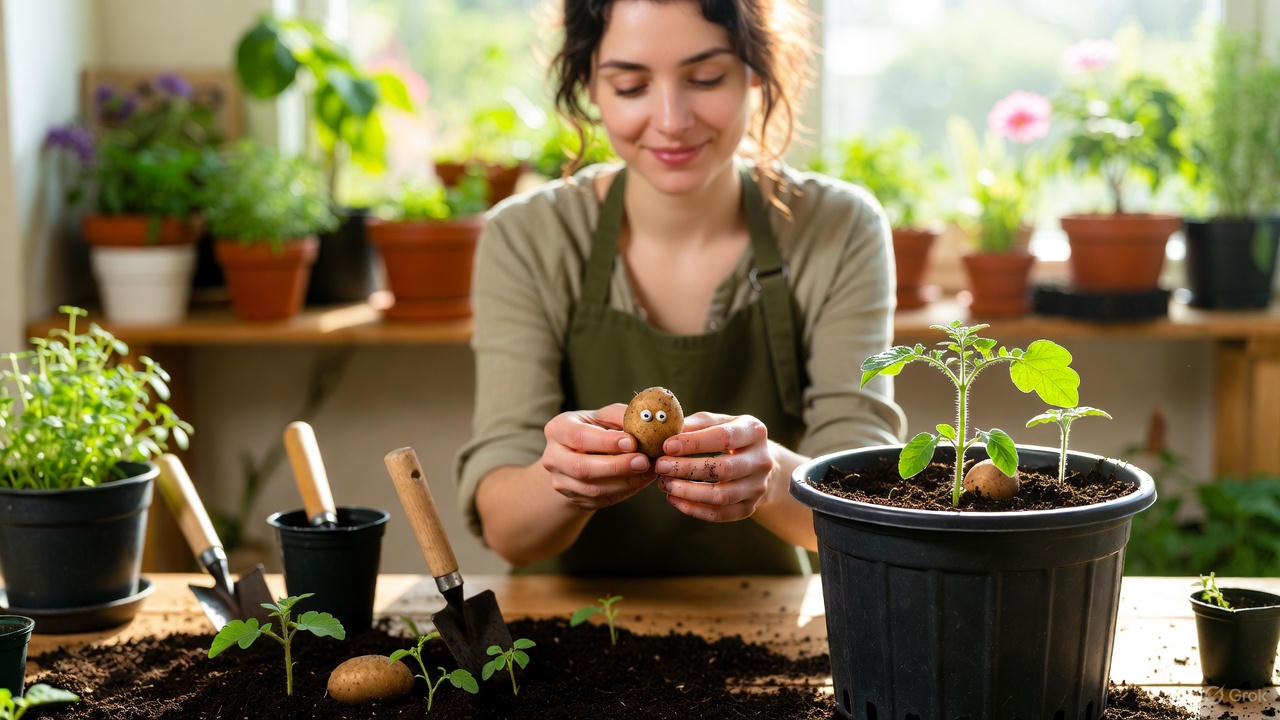
Preparing and Planting Your Seed Potatoes
Seed potatoes often come in various sizes. Large ones should be cut into chunks, each with at least two eyes. These eyes are the growing points where sprouts emerge. Each piece needs to be about the size of a golf ball.
After cutting, let the pieces dry for 24-48 hours. This allows the cut surfaces to form a protective layer called a callus. The callus prevents rot when you plant them in moist soil.
You can skip the cutting process if your seed potatoes are already small. Plant whole seed potatoes that are smaller than an egg.
Some gardeners pre-sprout their seed potatoes. Place them in a bright spot at room temperature for a couple of weeks before planting. Short, sturdy sprouts will develop. This technique, called chitting, gives you a head start on the growing season.
Fill your container with 4-6 inches of soil mix. Place the seed potatoes on top with the eyes facing up. Space them about 6 inches apart if you’re planting multiple tubers in one container.
Cover the seed potatoes with 3-4 inches of soil. Water gently until moisture runs from the drainage holes. Don’t flood the container. Just make sure the soil is evenly moist throughout.
When to Plant for Best Results
Timing depends on your climate and frost dates. Potatoes are cool-season crops that don’t tolerate frost. Plant them 2-4 weeks before your last expected spring frost date.
The soil temperature needs to reach at least 45°F for sprouting. Ideal soil temperatures range between 60-70°F. Warmer soil means faster germination and stronger plants.
Cold-climate gardeners can start containers indoors or in a greenhouse. Move them outside after the frost danger passes. This extends your growing season significantly.
You can also plant a fall crop in late summer. Count back 90-120 days from your first fall frost date. Plant heat-tolerant varieties that can handle warm soil temperatures during late summer.
Containers heat up faster than garden beds in spring. This means you can often plant a week or two earlier than in-ground gardens. Just be ready to cover your plants if a late frost threatens.
Caring for Your Container Potatoes
Watering Your Plants
Consistent moisture is critical for potato growing success. Containers dry out much faster than garden beds. Check the soil daily by sticking your finger two inches deep. If it feels dry, water thoroughly.
Water until you see it flowing from the drainage holes. This ensures the entire root zone gets moisture. The top layer might look wet while the bottom stays dry if you water too lightly.
Irregular watering causes problems. Dry periods followed by heavy watering can split the tubers. The potatoes develop hollow centers or knobby shapes. Try to maintain even moisture throughout the season.
Morning watering works best. The plants have all day to use the water. Any moisture on the leaves dries quickly, reducing disease risks.
Reduce watering as the plants mature and foliage begins to yellow. This helps the potato skins toughen up for storage.
Feeding Your Growing Plants
Potatoes are heavy feeders that need regular nutrients. Start with rich soil, but don’t stop there. Feed your plants every 2-3 weeks once they’re actively growing.
Organic fertilizers work wonderfully for potatoes. Fish emulsion provides quick nitrogen for leafy growth. Compost tea adds beneficial microbes along with nutrients. Seaweed extract supplies trace minerals that improve plant health.
Balanced fertilizers with equal amounts of nitrogen, phosphorus, and potassium work well. Look for a 5-5-5 or 10-10-10 ratio. Water-soluble fertilizers absorb quickly through the roots.
Avoid high-nitrogen fertilizers once the plants flower. Too much nitrogen at this stage produces lots of foliage but fewer potatoes. Switch to a fertilizer higher in phosphorus and potassium to support tuber development.
Side dress with compost halfway through the season. Gently mix a handful of compost into the top layer of soil. This provides a slow release of nutrients.
Hilling Up the Soil
Hilling is the secret technique that multiplies your potato harvest. As the plants grow, you gradually add more soil around the stems. This encourages additional tubers to form along the buried stem sections.
Start hilling when the plants reach 6-8 inches tall. Add 2-3 inches of soil mix around the base, leaving the top leaves exposed. Only the bottom portion of the stem should be covered.
Repeat this process every couple of weeks. Keep burying the lower stems as the plants grow taller. Stop when the container is full or when the plants start flowering.
This technique can double or triple your harvest compared to planting at one depth. Each buried section of stem can produce potatoes. The more stem you bury, the more potatoes you’ll get.
Use the same soil mix you started with for hilling. Straight potting soil works too. Keep the added soil loose and don’t pack it down.

Dealing with Common Problems
Pests That Bother Container Potatoes
Container growing naturally protects you from many soil-dwelling pests. You still need to watch for a few troublemakers.
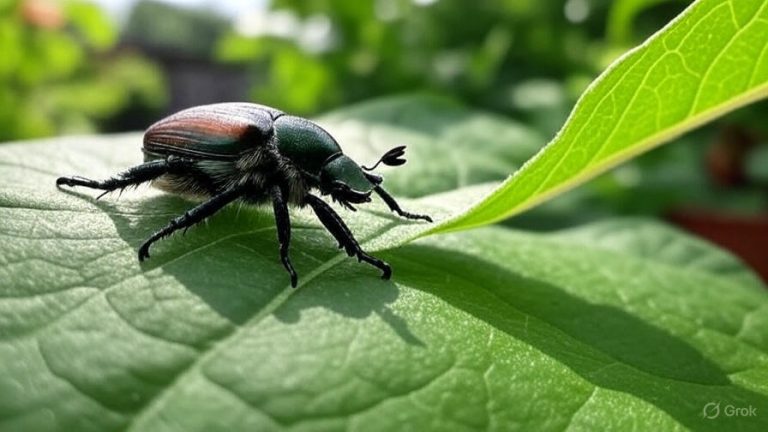
Colorado potato beetles are the most common pest. These orange and black striped insects munch on leaves. Their orange larvae are even more destructive. Check your plants regularly and remove any beetles or larvae you find. Drop them in soapy water.
Aphids sometimes cluster on new growth. These tiny green or black insects suck plant juices. Spray them off with a strong stream of water. Insecticidal soap handles heavy infestations.
Slugs can climb into containers and chew holes in leaves. Set out shallow dishes of beer to trap them. Copper tape around the container rim deters them.
Disease Prevention
Good cultural practices prevent most diseases. Proper watering, good air circulation, and clean practices make a huge difference.
Late blight causes dark spots on leaves and stems. This fungal disease thrives in cool, wet conditions. Water at the base of plants, not overhead. Space containers apart for air flow.
Early blight creates target-like spots on older leaves. Remove affected leaves promptly. Avoid getting foliage wet when watering.
Scab shows up as rough, corky spots on potato skins. It develops in alkaline soil with inconsistent moisture. Maintain even watering and slightly acidic soil to prevent it.
Start with disease-resistant varieties when possible. Use fresh potting mix each year. Clean containers thoroughly before reusing them.
Recognizing Harvest Time
Potato plants tell you when they’re ready for harvest. Watch for these signs as the season progresses.
Early varieties are ready 70-90 days after planting. You can harvest “new potatoes” even sooner. These are small, tender potatoes with thin skins. Gently dig around the plant edges and take a few without destroying the plant. It will keep producing.
For full-sized potatoes, wait until the plants flower. The flowering stage signals that tubers are forming underground. You can start checking for harvestable potatoes about two weeks after flowering.
The foliage begins yellowing and dying back when potatoes reach maturity. This happens naturally as the plants complete their life cycle. Once most of the foliage has turned brown and withered, your potatoes are ready.
Stop watering about a week before harvest. This gives the skins time to toughen. Tough skins help potatoes store longer.
Harvesting Your Container Potatoes
Harvest on a dry day if possible. Tip the container over onto a tarp or into a wheelbarrow. Gently break apart the soil with your hands. The potatoes will tumble out easily.
Be gentle to avoid bruising. Damaged potatoes don’t store well. Set aside any that get cut or bruised for immediate use.
You’ll be amazed at how many potatoes hide in that container. A single 10-gallon container can produce 5-10 pounds of potatoes. Larger containers yield even more.
Brush off excess dirt but don’t wash the potatoes yet. The protective soil layer helps them store better. Only wash potatoes right before you use them.
Curing and Storing Your Harvest
Freshly harvested potatoes need curing before storage. This process toughens the skins and heals any minor damage.
Spread your potatoes in a single layer in a dark, humid location. The temperature should stay between 50-60°F. A basement or garage often works well. Let them cure for 10-14 days.
After curing, brush off any remaining dirt. Sort through them carefully. Remove any with soft spots, green areas, or damage. These won’t store well.
Store cured potatoes in a dark, cool place. The ideal temperature is 40-45°F with high humidity. A basement, root cellar, or cool closet works perfectly. Light causes potatoes to turn green and develop toxic compounds.
Paper bags or cardboard boxes with ventilation holes make good storage containers. Avoid plastic bags. These trap moisture and promote rot.
Check your stored potatoes regularly. Remove any that show signs of sprouting, softening, or rot. One bad potato can affect the others.
Properly stored potatoes can last 3-6 months. Early varieties generally store for shorter periods than late-season varieties.
Getting Ready for Next Season
Don’t reuse the same soil next year. Spent potting mix loses nutrients and can harbor diseases. Dump it into your garden beds or compost pile.
Clean your containers thoroughly. Scrub them with a solution of one part bleach to nine parts water. This kills any lingering disease organisms. Rinse well and let them dry completely before storing.
Save your best potatoes as seed for next year if you want. Store them separately from eating potatoes. Keep them in slightly warmer conditions (45-50°F) to maintain dormancy. They should stay firm through winter.
Plan to rotate varieties each year. Different varieties have different nutrient needs and disease resistances. This simple practice improves your success rate.
Troubleshooting Common Questions
Why are my potatoes green? Green potatoes develop when tubers get exposed to light. This happens if you don’t hill up enough soil or if potatoes form near the surface. Green areas contain solanine, a toxic compound. Cut away all green portions before eating.
Why are my potatoes small? Several factors cause small potatoes. The container might be too small. You may have planted too many seed potatoes too close together. Inconsistent watering or lack of nutrients also limit tuber size. Use larger containers, space plants properly, and maintain consistent care.
Can I grow potatoes indoors? You can try, but results vary. Potatoes need 6-8 hours of bright light daily. A sunny south-facing window might work. Grow lights provide better results. The bigger challenge is the space needed as plants grow 2-3 feet tall.
How many potatoes will I get? Expect 5-10 times what you planted. One seed potato typically produces 5-10 new potatoes. Larger containers with optimal care can yield even more. My best 15-gallon container produced nearly 15 pounds of potatoes.
Do potatoes need full sun? Yes, potatoes perform best with 6-8 hours of direct sunlight. They’ll grow in partial shade but produce smaller yields. Place your containers in the sunniest spot available.
Final Thoughts on Container Potato Growing
Growing potatoes in containers turns any space into a productive mini farm. You don’t need gardening experience or a green thumb. Just follow these basics: use large containers with drainage, fill them with quality soil, plant certified seed potatoes, water consistently, and hill up as plants grow.
The reward for your efforts is incredibly fresh potatoes with flavors that store-bought spuds can’t match. You’ll know exactly how they were grown without chemicals or pesticides. The satisfaction of harvesting your own food is hard to beat.
Start small with one or two containers your first year. Learn what works in your specific conditions. Once you taste your homegrown potatoes, you’ll want to expand your container garden.
This method works anywhere – apartments, condos, suburban yards, or rural homesteads. All you need is a container, some soil, and a sunny spot. Before you know it, you’ll be enjoying delicious potatoes you grew yourself.