How Brussels Sprouts Are Grown?
Brussels sprouts have transformed from the dreaded vegetable on dinner plates to a celebrated superfood in modern kitchens. These miniature cabbage-like vegetables pack impressive nutritional value and offer surprising versatility in cooking. Yet many gardeners shy away from growing Brussels sprouts, believing them too challenging for home cultivation.
The truth is that Brussels sprouts cultivation requires patience and proper technique, but the results reward dedicated growers with months of fresh, flavorful harvests. This comprehensive guide walks you through every aspect of Brussels sprouts farming, from soil preparation to harvest timing.
The Brussels Sprouts Plant: A Botanical Marvel
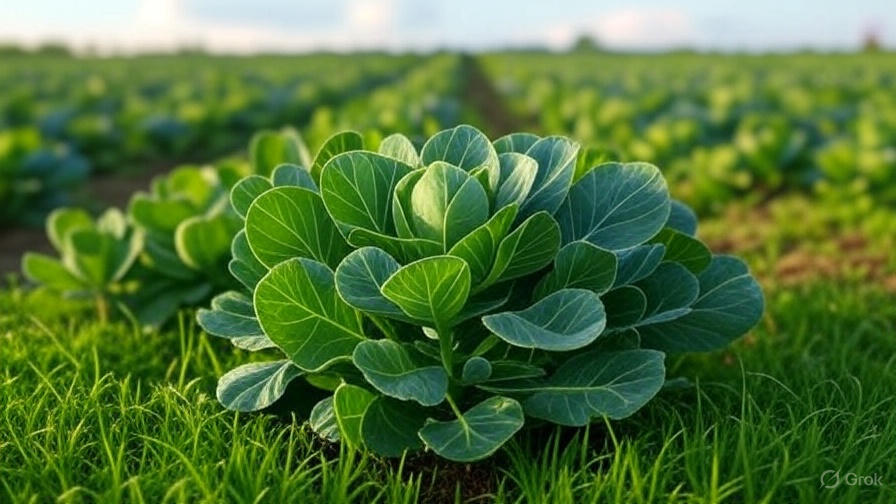
Brussels sprouts (Brassica oleracea var. gemmifera) belong to the brassica family, sharing ancestry with cabbage, broccoli, and kale. The plant develops a tall, sturdy stem that can reach heights of 2-3 feet, supporting large, blue-green leaves that spread outward like an umbrella.
The magic happens along this central stem, where dozens of small, tight buds form in the leaf axils. These buds gradually develop into the familiar Brussels sprouts we harvest. Each plant typically produces 50-100 sprouts throughout the growing season, making it one of the most productive vegetables per square foot of garden space.
The plant’s unique growth pattern sets it apart from other brassicas. While cabbage forms one large head and broccoli produces a central crown with side shoots, Brussels sprouts create multiple mini-heads arranged spirally up the main stem. This vertical growing habit makes efficient use of garden space and allows for extended harvesting periods.
Climate Requirements and Growing Conditions
Brussels sprouts thrive in cool weather conditions, performing best when temperatures range between 60-70°F during the day and drop to 45-55°F at night. These cool-season vegetables actually improve in flavor after exposure to light frost, which converts starches to sugars and reduces the bitter compounds that make some people avoid Brussels sprouts.
The ideal growing season varies by region. In northern climates, gardeners start Brussels sprouts in late spring for fall harvest. Southern gardeners can grow them as winter crops, starting seeds in late summer or early fall. The key is timing the harvest period to coincide with cool weather.
Brussels sprouts require full sun exposure for optimal growth, though they tolerate partial shade better than many vegetables. At least 6 hours of direct sunlight daily ensures proper head formation and prevents the plants from becoming leggy and weak.
Wind protection benefits Brussels sprouts plants, especially as they grow taller and become top-heavy with developing sprouts. Strong winds can snap the main stem or cause the plant to lean, affecting sprout quality. Consider planting near fences or larger plants that provide natural windbreaks.
Soil Preparation and Fertility Management
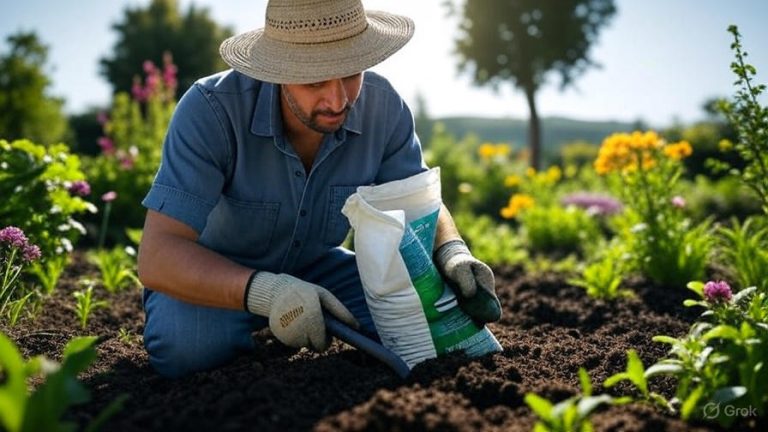
Success with Brussels sprouts begins with proper soil preparation. These heavy feeders require rich, fertile soil with excellent drainage and consistent moisture retention. The ideal soil pH ranges from 6.0 to 7.0, slightly on the alkaline side compared to many vegetables.
Start soil preparation several weeks before planting by working in 2-3 inches of well-aged compost or rotted manure. This organic matter improves soil structure, provides slow-release nutrients, and enhances the soil’s water-holding capacity. Avoid fresh manure, which can burn young plants and contribute excess nitrogen that promotes leaf growth at the expense of sprout development.
Brussels sprouts consume substantial amounts of nitrogen, phosphorus, and potassium throughout their long growing season. A balanced organic fertilizer applied at planting time provides baseline nutrition, but most plants benefit from supplemental feeding every 4-6 weeks during active growth.
Calcium plays a crucial role in preventing disorders like tipburn and ensuring proper cell wall development in the developing sprouts. If soil tests reveal calcium deficiency, work in lime or gypsum according to package directions several months before planting.
The soil must drain well while retaining consistent moisture. Brussels sprouts suffer in waterlogged conditions, which promote root rot and other diseases. If your garden has heavy clay soil, consider building raised beds or working in coarse sand and organic matter to improve drainage.
Starting Brussels Sprouts from Seed
Most gardeners achieve better results starting Brussels sprouts from seed rather than purchasing transplants. Seeds offer more variety options and cost significantly less than buying enough transplants for a substantial harvest.
Start Brussels sprouts seeds indoors 12-14 weeks before the average first fall frost in your area. This timing allows the plants to develop strong root systems and begin forming sprouts before hot summer weather arrives.
Use seed-starting trays filled with high-quality potting mix. Plant seeds ¼ inch deep, spacing them about 2 inches apart. Brussels sprouts seeds germinate best at temperatures between 70-75°F, so consider using heat mats if your home runs cool.
Seeds typically germinate within 5-10 days under optimal conditions. Once seedlings emerge, move them to a bright location or under grow lights. Maintain temperatures around 65°F to prevent leggy growth. Water regularly but avoid overwatering, which can cause damping-off disease.
When seedlings develop their first true leaves, transplant them into individual 3-4 inch pots. This step gives each plant more room to develop strong roots and makes the eventual transplanting to the garden less stressful.
Transplanting and Garden Placement
Brussels sprouts transplants are ready for the garden when they reach 4-6 inches tall and have developed several sets of true leaves. In most regions, this occurs 6-8 weeks after starting seeds indoors.
Harden off transplants gradually over 7-10 days before planting in the garden. Start by placing them outside in a sheltered location for just a few hours, gradually increasing exposure time and sun intensity. This process helps plants adjust to outdoor conditions and reduces transplant shock.
Space Brussels sprouts plants 18-24 inches apart in rows 3 feet apart. This spacing provides adequate room for the large leaves to develop while ensuring good air circulation around each plant. Crowded plants are more susceptible to diseases and produce smaller, less developed sprouts.
Dig planting holes slightly deeper than the root ball and water thoroughly after transplanting. Apply a 2-3 inch layer of organic mulch around each plant, keeping it several inches away from the stem. Mulch conserves soil moisture, suppresses weeds, and moderates soil temperature fluctuations.
Plant Brussels sprouts transplants on a cloudy day or in late afternoon to reduce transplant stress. If the weather has been dry, water the transplants daily for the first week until they establish new roots.
Watering and Irrigation Strategies
Consistent soil moisture is critical for Brussels sprouts success. These plants have shallow root systems that dry out quickly, yet they’re sensitive to waterlogged conditions. The goal is maintaining evenly moist soil throughout the growing season.
Brussels sprouts require approximately 1-1.5 inches of water per week, including rainfall. During hot, dry periods, they may need supplemental watering every 2-3 days. Deep, infrequent watering encourages deeper root development compared to frequent, shallow watering.
Drip irrigation or soaker hoses provide the most efficient watering method for Brussels sprouts. These systems deliver water directly to the root zone while keeping foliage dry, reducing the risk of foliar diseases. If using overhead sprinklers, water early in the morning so leaves can dry before evening.
Monitor soil moisture by inserting your finger 2-3 inches into the soil near the plant base. If the soil feels dry at this depth, it’s time to water. During the final weeks before harvest, maintain consistent moisture to prevent sprouts from becoming loose or failing to form properly.
Avoid allowing the soil to completely dry out, which stresses plants and can cause premature bolting or poor sprout development. Similarly, avoid overwatering, which can lead to root rot, split sprouts, and increased susceptibility to diseases.
Fertilizing Throughout the Growing Season
Brussels sprouts are among the heaviest feeding vegetables, requiring consistent nutrition throughout their 100-120 day growing season. A well-planned fertilization program ensures vigorous plant growth and quality sprout production.
Apply a balanced organic fertilizer at planting time, working it into the soil around each transplant. Look for fertilizers with an N-P-K ratio of approximately 10-10-10 or similar balanced formulation. This initial feeding provides nutrients for early growth and establishment.
Four weeks after transplanting, apply a nitrogen-rich fertilizer to support the rapid vegetative growth phase. Fish emulsion, blood meal, or compost tea work well for this feeding. Apply according to package directions, being careful not to overfertilize, which can delay sprout formation.
As plants begin forming sprouts along the stem (typically 8-10 weeks after transplanting), switch to a lower-nitrogen, higher-phosphorus fertilizer. This change encourages sprout development rather than continued leaf production. Bone meal or a bloom-booster fertilizer provides appropriate nutrition during this phase.
Side-dress plants with compost or aged manure mid-season to provide slow-release nutrients and improve soil organic matter. Work the organic matter into the soil surface around each plant, being careful not to damage surface roots.
Monitor plants for nutrient deficiency symptoms. Yellowing lower leaves often indicate nitrogen deficiency, while purple leaf tinges may suggest phosphorus deficiency. Adjust your fertilization program based on plant appearance and growth rate.
Pest Management and Common Problems
Several pests commonly attack Brussels sprouts, but proactive management keeps most problems under control. The most troublesome pests include cabbage worms, aphids, flea beetles, and cutworms.
Cabbage worms are the larvae of white butterflies that lay eggs on brassica plants. These green caterpillars can quickly defoliate Brussels sprouts plants if left unchecked. Hand-picking works for small infestations, while Bacillus thuringiensis (Bt) provides organic control for larger populations.
Row covers offer excellent protection from flying pests during the early growing season. Install lightweight fabric covers immediately after transplanting and secure the edges to prevent pest entry. Remove covers once plants outgrow them or when they interfere with plant development.
Aphids cluster on new growth and the undersides of leaves, sucking plant juices and potentially transmitting viral diseases. Strong water sprays dislodge aphids, while beneficial insects like ladybugs provide natural control. Insecticidal soap offers organic control when necessary.
Flea beetles create small holes in leaves and can severely damage young plants. These tiny, jumping beetles are most active during warm, dry weather. Row covers provide the best protection, though diatomaceous earth applied to plant leaves can also deter them.
Cutworms cut through plant stems at soil level, toppling entire plants overnight. Collar barriers made from cardboard or plastic cups pushed into the soil around each transplant prevent cutworm damage.
Disease Prevention and Management
Brussels sprouts are susceptible to several diseases, most of which are prevented through proper cultural practices and garden sanitation. The most common diseases include clubroot, black rot, and downy mildew.
Clubroot causes swollen, distorted roots and stunted plant growth. This soil-borne disease persists for many years once established, making prevention crucial. Avoid planting brassicas in infected soil and maintain proper soil pH above 7.0, which inhibits clubroot development.
Crop rotation prevents the buildup of soil-borne diseases and pests. Avoid planting Brussels sprouts or other brassicas in the same location for at least 3-4 years. Rotate with unrelated crops like legumes, nightshades, or root vegetables.
Black rot causes V-shaped yellow lesions on leaves that progress to black veins and eventual plant death. This bacterial disease spreads through contaminated seeds, tools, and splashing water. Use certified disease-free seeds and avoid working in the garden when plants are wet.
Downy mildew appears as yellow spots on upper leaf surfaces with corresponding fuzzy growth on undersides. This fungal disease thrives in cool, moist conditions. Ensure adequate plant spacing for air circulation and avoid overhead watering when possible.
Remove and dispose of diseased plant material immediately. Don’t compost infected plants, as many pathogens survive the composting process. Clean tools between plants when working with diseased specimens to prevent spreading problems.
Supporting and Maintaining Plants
Brussels sprouts plants grow tall and can become top-heavy as sprouts develop along the stem. Proper support prevents plants from falling over and ensures continued production throughout the harvest season.
Install stakes or cages around plants when they reach 12-18 inches tall, before they become difficult to support without damage. Use 4-foot stakes driven 8-12 inches into the ground, positioned close to but not touching the main stem.
Tie plants to supports using soft materials like cloth strips or plant ties. Avoid using wire or string that can cut into the stem as plants grow and sway in wind. Check and adjust ties regularly as stems thicken.
Remove lower leaves as they yellow and die back naturally. This practice improves air circulation around the plant base and reduces disease pressure. However, avoid removing healthy green leaves, which continue photosynthesizing and supporting plant growth.
Some gardeners practice “topping” Brussels sprouts plants by removing the growing tip when plants reach desired height or when sprouts begin forming. This technique can promote more uniform sprout development and easier harvesting, though it’s not necessary for success.
Keep the area around plants weed-free through regular cultivation or mulching. Weeds compete for nutrients and water while harboring pests and diseases. Be careful when cultivating around Brussels sprouts, as they have shallow root systems easily damaged by aggressive hoeing.
Harvest Timing and Techniques
Brussels sprouts are ready for harvest when the buds reach 1-2 inches in diameter and feel firm and tight. Harvest typically begins 90-120 days after transplanting, depending on variety and growing conditions.
Start harvesting from the bottom of the plant and work upward as sprouts mature. Lower sprouts mature first, while those higher on the stem continue developing. This sequential harvesting extends the harvest period over several weeks or months.
Twist and pull sprouts from the stem, or use a sharp knife to cut them cleanly. Harvest before sprouts become loose and begin opening, as overripe sprouts have poor flavor and texture. Cold weather improves sprout quality, so there’s no rush to harvest before frost.
After harvesting sprouts, remove the corresponding leaf below each one. This practice allows more light to reach developing upper sprouts and keeps the plant looking tidy. Some gardeners remove all leaves at once for easier harvesting, though this reduces the plant’s photosynthetic capacity.
Fresh Brussels sprouts store in the refrigerator for 2-3 weeks when kept in perforated plastic bags. For longer storage, blanch sprouts for 3-5 minutes, cool in ice water, and freeze in portion-sized containers.
Extending the Growing Season
Brussels sprouts tolerate frost better than most vegetables, allowing gardeners to extend harvests well into winter in many regions. Proper season extension techniques can provide fresh sprouts through December or even January in moderate climates.
Row covers provide several degrees of frost protection while maintaining good light transmission. Install covers when nighttime temperatures consistently drop below 25°F. Remove covers during warm days to prevent overheating and maintain air circulation.
Cold frames offer more substantial protection for smaller plantings. These mini-greenhouses use solar heating during the day and retain warmth at night. Open cold frames during warm days and close them before temperatures drop in late afternoon.
Some varieties are specifically bred for extended season growing and improved cold tolerance. These selections maintain better sprout quality through repeated freeze-thaw cycles and often have enhanced flavor after cold exposure.
Harvest timing affects a plant’s ability to withstand cold weather. Plants with many unharvested sprouts are more cold-sensitive than those that have been regularly harvested. Continue picking sprouts as they mature to maintain plant vigor.
Variety Selection for Different Goals
Numerous Brussels sprouts varieties offer different characteristics for specific growing conditions and harvest goals. Early varieties mature quickly but may not tolerate heat as well as later types.
‘Jade Cross’ is a popular hybrid variety that produces uniform, compact sprouts on sturdy plants. This variety tolerates heat better than many others and produces reliably in various growing conditions. Maturity occurs in about 90 days from transplanting.
‘Long Island Improved’ is an open-pollinated variety that’s been grown for generations. These plants produce large sprouts on tall stems and have excellent cold tolerance for extended season growing. Seeds can be saved for future plantings.
‘Diablo’ is a heat-tolerant variety that performs well in challenging climates. This hybrid produces medium-sized sprouts with good flavor and maintains quality even when temperatures fluctuate during the growing season.
For small space gardening, consider compact varieties like ‘Oliver’ or ‘Redarling’ that produce full-sized sprouts on shorter plants. These varieties work well in containers or intensive growing systems where space is limited.
Purple varieties like ‘Red Bull’ or ‘Falstaff’ add color diversity to the harvest while providing the same nutritional benefits as green types. These varieties often have slightly milder flavor and maintain their color when lightly cooked.
Troubleshooting Common Growing Problems
Even experienced gardeners encounter challenges when growing Brussels sprouts. Many problems can be corrected with timely intervention and proper cultural adjustments.
Loose, open sprouts typically result from hot weather during development, inconsistent watering, or excessive nitrogen fertilization. While these sprouts are still edible, they lack the tight, compact texture of properly formed ones. Maintain consistent soil moisture and avoid high-nitrogen fertilizers once sprout formation begins.
Small sprout size often indicates overcrowding, inadequate fertility, or insufficient water. Space plants properly and maintain consistent fertilization throughout the growing season. Thinning overcrowded plantings may salvage some plants even late in the season.
Poor sprout formation can result from excessive heat, inadequate chilling, or premature bolting. Some varieties require exposure to temperatures below 50°F for several weeks to initiate proper sprout development. Plant at appropriate times for your climate zone.
Splitting sprouts occur when plants receive irregular watering, especially after dry periods. Maintain consistent soil moisture and avoid allowing plants to become water-stressed. Mulching helps moderate soil moisture fluctuations.
Plants that bolt (go to seed prematurely) have been stressed by extreme temperatures, drought, or root damage. Once bolting begins, sprout formation typically stops and quality declines. Remove bolted plants and replant if time allows.
Companion Planting and Garden Integration
Brussels sprouts grow well with many other vegetables and benefit from strategic companion planting. These relationships can improve growth, reduce pest pressure, and maximize garden space utilization.
Plant Brussels sprouts near herbs like dill, sage, and rosemary, which may repel common brassica pests. These aromatic plants also attract beneficial insects that prey on harmful pests. Avoid planting near fennel, which can inhibit brassica growth.
Root vegetables like carrots and beets make good companions since they occupy different soil layers and don’t compete directly for nutrients. These crops can be harvested before Brussels sprouts reach full size, making efficient use of garden space.
Lettuce and other greens can be planted between Brussels sprouts rows early in the season when the brassicas are still small. These quick-growing crops will be harvested before they’re shaded out by the expanding Brussels sprouts plants.
Avoid planting Brussels sprouts near other brassicas like cabbage, broccoli, or cauliflower. These related crops attract the same pests and diseases, concentrating problems in one area. They also compete for similar nutrients, reducing overall productivity.
Nitrogen-fixing legumes like beans and peas can benefit Brussels sprouts by adding nitrogen to the soil. Plant legumes as cover crops before Brussels sprouts or in adjacent areas where their root nodules can contribute to soil fertility.
Conclusion: Mastering Brussels Sprouts Cultivation
Growing Brussels sprouts successfully requires patience, attention to detail, and consistent care throughout the long growing season. These rewarding vegetables offer exceptional nutritional value and unique flavors that improve with proper cultivation techniques.
Start with quality seeds or transplants, prepare nutrient-rich soil, and maintain consistent growing conditions throughout the season. Pay careful attention to spacing, support, and pest management to ensure healthy plant development and quality sprout production.
The key to Brussels sprouts success lies in timing – both for planting and harvesting. Cool weather improves sprout quality and flavor, making fall harvests particularly rewarding. With proper planning and care, a small planting can provide months of fresh, homegrown Brussels sprouts for your table.
Remember that Brussels sprouts cultivation is as much about the journey as the destination. Each growing season teaches new lessons about timing, variety selection, and garden management. Keep detailed records of what works in your specific conditions, and don’t be discouraged by initial challenges.
The satisfaction of harvesting tight, flavorful Brussels sprouts from your own garden makes the effort worthwhile. These nutritious vegetables provide excellent returns on investment in terms of both space and time, feeding families fresh, healthy produce well into the winter months when garden-fresh vegetables are most appreciated.