How to Bottom Water Plants?
Bottom watering transforms the way you care for your houseplants. This technique delivers water directly to plant roots through drainage holes, creating stronger root systems and preventing common watering mistakes that kill indoor plants.
Many plant parents struggle with overwatering, yellowing leaves, and root rot. Bottom watering solves these problems by letting plants absorb only the water they need while encouraging deep root development.
What Is Bottom Watering?
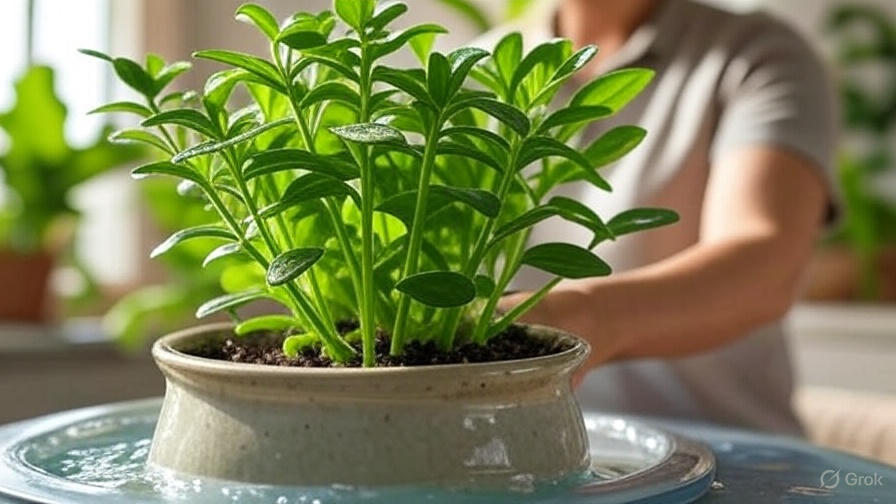
Bottom watering involves placing your potted plant in a container filled with water. The plant absorbs moisture through its drainage holes, allowing water to move upward through the soil via capillary action.
This method mimics how plants receive water in nature. Rain soaks into soil, and plant roots draw water upward as needed. Your plants control their water intake naturally, preventing the soggy soil conditions that lead to root problems.
Standard top watering often creates uneven moisture distribution. Water may run down the sides of the pot or pool on the soil surface without reaching deeper roots. Bottom watering ensures complete soil saturation from the root zone upward.
Benefits of Bottom Watering Your Plants
Stronger Root Systems Develop
Plants watered from below grow extensive, healthy root networks. Roots stretch downward seeking water sources, creating robust foundation systems. These strong roots support better nutrient uptake and overall plant health.
Prevents Overwatering Issues
Plants absorb only the water they require through bottom watering. Excess water remains in the reservoir rather than saturating soil completely. This natural regulation prevents waterlogged conditions that cause root rot and fungal diseases.
Reduces Leaf Damage
Water never touches plant foliage during bottom watering sessions. Wet leaves often develop brown spots, fungal infections, or burn marks under bright light. Keeping foliage dry maintains healthy leaf appearance and prevents disease transmission.
Even Soil Moisture Distribution
Capillary action draws water evenly throughout the soil mass. Every root receives adequate moisture without creating dry pockets or overly wet zones. This consistent moisture level supports steady plant growth.
Saves Time and Effort
Bottom watering requires less frequent watering sessions. Plants stay hydrated longer because water reaches all soil areas effectively. You spend less time monitoring soil moisture and dealing with drainage issues.
Which Plants Benefit Most from Bottom Watering
Succulents and Cacti
These water-storing plants prefer infrequent, deep watering sessions. Bottom watering allows succulents to drink deeply without sitting in wet soil that causes rot. The technique works especially well for jade plants, echeveria, and barrel cacti.
African Violets and Sensitive Plants
Plants with fuzzy leaves or delicate foliage thrive with bottom watering. Water never touches sensitive leaf surfaces, preventing damage and disease. Begonias, cyclamen, and gloxinias also respond well to this gentler watering approach.
Deep-Rooted Houseplants
Plants with extensive root systems benefit from thorough soil saturation. Fiddle leaf figs, rubber trees, and large palms develop stronger anchoring roots when watered from below. The deep watering encourages root growth throughout the entire pot.
Seedlings and Young Plants
Tender seedlings often suffer from top watering that disturbs delicate roots or displaces small plants. Bottom watering provides steady moisture without soil disruption. Young vegetables, herbs, and flower seedlings establish better with this gentle method.
Plants Prone to Root Rot
Species sensitive to fungal diseases benefit from bottom watering’s controlled moisture delivery. Peace lilies, snake plants, and ZZ plants stay healthier when their soil receives water from below rather than staying constantly moist at the surface.
Step-by-Step Bottom Watering Process
Gather Your Materials
You need a waterproof tray, bowl, or saucer larger than your plant pot. The container should hold at least one inch of water depth. Room temperature water works best – avoid cold water that shocks plant roots.
Check Drainage Holes
Ensure your plant pot has adequate drainage holes in the bottom. Blocked or missing drainage prevents proper water absorption. Clean any debris from holes using a small stick or wire.
Fill the Water Reservoir
Pour water into your chosen container until it reaches about one inch deep. Place the plant pot directly in the water, ensuring the drainage holes sit below the water line. Water should not reach the soil surface.
Monitor Water Absorption
Leave the plant in the water reservoir for 30-60 minutes. Watch for moisture appearing on the soil surface, indicating complete saturation. Smaller pots absorb water faster than large containers with dense soil.
Remove and Drain Excess Water
Lift the pot from the water and allow excess moisture to drain for 10-15 minutes. Empty any water remaining in the plant saucer to prevent prolonged soil saturation. Return the plant to its normal location.
Check Soil Moisture Levels
Insert your finger one inch into the soil to verify adequate moisture penetration. The soil should feel evenly damp throughout but not soggy or waterlogged. Properly bottom-watered soil feels like a wrung-out sponge.
Common Bottom Watering Mistakes to Avoid
Using Too Much Water
Filling reservoirs too deep causes soil oversaturation and potential root damage. Keep water levels around one inch deep, allowing plants to absorb what they need without creating boggy conditions.
Leaving Plants in Water Too Long
Extended soaking periods lead to overwatering problems despite using the bottom watering method. Most plants complete water absorption within an hour. Longer exposure creates the same issues as traditional overwatering.
Ignoring Drainage Requirements
Plants without proper drainage holes cannot benefit from bottom watering. Water has no entry point into the soil, leaving plants thirsty despite sitting in water. Always verify adequate drainage before attempting this method.
Using Cold or Treated Water
Cold water shocks plant roots and slows absorption rates. Highly chlorinated tap water may harm sensitive plants over time. Use room temperature water, or let tap water sit overnight to allow chlorine to dissipate.
Forgetting to Empty Saucers
Water left in plant saucers after bottom watering continues saturating soil and roots. This extended moisture exposure defeats the controlled watering benefits. Always drain excess water completely.
Best Tools and Containers for Bottom Watering
Plastic Storage Containers
Large, shallow plastic containers work well for multiple small plants. These inexpensive options hold adequate water depth while accommodating several pots simultaneously. Look for containers with smooth sides that won’t scratch furniture.
Ceramic or Metal Trays
Decorative trays serve double duty as functional watering tools and attractive plant displays. Metal trays conduct temperature evenly, while ceramic options provide stable, heavy bases for larger plants.
Kitchen Bowls and Dishes
Repurpose large mixing bowls, cake pans, or serving dishes as temporary bottom watering containers. These household items work perfectly for occasional use or when trying the method with new plants.
Commercial Plant Saucers
Purpose-built plant saucers come in sizes matching common pot dimensions. These tools often feature raised edges and water level indicators. Invest in quality saucers for plants you water frequently using this method.
Self-Watering Planters
Advanced self-watering containers incorporate bottom watering principles into their design. These planters include built-in water reservoirs and wicking systems that maintain consistent soil moisture automatically.
Timing and Frequency Guidelines
Seasonal Watering Adjustments
Plants require less frequent watering during winter months when growth slows and indoor humidity increases. Summer heat and active growing seasons demand more regular bottom watering sessions. Adjust your schedule based on seasonal plant needs.
Soil Type Considerations
Well-draining potting mixes dry faster than dense, moisture-retaining soils. Cactus soil may require bottom watering twice weekly, while standard potting soil might need attention only once per week. Test individual plant needs rather than following rigid schedules.
Plant Size and Pot Volume
Large plants in big containers hold moisture longer than small plants in tiny pots. A massive fiddle leaf fig might need weekly bottom watering, while small succulent arrangements require attention every few days. Monitor each plant individually.
Environmental Factors
Indoor temperature, humidity levels, and air circulation affect how quickly soil dries between watering sessions. Plants near heating vents or in low humidity environments need more frequent bottom watering than those in stable, humid conditions.
Troubleshooting Bottom Watering Problems
Water Not Absorbing Properly
Hydrophobic soil repels water and prevents proper absorption during bottom watering. This often happens with very dry potting mix that has pulled away from pot sides. Add a few drops of liquid soap to the water reservoir to improve soil wettability.
Mold Growth on Soil Surface
White, fuzzy mold indicates poor air circulation around wet soil. Increase airflow around plants with a small fan, reduce watering frequency, or add perlite to soil mix for better drainage. Remove moldy soil surface and replace with fresh potting mix.
Slow Water Uptake
Compacted soil or blocked drainage holes slow water absorption rates. Gently aerate soil with a fork or chopstick to create channels for water movement. Clean drainage holes and verify adequate opening size.
Plants Still Showing Stress Signs
Continued wilting or yellowing despite bottom watering may indicate root problems, nutrient deficiencies, or environmental stress. Examine roots for rot, consider fertilizing needs, and evaluate light and temperature conditions.
Salt Buildup on Pot Exteriors
White, crusty deposits on pot surfaces result from mineral-rich water evaporation. Use distilled or filtered water for bottom watering, or flush soil occasionally with top watering to remove accumulated salts.
Advanced Bottom Watering Techniques
Creating Automatic Systems
Set up continuous bottom watering systems using reservoirs and wicking materials. Cotton string or special plant wicks draw water from containers into soil continuously. These systems maintain consistent moisture for vacation care or high-maintenance plants.
Combining with Fertilizer Application
Mix liquid fertilizer into bottom watering reservoirs for efficient nutrient delivery. Roots absorb fertilizer along with water, ensuring even distribution throughout the root zone. Use quarter-strength fertilizer solutions to prevent root burn.
Humidity Tray Integration
Use bottom watering trays as humidity sources for tropical plants. After plants absorb needed water, leave shallow water in trays to evaporate and increase local humidity. This dual-purpose approach benefits plants requiring higher moisture levels.
Group Watering Strategies
Water multiple plants simultaneously using large containers or specialized multi-plant watering systems. Group plants with similar water needs together for efficient care routines. This batch approach saves time while ensuring consistent care.
Bottom watering revolutionizes indoor plant care by working with natural plant processes rather than against them. Plants develop stronger roots, experience fewer diseases, and require less frequent attention when watered using this method.
Start experimenting with bottom watering on a few plants to observe the benefits firsthand. Your plants will reward you with healthier growth, fewer problems, and reduced maintenance needs. Master this technique to become a more successful indoor gardener while giving your green friends the care they deserve.