How to Get Rid of Pincher Bugs?
You’ve seen them scurrying across your bathroom floor at night. Those creepy bugs with pincers on their rear end that make your skin crawl. They hide in damp corners, cluster under flower pots, and somehow always appear when you least expect them.
Pincher bugs, commonly called earwigs, are one of the most misunderstood household pests. Despite old myths claiming they crawl into people’s ears, these insects are relatively harmless. But that doesn’t mean you want them taking over your home.
Getting rid of earwigs requires a combination of prevention, natural remedies, and targeted treatments. This guide will walk you through everything you need to know about these nocturnal pests and how to eliminate them for good.
What Are Pincher Bugs and Why Do They Invade Homes?
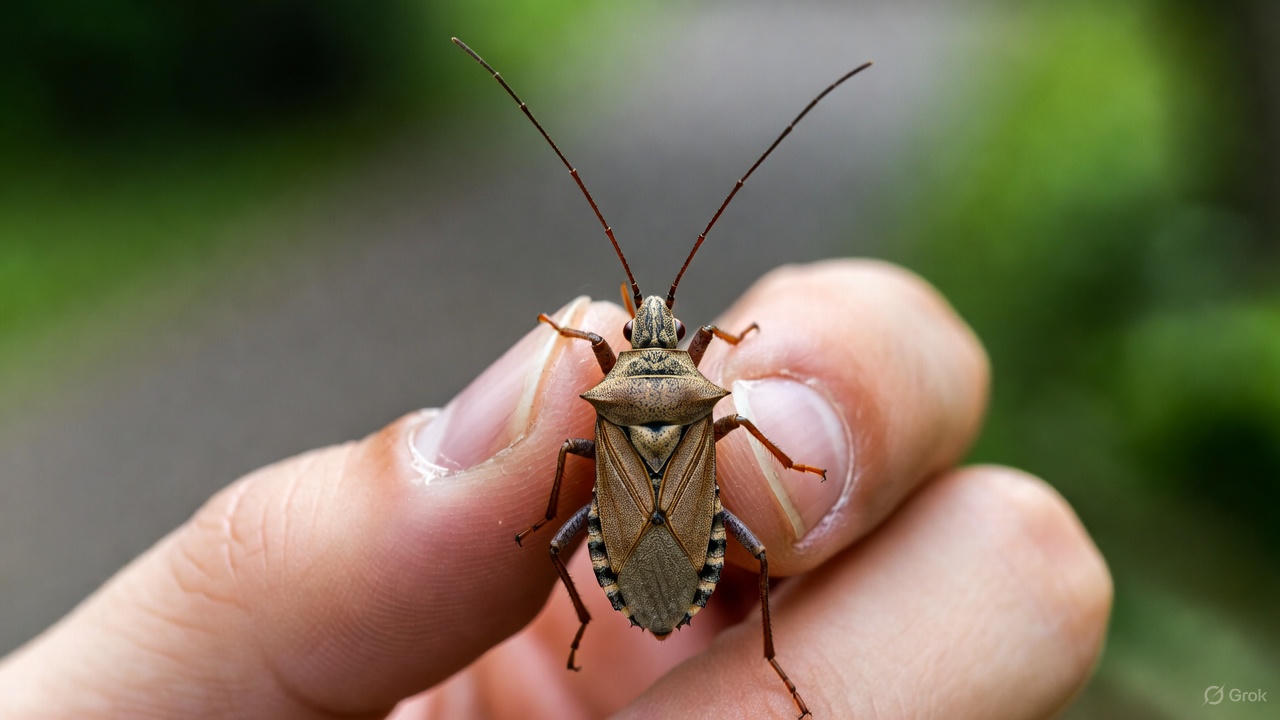
Pincher bugs earn their name from the forceps-like pincers protruding from their abdomen. Scientists call them earwigs, belonging to the order Dermaptera. These reddish-brown insects grow about three-quarters of an inch long and have elongated, flattened bodies.
Male earwigs have curved pincers, while females have straight ones. They use these appendages for defense, capturing prey, and during mating. Don’t worry too much about those pincers – they can pinch if handled roughly, but the sensation is minor and doesn’t break skin.
Earwigs prefer dark, moist environments. They spend their days hiding under rocks, mulch, logs, and leaf piles. When night falls, they emerge to feed on decaying plant matter, soft-bodied insects like aphids, and sometimes tender plant shoots.
So why do they end up in your house? Earwigs don’t actually want to live indoors. They stumble inside by accident while searching for food, moisture, or shelter. Hot, dry weather drives them toward the cool dampness inside homes. Heavy rains also push them indoors as they flee flooded hiding spots.
Once inside, earwigs gravitate toward bathrooms, basements, kitchens, and laundry rooms. Any place with high humidity becomes a potential harborage area. They squeeze through tiny cracks around doors, windows, pipes, and foundation gaps.
Signs You Have an Earwig Problem
Many homeowners only spot one or two earwigs occasionally. That’s normal and doesn’t indicate an infestation. But certain signs point to a larger problem:
Finding multiple earwigs daily – If you’re consistently seeing several earwigs every day, especially in the same areas, you likely have a breeding population nearby.
Discovering them during the day – Earwigs are nocturnal. Seeing them in daylight hours suggests overcrowding is forcing them out of their hiding spots.
Plant damage in your garden – While earwigs eat mostly decaying matter, large populations will munch on seedlings, flower petals, and soft fruits. Irregular holes in leaves and damaged flower buds indicate their presence.
Foul odor – When threatened, earwigs release a yellowish-brown liquid with a distinctive odor. A persistent smell in certain areas might mean you’re housing many of them.
Droppings – Earwig feces look like tiny black pellets, similar to mouse droppings but much smaller. You’ll find them where earwigs hide during the day.
Remove Their Outdoor Hiding Places
Controlling earwigs starts in your yard. The fewer harborage sites you provide outside, the fewer earwigs will be near your home. This is your first line of defense.
Clean up yard debris regularly – Rake fallen leaves, remove dead branches, and clear away plant trimmings. Earwigs love hiding under piles of organic matter. Don’t let debris accumulate against your foundation.
Reduce mulch thickness – Mulch beds create perfect earwig habitat. Keep mulch layers no thicker than 2-3 inches. Pull mulch at least six inches away from your foundation. Consider using inorganic alternatives like gravel or river rock in areas immediately adjacent to your home.
Trim vegetation – Keep bushes, shrubs, and tree branches trimmed back from your house. Overgrown vegetation touching your siding creates a highway for earwigs to reach entry points. Maintain at least a 12-inch gap between plants and your foundation.
Improve yard drainage – Standing water and overly moist soil attract earwigs. Fill in low spots where water pools. Clean gutters regularly so they drain properly. Extend downspouts to carry water at least five feet from your foundation.
Store firewood properly – Don’t stack firewood against your house. Keep wood piles elevated off the ground on a rack and position them at least 20 feet from your home. Only bring indoors the amount of wood you’ll burn immediately.
Flip objects periodically – Toys, tarps, empty pots, and decorative items left on the ground become earwig condos. Either remove these items or flip them over regularly to disrupt harborage sites.
Seal Entry Points to Keep Them Out
Even with a pristine yard, earwigs will find their way to your home’s exterior. Your next job is making sure they can’t get inside.
Inspect your foundation – Walk around your home looking for cracks in the foundation, gaps in the siding, and openings around utility penetrations. Seal everything you find with silicone caulk or expanding foam.
Install door sweeps – The gap under exterior doors is like a welcome mat for earwigs. Install quality door sweeps on all exterior doors, ensuring they make firm contact with the threshold when closed.
Add weatherstripping – Check all door and window weatherstripping. Replace worn, cracked, or compressed weatherstripping that has lost its seal. This keeps out more than just earwigs – it improves energy efficiency too.
Screen vents and openings – Dryer vents, crawl space vents, and attic vents need tight-fitting screens. Use hardware cloth with small mesh to prevent earwig entry while maintaining airflow.
Repair window screens – Any torn or punctured window screen is an open invitation. Patch small holes with clear nail polish or screen repair tape. Replace screens with significant damage.
Seal around pipes – Pipes entering your home often have generous gaps around them. Fill these openings with caulk, foam, or copper mesh. Pay special attention to outdoor faucets, gas lines, and electrical conduits.
Natural Methods to Eliminate Earwigs
Once you’ve addressed outdoor conditions and sealed your home, you can tackle existing earwig populations with natural solutions. These methods work well for light to moderate infestations.
Create oil pitfall traps – Take shallow containers like tuna cans or plastic lids. Fill them halfway with vegetable oil or fish oil. Bury them level with the ground near areas where you’ve seen earwigs. The insects crawl in and can’t escape. Empty and refill traps every few days.
Make soy sauce traps – Mix equal parts soy sauce and vegetable oil in containers. The soy sauce attracts earwigs while the oil traps them. Place these in damp areas where earwigs hide during the day.
Use rolled newspaper traps – Lightly dampen newspaper and roll it into tubes. Secure with rubber bands and place them around your garden and near foundation walls at dusk. Earwigs will crawl inside by morning. Shake them into a bucket of soapy water or seal in a plastic bag and dispose.
Try diatomaceous earth – This natural powder made from fossilized algae cuts through the earwig’s waxy coating, causing dehydration. Sprinkle food-grade diatomaceous earth along baseboards, in cracks, under appliances, and around the foundation. Reapply after rain or watering.
Apply boric acid – Boric acid powder kills earwigs when they ingest it or crawl through it. Dust a thin layer in cracks, crevices, and other harborage areas. Keep it away from pets and children. Wear a dust mask during application.
Spray them with rubbing alcohol – A 50/50 mixture of rubbing alcohol and water in a spray bottle kills earwigs on contact. Spray directly on visible insects. This works great as a spot treatment but doesn’t provide residual control.
Use essential oil sprays – Earwigs dislike certain strong scents. Mix 10-15 drops of peppermint, tea tree, or eucalyptus oil with water and a few drops of dish soap in a spray bottle. Spray around entry points, windowsills, and areas where earwigs appear. Reapply weekly.
Reduce Indoor Moisture Levels
Earwigs need moisture to survive. Making your home less humid creates an inhospitable environment that encourages them to leave.
Fix leaky pipes and faucets – Even minor drips create enough moisture to sustain earwigs. Check under sinks, around toilet bases, and behind appliances for leaks. Repair immediately.
Run a dehumidifier – Basements and crawl spaces often have high humidity. Keep humidity levels below 50% using a dehumidifier. Empty the reservoir regularly and clean the unit to prevent mold growth.
Improve bathroom ventilation – Always run the exhaust fan when showering or bathing. Leave it running for at least 15 minutes after you finish. If you don’t have a fan, open a window to let moisture escape.
Insulate cold pipes – Cold water pipes develop condensation in humid environments. Wrap them with foam pipe insulation to prevent this moisture source.
Address crawl space issues – Dirt-floor crawl spaces generate significant moisture. Install a vapor barrier over exposed soil. Ensure crawl space vents provide adequate airflow or consider encapsulation.
Dry damp areas quickly – Wipe up spills immediately. Don’t let wet towels sit in piles. Fix any roof leaks promptly. The faster you eliminate moisture, the less attractive your home becomes to earwigs.
Chemical Control Options for Severe Infestations
Natural methods work well for small populations, but heavy infestations may require chemical intervention. Always follow label directions carefully and consider the safety of family members and pets.
Perimeter sprays – Apply a residual insecticide around your home’s exterior foundation. Create a barrier approximately three feet up the wall and three feet out from the foundation. Products containing bifenthrin, cyfluthrin, or permethrin provide several weeks of control. Reapply according to label directions.
Granular insecticides – Scatter granular insecticide around your home’s perimeter, in mulch beds, and other areas where earwigs hide. Water lightly after application to activate the product. Granules provide longer-lasting control than sprays in outdoor areas.
Indoor sprays – For earwigs inside your home, use indoor-labeled residual insecticides. Spray along baseboards, in cracks and crevices, under appliances, and in closets. Focus on areas where you’ve seen earwig activity.
Dust formulations – Insecticidal dusts work well in wall voids, attics, and other hidden spaces. Products containing deltamethrin or cyfluthrin applied as dust provide long-term control in dry areas. Use a hand duster for precise application.
Aerosol sprays – Aerosol products with quick knockdown properties kill earwigs on contact. Keep a can handy for spot treatments when you encounter individual insects. These don’t provide residual protection.
Bait stations – While less common for earwigs, some bait products attract and kill these pests. Place bait stations near entry points and in areas of high activity. Check and replace bait regularly.
Create an Earwig-Unfriendly Landscape
Long-term earwig control requires making your entire property less appealing to these insects. Think of it as creating an environment they naturally avoid.
Choose the right plants – Some plants naturally repel earwigs. Include lavender, garlic, sage, rosemary, and marigolds in your landscaping. While not a complete solution, these plants help reduce earwig populations.
Water wisely – Water your lawn and garden early in the morning so plants dry before evening. Avoid watering in the evening when earwigs emerge. Use drip irrigation instead of sprinklers to minimize excess moisture.
Maintain your lawn – Keep grass cut to the proper height for your grass type. Thatch buildup creates earwig habitat, so dethatch if your lawn develops a thick layer. Aerate compacted soil to improve drainage.
Use stone or gravel ground covers – In areas where plants struggle to grow, consider stone or gravel instead of mulch. These inorganic materials don’t retain moisture or provide food for earwigs.
Install proper lighting – Earwigs and many insects are attracted to lights. Use yellow “bug light” bulbs in outdoor fixtures. Position lights away from doors and windows so insects drawn to the light don’t end up near entry points.
Remove ivy and ground covers from foundations – Dense ground covers growing against your house create perfect earwig habitat. Replace foundation plantings with drought-tolerant species that don’t require heavy watering.
Monitor and Maintain Your Control Efforts
Eliminating earwigs isn’t a one-time project. Ongoing monitoring and maintenance keep populations under control and prevent new infestations.
Conduct regular inspections – Walk around your property monthly looking for conditions that attract earwigs. Check mulch depth, look for debris accumulation, and inspect potential entry points. Catching problems early prevents population explosions.
Keep a pest diary – Note when and where you see earwigs. Track which control methods you’ve used and their effectiveness. This information helps you refine your approach and identify problem areas.
Refresh traps regularly – Empty and refill oil traps every few days. Replace newspaper traps daily. Maintain consistent trapping pressure to reduce populations.
Reapply treatments as needed – Barrier sprays break down over time, especially in rain and sun. Follow product labels for reapplication intervals. Don’t wait until you see earwigs again to reapply.
Stay vigilant during peak season – Earwig populations peak in mid to late summer. Increase your monitoring and control efforts during this time. Populations naturally decline in fall as temperatures drop.
Address new moisture problems immediately – A new leak, drainage issue, or water source can quickly attract earwigs. Fix moisture problems the moment you discover them.
When to Call a Professional Exterminator
Most homeowners can handle earwig problems with the methods described above. But sometimes professional help makes sense.
Call a pest control professional if:
- You’ve consistently applied control methods for several weeks with no improvement
- You’re finding dozens of earwigs daily despite your best efforts
- You have health concerns that make handling pesticides difficult
- The infestation extends to multiple areas of your home
- You need help identifying structural issues contributing to the problem
- You lack the time or ability to implement comprehensive control
Professional pest control technicians have access to commercial-grade products unavailable to consumers. They can identify conditions you might miss and develop a customized treatment plan. Most companies offer follow-up visits to ensure complete elimination.
Expect to pay between $150 and $400 for professional earwig treatment, depending on your home’s size and the infestation severity. Many companies offer guarantees and will retreat at no charge if earwigs return within a specified period.
Common Mistakes to Avoid
As you tackle your earwig problem, watch out for these common errors that undermine control efforts:
Over-watering your lawn and garden – Excessive irrigation creates the moist conditions earwigs love. Water only when needed and always early in the day.
Ignoring the yard – Focusing only on indoor control while neglecting outdoor harborage sites ensures earwigs keep coming. You must address both areas simultaneously.
Using only one control method – Relying on a single approach rarely eliminates earwigs completely. Combine multiple strategies for best results.
Applying pesticides in the wrong places – Spraying pesticides in random locations wastes product and money. Target areas where earwigs actually hide and travel.
Expecting instant results – Earwig populations don’t disappear overnight. Consistent effort over several weeks delivers the best outcome.
Neglecting entry point sealing – All the traps and sprays in the world won’t stop new earwigs from entering if your home has gaps and cracks.
Panicking over a few individuals – Seeing an occasional earwig doesn’t mean you have an infestation. A measured response prevents overreaction and unnecessary pesticide use.
Living Earwig-Free
Getting rid of pincher bugs takes effort, but the results are worth it. By combining prevention, exclusion, and targeted control methods, you can eliminate these unwelcome guests from your home.
Start with the basics: clean up your yard, seal entry points, and reduce moisture. These foundational steps make your property naturally resistant to earwig invasion. Add trapping and natural controls for existing populations. Reserve chemical treatments for situations where other methods fall short.
Remember that earwigs play beneficial roles in outdoor ecosystems. They eat aphids, mites, and decaying matter. Your goal isn’t to eliminate every earwig from your property – that’s impossible and unnecessary. You simply want to keep them outside where they belong and out of your living spaces.
Stay consistent with your efforts. The homeowners who succeed in controlling earwigs are those who maintain their prevention strategies even after the immediate problem resolves. A little ongoing vigilance prevents future infestations and keeps your home pest-free.
With patience and persistence, you can reclaim your home from pincher bugs and enjoy peace of mind knowing these creepy crawlers won’t surprise you anymore. Your bathroom floors will stay clear, your potted plants will be bug-free, and you’ll sleep better knowing earwigs aren’t scuttling through your home at night.