How to Grow Carrots?
Growing carrots in your own garden brings incredible satisfaction. That first pull from the soil, seeing a perfect orange root emerge covered in dirt, makes all your effort worthwhile. These crunchy vegetables thrive in home gardens when you know the right techniques. This guide walks you through every step of growing carrots successfully, from preparing soil to harvesting crisp roots.
Why You Should Grow Your Own Carrots
Homegrown carrots taste remarkably different from store-bought versions. The sweetness and flavor intensity simply can’t compare. You control what goes into your soil, avoiding pesticides and chemicals. Plus, you can grow unique carrot varieties in purple, yellow, and white that stores rarely stock.
Carrots also store well after harvest. A single good crop keeps your kitchen supplied for months. They need minimal space and work beautifully in raised beds, containers, and traditional garden plots. Even beginner gardeners succeed with carrots when they follow basic guidelines.
Best Time to Plant Carrots
Timing plays a crucial role in carrot success. These cool-season crops perform best when soil temperatures reach 45-85°F. Most gardeners plant carrots in early spring, about 3-4 weeks before the last frost date. The seeds germinate slowly in cold soil but tolerate light frosts once sprouted.
You can also plant carrots for a fall harvest. Sow seeds in mid to late summer, roughly 10-12 weeks before your first expected frost. Fall carrots often taste sweeter because cool temperatures convert starches to sugars. Many gardeners prefer fall crops for this reason.
Succession planting works wonderfully with carrots. Plant a new row every 3 weeks throughout the growing season. This strategy gives you a continuous supply of fresh carrots rather than one massive harvest all at once.
Preparing the Perfect Soil for Carrots
Soil preparation makes or breaks your carrot crop. These root vegetables need loose, well-draining soil to develop properly. Heavy clay or compacted earth causes stunted, forked, or twisted roots. Take time to prepare your bed correctly before planting carrot seeds.
Start by loosening soil to a depth of 12 inches. Carrots need this deep, loose environment for their taproots to grow straight down. Use a broadfork, tiller, or spade to break up compacted layers. Remove all rocks, sticks, and debris that could obstruct root growth.
Mix in plenty of organic matter like compost or aged manure. Work in 2-3 inches of compost throughout the bed. This improves soil structure, adds nutrients, and helps retain moisture. Avoid fresh manure, though, as it causes forked and hairy roots.
Sandy loam soil works best for growing carrots. If you have heavy clay, consider building raised beds filled with quality garden soil. Raised beds give you complete control over soil composition and drainage. They also warm up faster in spring, allowing earlier planting.
Test your soil pH before planting. Carrots grow best in slightly acidic to neutral soil with a pH between 6.0 and 6.8. Adjust pH if needed using lime to raise it or sulfur to lower it. A simple soil test kit from any garden center tells you exactly what your soil needs.
Selecting the Right Carrot Varieties
Different carrot varieties suit different garden conditions and purposes. Short varieties work well in heavy soil or containers. Long varieties need deep, loose soil but produce impressive yields. Your choice depends on your growing space and soil type.
Nantes carrots offer sweet flavor and crispy texture. These cylindrical roots grow 6-7 inches long with blunt tips. They tolerate various soil types better than other varieties. ‘Scarlet Nantes’ and ‘Bolero’ perform consistently well for home gardeners.
Chantenay carrots grow short and stocky, reaching only 4-5 inches long. Their broad shoulders and tapered tips make them perfect for heavy or shallow soil. They store exceptionally well after harvest. ‘Red Cored Chantenay’ remains a classic choice.
Danvers carrots produce 6-8 inch roots with strong tops for easy pulling. They adapt well to various soil conditions and store excellently. ‘Danvers Half Long’ has served gardeners reliably for generations.
Imperator carrots are those long, slender types you see in grocery stores. They need deep, sandy soil to reach their full 8-10 inch length. ‘Sugarsnax’ and ‘Tendersweet’ deliver excellent flavor for fresh eating.
Baby carrots (actually immature regular carrots) harvest in just 50-60 days. Varieties like ‘Babette’ and ‘Little Finger’ grow 3-4 inches long. They work perfectly in containers and small spaces.
Rainbow carrot mixes include purple, yellow, white, and red varieties. These colorful options add visual interest to salads and vegetable trays. Each color offers slightly different flavors and nutritional profiles.
How to Plant Carrot Seeds
Carrot seeds look tiny and can frustrate new gardeners. These small seeds need special attention during planting. Direct sowing works best since carrots don’t transplant well due to their sensitive taproot.
Create shallow furrows about half an inch deep in your prepared bed. Space rows 12-18 inches apart for easy access during thinning and weeding. If planting in raised beds, you can space rows closer at 8-10 inches.
Sow seeds thinly along the furrow. Aim for 2-3 seeds per inch. Many gardeners mix carrot seeds with sand or coffee grounds to help spread them more evenly. This technique prevents overcrowding and reduces thinning work later.
Cover seeds lightly with fine soil or compost. Press down gently to ensure good seed-to-soil contact. Carrot seeds need consistent moisture to germinate, so water the bed thoroughly but gently after planting.
Mark your rows clearly with stakes or labels. Carrot seeds take 14-21 days to germinate, much longer than most vegetables. Marking helps you remember where you planted and avoid accidentally disturbing the area.
Some gardeners plant quick-germinating radish seeds mixed with carrot seeds. Radishes mark the rows, break up soil crust, and harvest before carrots need the space. This companion planting strategy works beautifully.
Keeping Seeds Moist During Germination
Carrot seed germination requires constant moisture. Dry soil during this period kills emerging seedlings. Check your carrot bed daily and water lightly if the surface feels dry.
Cover seeded rows with burlap, boards, or row cover fabric. This covering keeps moisture in and prevents soil from crusting. Remove the covering immediately when you see seedlings emerging.
Mist the bed gently with a fine spray nozzle. Strong water pressure washes away seeds or creates holes in your rows. A watering wand with a soft rain setting works perfectly for this delicate task.
Consider using a layer of vermiculite over carrot seeds. This mineral holds moisture well and won’t crust over like soil. Seedlings push through it easily as they emerge.
Thinning Carrot Seedlings
Thinning ranks among the most important tasks in growing carrots. Crowded seedlings produce small, deformed roots. Each carrot needs space to develop properly.
Begin thinning when seedlings reach 2 inches tall. Pull out excess plants until remaining carrots stand 2-3 inches apart. This spacing allows roots to develop without competing for nutrients and water.
The thinning process feels wasteful, but it’s essential. Grasp unwanted seedlings near the soil line and pull gently. Be careful not to disturb neighboring plants. Some gardeners use small scissors to snip off unwanted seedlings instead of pulling.
Save larger thinnings to use as microgreens in salads. These tiny greens taste like mild carrots and add nutrition to meals. This makes thinning feel less wasteful.
Do a second thinning about 4 weeks after the first one. Final spacing should be 3-4 inches between plants for standard varieties. Baby carrot varieties can stay slightly closer together.
Watering Your Carrot Plants
Consistent watering produces straight, smooth carrots without cracks or splits. Irregular watering leads to oddly shaped roots and tough texture. Set up a regular watering schedule rather than waiting for plants to look stressed.
Provide 1 inch of water per week through rain or irrigation. Deep, infrequent watering encourages roots to grow down rather than staying shallow. Water thoroughly once or twice weekly rather than giving light sprinkles daily.
Soil should stay evenly moist but never waterlogged. Check moisture by sticking your finger 2 inches into the soil. If it feels dry at this depth, water your carrots. Sandy soils need more frequent watering than clay soils.
Drip irrigation or soaker hoses work excellently for carrots. These systems deliver water directly to the root zone without wetting foliage. They also conserve water and reduce disease problems.
Reduce watering slightly as carrots approach maturity. This concentrates sugars in the roots and improves flavor. Never let soil dry out completely, though, as this causes roots to crack.
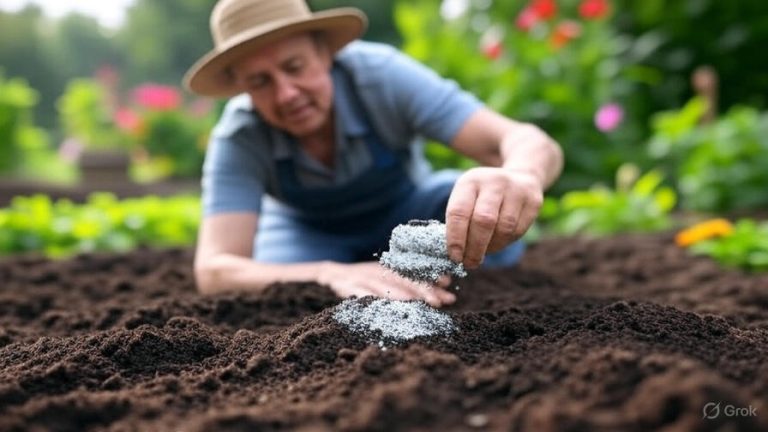
Fertilizing Carrot Plants
Carrots need balanced nutrition but not excessive nitrogen. Too much nitrogen produces lots of leafy tops with small, hairy roots. These root vegetables prefer soil rich in phosphorus and potassium.
Apply a balanced vegetable fertilizer when seedlings reach 3 inches tall. Choose a formula like 5-10-10 or 10-10-10. Follow package directions carefully to avoid overfeeding. Side-dress fertilizer 2-3 inches from plant stems rather than applying directly against them.
Wood ash provides potassium that carrots love. Sprinkle a light dusting of wood ash along carrot rows once during the growing season. Don’t overdo it, as wood ash raises soil pH.
Compost tea feeds carrots gently throughout the season. Apply this liquid fertilizer every 2-3 weeks by watering it into the soil around plants. Compost tea adds nutrients plus beneficial microorganisms.
Avoid high-nitrogen fertilizers like blood meal or fresh manure. These create forked roots and excessive top growth. Your carrots will look beautiful above ground but disappoint at harvest.
Mulching Your Carrot Bed
Mulch benefits carrot beds in multiple ways. It suppresses weeds, conserves moisture, and regulates soil temperature. Apply mulch after seedlings establish themselves and grow 4-5 inches tall.
Use fine-textured mulch like grass clippings, shredded leaves, or straw. Spread a 2-3 inch layer between rows and around plants. Keep mulch pulled back slightly from seedling stems to prevent rot.
Grass clippings make excellent carrot mulch if pesticide-free. Let fresh clippings dry for a day before applying to prevent matting and heating. Thin layers work better than thick clumps.
Straw keeps soil cool during hot weather, which carrots appreciate. It also prevents rain from splashing soil onto foliage, reducing disease issues. Straw breaks down slowly, so it lasts all season.
Shredded leaves add organic matter as they decompose. Run leaves through a mower or shredder before using as mulch. Whole leaves mat down and prevent water from reaching soil.
Dealing with Common Carrot Pests
Several insects target carrots, but most problems have simple solutions. Regular monitoring catches issues before they become serious. Walk through your garden every few days and inspect plants carefully.
Carrot rust flies lay eggs near plant bases. The larvae tunnel into roots, creating brown channels and ruined crops. Row covers prevent adult flies from reaching plants. Install covers right after planting and leave them in place until harvest.
Aphids cluster on carrot foliage, sucking plant juices and spreading diseases. Spray them off with a strong water stream. Insecticidal soap kills aphids on contact without harming beneficial insects.
Wireworms live in soil and chew holes in carrot roots. These brown, segmented larvae especially love gardens converted from lawn. Trap wireworms by burying carrot or potato pieces 2-4 inches deep. Check traps every few days and destroy captured pests.
Cutworms sever young seedlings at soil level. These fat caterpillars hide in soil during the day. Create collars from toilet paper tubes placed around seedlings to protect them. The collars create a barrier cutworms can’t cross.
Rabbits and groundhogs find carrot tops irresistible. Fence your garden with chicken wire buried 6 inches underground. The fence should stand at least 2 feet tall for rabbits, 4 feet for groundhogs.
Preventing Carrot Diseases
Carrots suffer from fewer diseases than many vegetables. Good cultural practices prevent most problems. Focus on prevention rather than treatment for the healthiest crop.
Leaf blight causes dark spots on foliage that eventually turn yellow and die. This fungal disease spreads through splashing water. Avoid overhead watering and space plants properly for good air circulation. Remove and destroy infected leaves immediately.
Root rot makes carrots mushy and inedible. Waterlogged soil and poor drainage cause this problem. Improve drainage by adding compost and never letting water puddle around plants. Plant carrots in raised beds if your soil drains poorly.
Aster yellows disease turns carrot tops yellow and stunts growth. Leafhopper insects spread this disease. Control leafhoppers with row covers and remove infected plants promptly to prevent spread.
Cavity spot creates small brown lesions on carrot roots. This soil-borne disease thrives in alkaline conditions. Maintain proper soil pH and practice crop rotation to avoid problems.
Rotate your carrot crop to different beds each year. Never plant carrots in the same spot two years running. Wait at least 3 years before returning carrots to the same bed. Rotation starves disease organisms and breaks pest cycles.
Companion Planting with Carrots
Certain plants grow beautifully alongside carrots and even improve their growth. Companion planting uses these beneficial relationships to create healthier gardens. Plan your garden layout to take advantage of these partnerships.
Onions, leeks, and garlic repel carrot rust flies with their strong scent. Plant these alliums in rows between your carrots. The aromatic compounds confuse pests searching for carrot plants.
Tomatoes and carrots make good neighbors. Both have different root depths and nutrient needs, so they don’t compete. Some gardeners report that carrots grown near tomatoes taste sweeter.
Lettuce and carrots work well together in the same bed. Quick-growing lettuce harvests before carrots need full space. This succession makes efficient use of garden space.
Rosemary, sage, and other herbs deter many carrot pests. Scatter these aromatic plants throughout your vegetable garden. They add beauty while protecting crops naturally.
Avoid planting carrots near dill or parsnips. These relatives attract the same pests and diseases. Keep them separated in your garden to reduce problems.
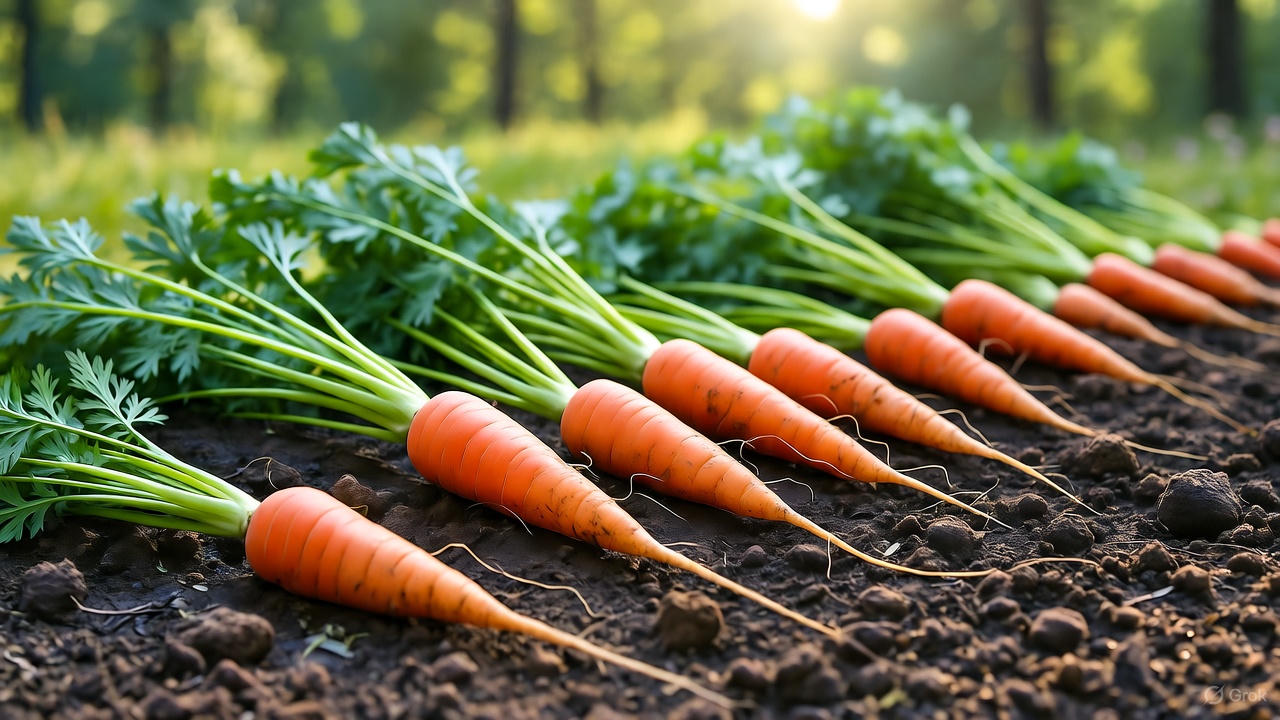
Knowing When to Harvest Carrots
Timing the harvest correctly gives you the best-tasting carrots. Days to maturity on seed packets provide a guideline, but actual harvest time varies with weather and growing conditions. Most carrot varieties mature 60-80 days after planting.
Check carrot size by gently brushing soil away from the top of roots. Mature carrots should measure at least 1/2 inch across at the shoulder. Color also indicates readiness—most varieties develop deep, rich color when ready.
Taste test a few carrots before harvesting the entire crop. Pull one or two roots to check flavor and texture. If they taste good, start harvesting. If bitter or tough, wait another week and test again.
Fall-planted carrots can stay in the ground after light frosts. Cold temperatures actually improve carrot sweetness by converting starches to sugars. Many gardeners leave fall carrots in place and harvest as needed through winter.
Small carrots taste tender and sweet. You don’t need to wait for maximum size. Harvest baby carrots anytime after they reach pencil thickness. Regular harvesting also gives remaining plants more room to grow.
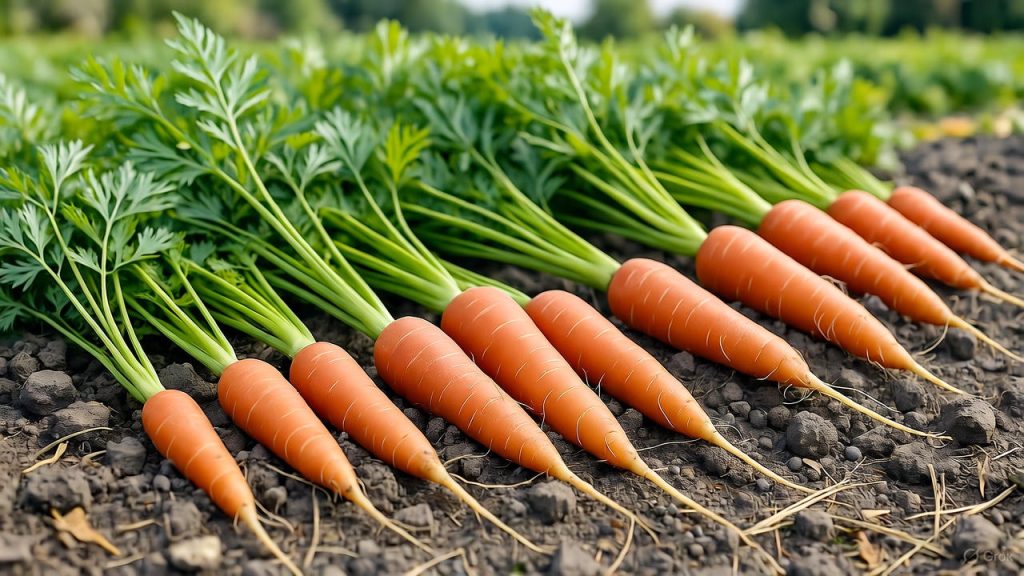
How to Harvest Carrots Properly
Harvest technique matters for getting carrots out undamaged. Pulling carelessly breaks roots and leaves pieces in the ground. Follow these steps for clean, whole carrots every time.
Water the carrot bed thoroughly the day before harvesting. Moist soil releases roots more easily than dry, compacted earth. This simple step prevents many broken carrots.
Loosen soil around carrots with a garden fork. Push the fork into the ground 4-6 inches from the row and gently lift. This breaks the soil’s grip on roots without stabbing them.
Grasp carrot tops close to the crown where green meets orange. Pull straight up with steady pressure. Twisting or jerking breaks roots or snaps off tops.
If carrot tops break off during pulling, use a digging fork to carefully excavate the root. Push the fork in at an angle beside the carrot and lift gently. This usually brings up stubborn roots without damage.
Brush off loose soil immediately after harvest. Don’t wash carrots if you plan to store them. Washing removes the protective soil coating and reduces storage life. Save washing for carrots you’ll use within a few days.
Storing Carrots for Winter
Proper storage keeps carrots fresh and crisp for months. These root vegetables store better than most garden produce. Several storage methods work, depending on your available space and harvest size.
Remove carrot tops immediately after harvest. Tops pull moisture from roots and cause them to shrivel. Twist or cut tops off, leaving about 1 inch of stem attached to prevent bleeding.
Store carrots in a cool, humid location. The ideal temperature sits between 32-40°F with 95% humidity. Root cellars, unheated basements, and spare refrigerators work perfectly.
Pack carrots in damp sand, sawdust, or peat moss for long-term storage. Layer them in boxes or bins so roots don’t touch. The medium maintains humidity and prevents shriveling. Check stored carrots monthly and remove any that show signs of rot.
Refrigerator storage works well for smaller harvests. Place unwashed carrots in perforated plastic bags. The bags maintain humidity while allowing some air circulation. Stored this way, carrots last 2-3 months.
Blanch and freeze carrots for the longest storage. Cut them into coins or sticks, blanch in boiling water for 2 minutes, then plunge into ice water. Drain well and freeze in airtight containers. Frozen carrots keep for up to a year.
Leave carrots in the ground over winter in mild climates. Mulch heavily with 12 inches of straw after the first hard frost. The mulch keeps soil from freezing solid. Harvest carrots as needed throughout winter, digging through the mulch layer.
Saving Carrot Seeds
Growing your own carrot seeds saves money and preserves favorite varieties. Carrots are biennials that flower and produce seeds in their second year. The process requires patience but rewards you with plenty of free seeds.
Leave the best carrot plants in the ground through winter. Choose plants with the traits you want—good color, straight roots, sweet flavor. Mulch these plants heavily to protect them from freezing.
Carrot plants send up tall flower stalks in spring of their second year. These umbels produce white or pinkish flowers that attract beneficial insects. Allow flowers to bloom and get pollinated naturally.
Flower heads mature into seed clusters that turn brown by late summer. Cut entire seed heads when they dry completely. Hang them upside down in paper bags to catch falling seeds.
Rub dried seed heads between your hands to separate seeds from chaff. Winnow seeds by pouring them between containers in front of a fan. The lighter chaff blows away while heavier seeds fall into the container.
Store carrot seeds in a cool, dry place in labeled envelopes. Include the variety name and harvest date. Properly stored carrot seeds remain viable for 3 years.
Troubleshooting Common Carrot Problems
Even experienced gardeners encounter carrot problems sometimes. Most issues have identifiable causes and practical solutions. Learning to recognize and fix problems improves your success rate.
Forked or twisted roots result from rocks, debris, or compacted soil. Heavy manure or excessive nitrogen also causes forking. Improve soil preparation and avoid fresh manure to prevent this issue.
Short, stunted carrots indicate overcrowding or poor soil. Thin seedlings properly and ensure loose soil depth of at least 12 inches. These roots need space to develop.
Bitter-tasting carrots come from heat stress or inconsistent watering. Plant carrots during cool seasons and maintain even soil moisture. Heat causes carrots to become woody and strong-flavored.
Green shoulders develop when carrot tops get exposed to sunlight. Mound soil or mulch around plant bases to keep roots covered. Green areas taste bitter, but you can trim them off before eating.
Cracked or split carrots happen when irregular watering follows a dry period. Roots grow rapidly when water returns, causing skin to split. Water consistently to prevent this problem.
Hairy roots result from excessive nitrogen or fresh manure in soil. Use well-aged compost instead and choose balanced fertilizers. The hair-like roots aren’t harmful but look unappealing.
Growing Carrots in Containers
Container-grown carrots suit apartment dwellers and those with limited garden space. This method works surprisingly well when you choose appropriate containers and varieties. You can even grow carrots on balconies and patios.
Use deep containers for standard carrot varieties. Pots should measure at least 12 inches deep to accommodate root growth. Five-gallon buckets with drainage holes work perfectly. Shorter varieties like Chantenay types need only 8-10 inches of depth.
Fill containers with quality potting mix, not garden soil. Potting mix provides the loose, well-draining environment carrots need. Mix in compost to add nutrients and improve water retention.
Sow seeds thicker in containers than in garden beds. Aim for 3-4 seeds per inch. You’ll thin them later, but dense planting makes good use of limited space.
Water container carrots more frequently than garden-grown ones. Pots dry out faster, especially in hot weather. Check daily and water when the top inch of soil feels dry.
Feed container carrots every 2-3 weeks with diluted liquid fertilizer. Container plants can’t reach nutrients beyond their pot, so regular feeding becomes essential. Use half-strength fertilizer to avoid overfeeding.
The Joy of Fresh Homegrown Carrots
Growing carrots connects you to the satisfaction of producing your own food. Each harvest brings fresh, flavorful vegetables that taste nothing like store-bought versions. The crisp texture and sweet flavor of homegrown carrots will spoil you for supermarket produce.
Start small if you’re new to vegetable gardening. Plant a 4-foot row of carrots and learn from the experience. You’ll quickly understand what works in your specific soil and climate. Next season, you can expand based on your success.
Keep records of what you plant and how it performs. Note varieties, planting dates, harvest dates, and any problems you encounter. These notes become valuable references that improve your skills over time.
Don’t get discouraged by failures. Every gardener grows some oddly-shaped carrots or loses crops to pests occasionally. Each challenge teaches you something valuable about gardening. Persistence and learning from mistakes lead to better results.
Share your harvest with friends and neighbors. Fresh carrots make wonderful gifts that people truly appreciate. This sharing builds community and spreads the joy of home gardening.
Experiment with different varieties each year. Try rainbow carrots one season, baby carrots the next. This variety keeps gardening interesting and helps you discover new favorites. Some varieties might surprise you with exceptional flavor or growing vigor.
Growing carrots requires patience, but the rewards justify your efforts. You’ll eat better, save money, and enjoy the deep satisfaction of growing your own food. Your garden-fresh carrots will convince you that the extra work beats any store-bought vegetable.