How to Make a Compost Pile?
You throw away banana peels, coffee grounds, and yard clippings every single week. That’s money walking out your door. Those scraps can become rich, dark compost that makes your garden explode with life.
Making a compost pile sounds complicated, but it’s not. You stack organic materials, keep them moist, and let nature do the heavy lifting. In a few months, you’ll have nutrient-rich soil amendment that costs nothing and works better than store-bought fertilizer.
This guide walks you through building and maintaining a compost pile from scratch. You’ll learn what materials to use, how to layer them properly, and how to avoid common mistakes that slow down decomposition.
Why Start Composting at Home
Americans toss 30% of their food in the trash. That food sits in landfills, creating methane gas that harms the environment. When you compost instead, you turn waste into something useful.
Your garden soil needs organic matter to thrive. Compost feeds beneficial microorganisms, improves drainage, and helps plants grow stronger roots. You’ll spend less money on fertilizers and soil amendments while reducing your carbon footprint.
Home composting also cuts down your garbage bill. Less trash means fewer bags going to the curb each week. The process is free once you set up your pile, and the results last for years.
The Science Behind Decomposition
Composting happens when microorganisms break down organic materials into simpler compounds. Bacteria, fungi, and other tiny creatures eat your scraps and transform them into humus—a dark, crumbly substance that smells like forest floor.
These decomposers need four basic things: carbon, nitrogen, oxygen, and water. Carbon comes from brown materials like dried leaves and cardboard. Nitrogen comes from green materials like grass clippings and vegetable scraps. The right balance between these ingredients creates the perfect environment for decomposition.
Temperature plays a huge role in how fast your compost pile works. Active piles can reach 130-150°F in the center. This heat kills weed seeds and harmful bacteria while speeding up the breakdown process. Cooler piles still work, but they take longer to produce finished compost.
Finding the Perfect Spot for Your Pile
Location matters when you’re building a compost pile. You want a spot that’s convenient to reach but not too close to your house. Bad smells can develop if you don’t manage the pile correctly, so keep it at least 10 feet from your back door.
Look for level ground with good drainage. Water shouldn’t pool under your pile after it rains. Too much moisture leads to anaerobic decomposition, which creates a rotten egg smell nobody wants.
Partial shade works better than full sun. Direct sunlight can dry out your pile too quickly during summer. Some sun exposure helps maintain warmth during cooler months, though. A spot near a water source makes it easy to add moisture when needed.
Keep your pile accessible year-round. You’ll be adding materials in winter and summer, so don’t put it somewhere that becomes hard to reach. Being near your garden makes sense because you’ll use the finished compost there anyway.
Gathering Your Composting Materials
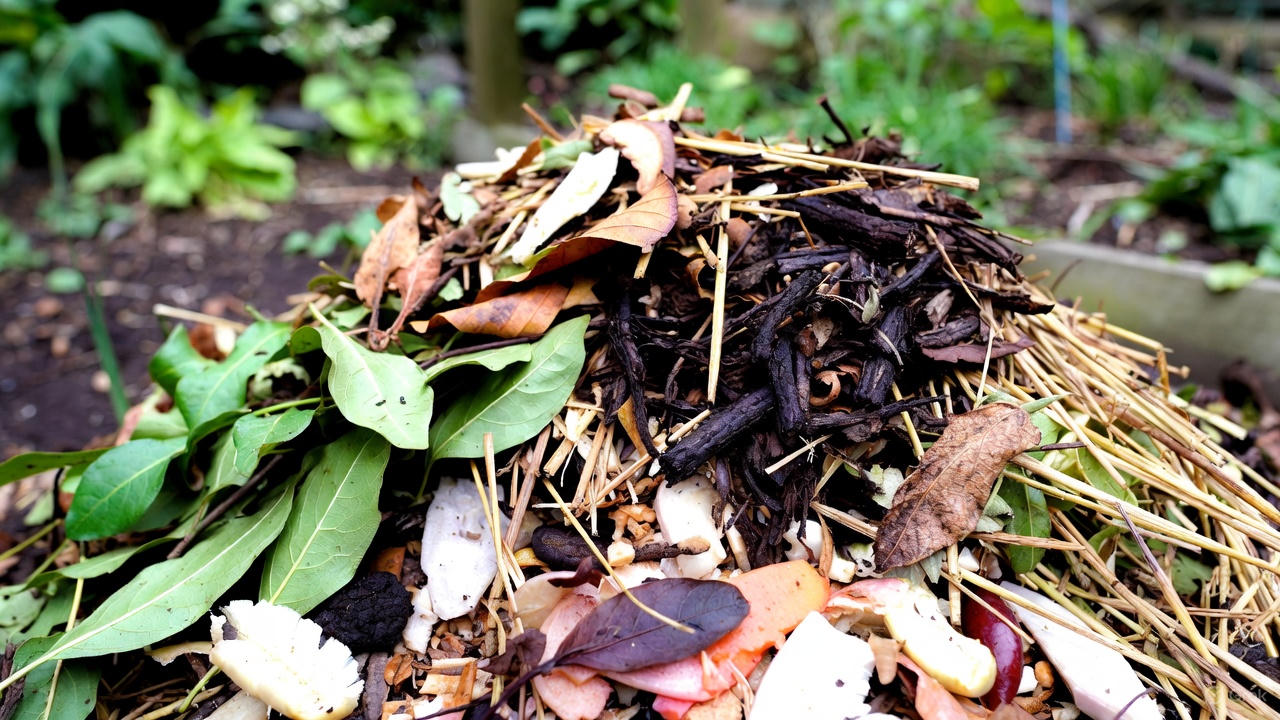
Successful composting depends on having the right mix of brown and green materials. Brown materials are high in carbon and include dried leaves, straw, shredded newspaper, cardboard, wood chips, and sawdust. These ingredients give your pile structure and help air flow through it.
Green materials are high in nitrogen and include grass clippings, vegetable scraps, fruit peels, coffee grounds, tea bags, and fresh plant trimmings. These ingredients heat up the pile and provide food for decomposers.
You can compost most kitchen scraps except meat, dairy, oils, and fatty foods. These attract pests and create unpleasant odors. Stick with plant-based materials from your kitchen. Eggshells work great once you crush them up.
Yard waste makes excellent compost material. Grass clippings break down quickly but should be mixed with browns to prevent matting. Fallen leaves are perfect for adding carbon. Small twigs and branches are fine, but larger pieces take forever to decompose.
The Carbon-to-Nitrogen Ratio Explained
The magic ratio for composting is about 30 parts carbon to 1 part nitrogen. Don’t worry—you don’t need to weigh everything. Just eyeball roughly three to four times more brown materials than green materials by volume.
Too much carbon slows down decomposition. Your pile stays cool and takes ages to break down. You’ll notice it looks dry and doesn’t seem to be changing much over time.
Too much nitrogen creates a slimy, stinky mess. The pile becomes soggy and develops ammonia smells. You might see a layer of slime on top or notice flies buzzing around constantly.
Getting the ratio right means your pile heats up properly and breaks down in a reasonable timeframe. The mix should feel like a wrung-out sponge when you squeeze it—moist but not dripping wet.
Building Your Compost Pile Step by Step
Start with a layer of coarse brown materials at the bottom. Twigs, straw, or wood chips work well. This base layer is about 4-6 inches thick and helps with drainage and air circulation.
Next, add a 2-3 inch layer of green materials. Spread grass clippings, vegetable scraps, or other nitrogen-rich ingredients evenly across the browns. Don’t dump everything in one spot. Even distribution helps your pile decompose uniformly.
Cover the greens with another layer of browns, about 3-4 inches thick. This pattern continues: greens, then browns, then greens again. Think of it like making lasagna with organic materials instead of pasta and cheese.
Water each layer as you build. The materials should be damp like that wrung-out sponge. Too dry and the microorganisms can’t do their work. Too wet and you’ll squeeze oxygen out of the pile.
Keep layering until your pile reaches at least 3 feet high and 3 feet wide. This minimum size helps the pile maintain heat. Smaller piles don’t get hot enough to decompose efficiently. Larger piles work even better but need more materials to maintain.
Different Composting Methods to Try
The hot composting method produces finished compost in 4-8 weeks. You build a large pile all at once, maintain the right moisture level, and turn it regularly. The pile heats up quickly and breaks down materials fast. This method takes more work but gives faster results.
Cold composting is the lazy person’s method, and there’s nothing wrong with that. You add materials whenever you have them, don’t turn the pile much, and wait 6-12 months for finished compost. Less work, slower results. The compost still ends up excellent for your garden.
Trench composting means burying organic waste directly in your garden beds. Dig a hole or trench about 12 inches deep, dump in your scraps, and cover with soil. The materials decompose underground where plant roots can access the nutrients directly. This works great in vegetable gardens.
Vermicomposting uses worms to break down materials. Red wiggler worms live in a bin and eat your kitchen scraps, producing worm castings that plants absolutely love. This method works indoors and produces finished compost in 2-3 months.
Managing Moisture Levels in Your Pile
Water is life for your compost pile. The microorganisms doing all the work need moisture to survive. Your pile should feel damp throughout, like soil after a light rain.
Check moisture by grabbing a handful from the middle of the pile and squeezing it. A few drops of water should come out. If it drips steadily, the pile is too wet. If nothing comes out and the material feels dry, add water.
During dry weather, spray your pile with a hose every week or two. Don’t just wet the surface. Push a stick or broom handle into the pile to create holes, then water into those openings. This gets moisture deep into the center where it’s needed most.
Rainy seasons can make your pile too soggy. Cover it with a tarp or sheet of plastic to keep excess water out. Leave the sides exposed so air can still circulate. You can also add extra brown materials to soak up moisture.
Turning Your Compost Pile
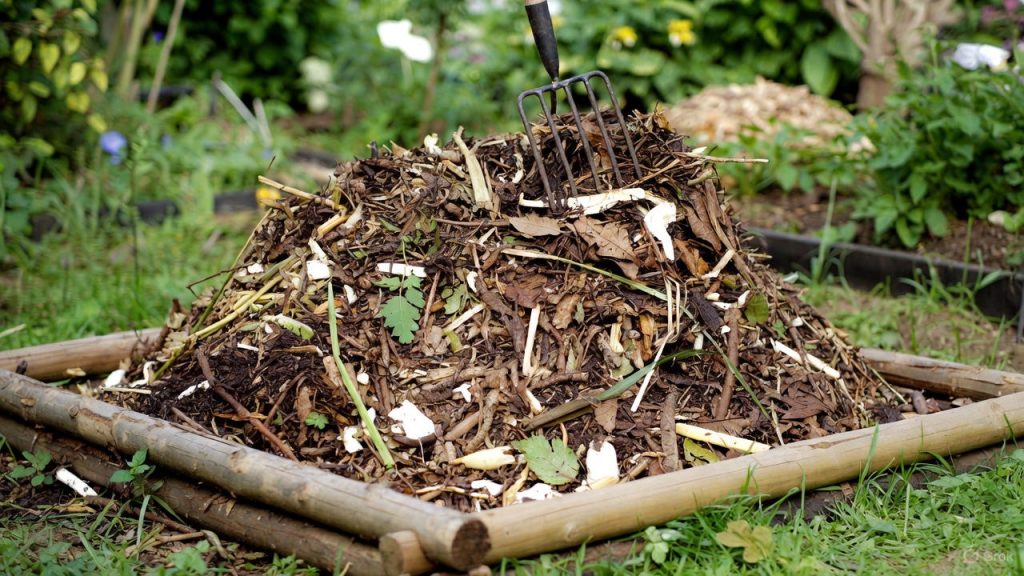
Turning means mixing up the materials so the outside stuff moves to the inside and vice versa. This adds oxygen, which keeps decomposition aerobic and prevents bad smells. It also distributes moisture and moves cooler materials into the hot center.
Use a pitchfork or garden fork to move materials from one spot to another. Some people build two bins side by side and move everything from one to the other. Others just mix the pile in place, moving outer materials toward the center.
Hot composting requires turning every 3-5 days for the first few weeks. This is when your pile is most active. The temperature drops after you turn it, then rises again as microorganisms multiply. This cycle speeds up decomposition dramatically.
Cold composting doesn’t require frequent turning. Once a month is plenty, or even less. The pile still breaks down without turning—it just takes longer. Do what fits your schedule and energy level.
Troubleshooting Common Problems
A smelly pile usually means too much nitrogen or not enough oxygen. Turn the pile to add air and mix in brown materials like shredded newspaper or dried leaves. The smell should improve within a day or two.
If your pile isn’t heating up, you might not have enough green materials. Add grass clippings, vegetable scraps, or other nitrogen sources. The pile might also be too small or too dry. Check your moisture level and consider building a bigger pile.
Pests can become a problem if you’re composting the wrong materials. Never add meat, fish, dairy, or fatty foods. Bury fresh kitchen scraps under browns instead of leaving them exposed. A layer of leaves or soil on top discourages animals from digging.
Your pile might attract fruit flies during summer. Cover fresh fruit scraps immediately with browns. You can also let fruit scraps dry out a bit before adding them to the pile. Fruit flies annoy you but don’t hurt the composting process.
Knowing When Your Compost is Ready
Finished compost looks dark brown or black, like rich potting soil. It feels crumbly in your hands and breaks apart easily. You shouldn’t be able to identify individual ingredients anymore—no recognizable leaves or food scraps.
The smell test matters too. Good compost smells earthy and pleasant, like the forest after rain. Any sour or ammonia odors mean the pile needs more time or has gone anaerobic.
Temperature is another clue. Active piles stay hot, but finished compost cools down to air temperature. When your pile stops heating up even after turning, the materials have mostly decomposed.
Most piles take 3-12 months to produce finished compost, depending on your method. Hot composting works fastest. Cold composting takes longest but requires less effort. Either way, the end product is worth the wait.
Using Your Finished Compost
Screen your compost before using it to remove any chunks that haven’t broken down completely. A simple frame with hardware cloth works perfectly. Toss the big pieces back into your active pile.
Mix compost into garden soil before planting. Work 2-3 inches into the top 6 inches of soil. This improves soil structure, adds nutrients, and helps with water retention. Your plants will show the difference with stronger growth and better yields.
Use compost as mulch around established plants. Spread a 2-inch layer on the soil surface around flowers, vegetables, and shrubs. This suppresses weeds, conserves moisture, and slowly releases nutrients as it continues to break down.
Make compost tea by steeping finished compost in water for 24-48 hours. Strain out the solids and use the liquid to water plants. This gives them a quick nutrient boost without the risk of burning roots with concentrated fertilizer.
Building a Compost Bin Structure
A bin isn’t required, but it keeps your pile contained and looks neater. You can build one from wood pallets, wire fencing, or cinder blocks. The structure should be at least 3 feet on each side to maintain proper heat.
Leave gaps between boards or use wire mesh so air can flow through. Decomposers need oxygen, and good ventilation prevents anaerobic conditions. One side should open for easy access when turning or harvesting compost.
Three-bin systems work great if you have space. One bin for fresh materials, one for active composting, and one for finished compost. This setup keeps your composting operation organized and efficient.
You can also buy ready-made compost bins. Tumbler bins make turning easy—just spin the barrel every few days. These work well for people who want faster results without the heavy lifting of turning a traditional pile.
Seasonal Composting Tips
Winter composting slows down but doesn’t stop. Your pile won’t heat up as much in cold weather, but decomposition continues. Keep adding materials through winter and they’ll break down when temperatures warm up in spring.
Insulate your pile with a thick layer of straw or leaves if you live somewhere with harsh winters. This helps maintain some heat and keeps the center active. You can also cover the pile with black plastic to absorb solar heat.
Summer brings its own challenges. Hot weather can dry out your pile quickly. Check moisture more often and water as needed. High temperatures also speed up decomposition, so your pile might need turning more frequently.
Fall is the perfect time to stockpile brown materials. Rake up those leaves and store them in bags or a separate bin. You’ll need them throughout the year to balance green materials from your kitchen.
What Not to Compost
Skip meat, bones, fish, and seafood. These attract animals and create terrible smells as they rot. The same goes for dairy products like cheese, milk, and yogurt. Fats and oils also cause problems by coating other materials and slowing decomposition.
Pet waste from dogs and cats shouldn’t go in your pile. It can contain parasites and pathogens that survive the composting process. Stick with herbivore manure like from rabbits, horses, or chickens if you have access to it.
Diseased plant material belongs in the trash, not your compost. Unless your pile gets really hot (over 140°F), diseases can survive and spread back to your garden. The same applies to plants that have been treated with pesticides recently.
Glossy paper, magazines, and colored newsprint contain inks and chemicals you don’t want in your compost. Plain newspaper and cardboard are fine. Just shred them first so they break down faster.
Accelerating the Composting Process
Chop or shred materials before adding them to your pile. Smaller pieces have more surface area for microorganisms to attack. Run your lawn mower over leaves to shred them. Cut vegetable scraps into chunks instead of tossing in whole items.
Commercial compost activators or starters can help jump-start a new pile. These products contain concentrated microorganisms and nutrients. They’re not necessary but can speed things up if you’re impatient.
A shovelful of soil adds billions of microorganisms to your pile. Garden soil or finished compost from a previous batch works as a natural activator. Sprinkle some between layers as you build.
Maintain optimal conditions for your decomposers. Keep the pile moist, turn it regularly, and maintain the right carbon-to-nitrogen ratio. When microorganisms have everything they need, they work faster and produce compost sooner.
Advanced Composting Techniques
Bokashi composting ferments organic waste instead of breaking it down aerobically. You layer kitchen scraps with bokashi bran in an airtight container. After 2 weeks, bury the fermented material in your garden or add it to a traditional compost pile. This method handles meat, dairy, and other items regular composting can’t.
Sheet composting means layering compostable materials directly on your garden beds in fall. Spread cardboard or newspaper, pile on leaves, grass clippings, and other organic matter, then leave it. By spring, everything breaks down and you can plant directly into the bed.
Hot water bottle method speeds up winter composting. Fill bottles with hot water and bury them in your pile. The heat keeps microbial activity going even when outside temperatures drop. Replace the bottles with fresh hot water every few days.
Two-stage composting separates the process. Stage one is hot and fast, breaking down materials quickly in 4-6 weeks. Stage two is slow curing, where the compost finishes decomposing and stabilizing over another 4-6 weeks. This produces the highest quality compost.
Making Compost Work in Small Spaces
Apartment dwellers can compost too. Worm bins fit under kitchen sinks or on balconies. Red wiggler worms eat your scraps and produce castings in a small, contained system. The bins don’t smell if you maintain them properly.
Tumbler composters work great for small yards. These sealed barrels sit on a stand and you rotate them to mix the contents. They keep pests out and take up minimal space. You can produce finished compost in 4-8 weeks.
Countertop composters use electricity to speed up decomposition. These devices dry and grind your scraps into a soil-like product in 24-48 hours. They’re expensive but convenient for people with zero outdoor space.
Community composting programs let you drop off your scraps at a local collection point. Your neighborhood or city might run one of these programs. You contribute materials and often get free finished compost in return.
The Environmental Impact of Composting
Food waste in landfills creates methane, a greenhouse gas 25 times more potent than carbon dioxide. When you compost instead, materials break down aerobically with minimal methane production. You’re directly reducing your carbon footprint with every banana peel.
Compost improves soil health, which helps plants grow better and sequester more carbon from the atmosphere. Healthy soil acts as a carbon sink, pulling CO2 out of the air and storing it underground. Your garden becomes part of the solution to climate change.
Using homemade compost means buying less commercial fertilizer. Manufacturing synthetic fertilizers requires massive amounts of energy and creates pollution. You’re reducing demand for these products while getting better results in your garden.
Composting saves water too. Soil amended with compost holds moisture better than plain dirt. Plants need less frequent watering, which conserves this precious resource. During droughts, compost-rich soil can make the difference between thriving plants and dead ones.
Start Your Compost Pile Today
You now know everything you need to turn waste into garden gold. Start small if the whole process feels overwhelming. Even a simple pile in the corner of your yard beats sending scraps to the landfill.
Collect a few bags of leaves this week. Start saving your kitchen scraps in a container. Layer them together in a 3×3 foot pile and keep it moist. That’s all it takes to begin.
Check your pile every week or two. Add materials as you collect them. Turn it when you have time. Before you know it, you’ll be spreading rich, dark compost on your garden and watching your plants thrive.
The best time to start composting was last year. The second best time is right now. Your garden—and the planet—will thank you.