How To Plant Artichoke?
Growing artichokes transforms your garden into a Mediterranean paradise while providing you with one of nature’s most unique vegetables. These impressive plants produce edible flower buds that become the delicious artichokes we love at dinner tables worldwide. Many gardeners feel intimidated by artichoke cultivation, but with proper knowledge and techniques, you can successfully grow these striking plants in your backyard.
Why Plant Artichokes in Your Garden?
Artichokes offer multiple benefits that make them worth adding to your garden space. The plants serve as stunning ornamental features with their silvery-green foliage and towering height that can reach six feet. Beyond their visual appeal, artichokes provide exceptional nutritional value, packed with fiber, antioxidants, and essential vitamins.
The perennial nature of artichoke plants means you’ll enjoy harvests for several years after your initial planting effort. Each plant can produce 10-15 artichokes during its peak season, making them incredibly productive for the space they occupy. The unique flavor profile of homegrown artichokes surpasses anything you’ll find in grocery stores, with tender hearts and meaty leaves perfect for steaming, grilling, or stuffing.
Best Climate Conditions for Artichoke Cultivation
Artichokes thrive in Mediterranean-style climates with mild, wet winters and warm, dry summers. These plants prefer temperatures between 60-70°F during their growing season and require a period of cool weather to stimulate bud formation. The ideal climate provides consistent moisture during spring growth followed by drier conditions as the buds mature.
Cold tolerance varies among artichoke varieties, but most plants struggle in regions with harsh winters below 20°F. Gardeners in colder zones can still grow artichokes as annuals or protect established plants with heavy mulching during winter months. Hot, humid climates present challenges as well, since excessive heat and humidity can cause plants to bolt prematurely or develop fungal diseases.
Coastal regions with natural fog and moderate temperatures create perfect artichoke growing conditions. Inland areas can also succeed with proper irrigation and some afternoon shade during the hottest summer months. Wind protection helps prevent damage to the large leaves and developing buds.
Soil Preparation and Requirements
Artichokes demand well-draining soil with excellent fertility to support their vigorous growth habits. The ideal soil pH ranges from 6.0 to 7.5, slightly acidic to neutral conditions that allow optimal nutrient uptake. Heavy clay soils require amendments to improve drainage, while sandy soils need organic matter to retain moisture and nutrients.
Begin soil preparation several weeks before planting by testing your soil’s pH and nutrient levels. Most garden centers offer affordable soil testing kits, or you can send samples to your local cooperative extension office for detailed analysis. Based on test results, you can adjust pH using lime to raise acidity or sulfur to lower it.
Incorporate generous amounts of compost, aged manure, or other organic matter into your planting area. Artichokes are heavy feeders that benefit from rich, humus-laden soil. Work organic amendments to a depth of 12-18 inches across the entire planting bed, not just individual holes.
Create raised beds if your soil has drainage issues or if you live in an area with heavy clay. Raised beds provide better drainage while allowing you to control soil composition more precisely. The elevated planting surface also warms up faster in spring, extending your growing season.
Starting Artichokes from Seeds vs. Transplants
You have two main options for starting artichokes: seeds or transplants. Each method has distinct advantages and challenges that affect your success rate and timeline to harvest.
Growing from Seeds
Starting artichokes from seeds offers the widest variety selection and costs less than purchasing transplants. However, seed germination can be inconsistent, and plants started from seed may not produce buds in their first year. Seeds require stratification (cold treatment) to break dormancy and encourage germination.
Begin seed starting indoors 10-12 weeks before your last expected frost date. Place seeds in slightly moist vermiculite or peat moss inside a sealed container, then refrigerate for 2-3 weeks. This cold stratification mimics winter conditions and improves germination rates significantly.
After stratification, plant seeds in seed-starting mix about 1/4 inch deep in individual containers. Maintain soil temperature around 70°F and provide consistent moisture without waterlogging. Germination typically occurs within 10-21 days under proper conditions.
Using Transplants
Transplants provide faster results and more predictable outcomes for new artichoke growers. Young plants purchased from nurseries have already passed through the difficult germination and early growth phases. Transplants often produce harvestable buds in their first year, especially if planted early in the season.
Look for healthy transplants with sturdy stems, good root development, and no signs of disease or pest damage. Avoid plants that appear rootbound or show yellowing leaves, as these indicate stress that may affect future performance.
Some gardeners propagate artichokes from root divisions of established plants. This method ensures genetic consistency and vigor while expanding your artichoke patch at no additional cost.
When to Plant Artichokes
Timing your artichoke planting correctly determines the success of your entire growing season. The specific planting window depends on your climate zone and local weather patterns.
In mild winter areas (zones 8-10), plant artichokes in fall for harvest the following spring and summer. Fall planting allows roots to establish during cooler months before rapid spring growth begins. Plant transplants 6-8 weeks before your first expected frost date.
Colder regions (zones 6-7) should plant artichokes in early spring after the danger of hard frost has passed. Late spring planting gives plants maximum growing time before winter dormancy. Some gardeners in marginal zones treat artichokes as annuals, replanting each year for consistent production.
Monitor soil temperature before planting, as artichokes prefer soil temperatures above 50°F for active root development. Cold, wet soil can cause root rot and poor establishment in young plants.
Step-by-Step Planting Process
Follow these detailed steps to ensure proper artichoke planting and establishment:
Site Selection
Choose a sunny location that receives at least 6-8 hours of direct sunlight daily. Artichokes tolerate partial shade but produce fewer and smaller buds in low-light conditions. Ensure adequate air circulation around plants to prevent fungal diseases while protecting them from strong winds that can damage large leaves.
Plan for mature plant size when selecting your site. Artichoke plants can spread 4-6 feet wide and grow equally tall, requiring substantial space between plants and other garden features.
Digging and Spacing
Dig planting holes twice as wide as the root ball and slightly shallower than the container depth. Artichokes prefer to be planted at the same depth they grew in their containers, with the soil line matching the previous growing level.
Space plants 4-6 feet apart in all directions to accommodate their mature size. Closer spacing creates competition for nutrients and water while reducing air circulation that helps prevent disease problems.
Planting Technique
Remove transplants from containers carefully to avoid disturbing the root system. Gently tease apart any circled roots around the bottom of the root ball to encourage outward growth. Place plants in prepared holes and backfill with native soil mixed with compost.
Water thoroughly immediately after planting to settle soil around roots and eliminate air pockets. Apply 2-3 inches of organic mulch around each plant, keeping mulch several inches away from the stem to prevent moisture-related problems.
Watering and Irrigation Needs
Artichokes require consistent moisture throughout their growing season but cannot tolerate waterlogged conditions. Proper irrigation management balances these competing needs while promoting healthy growth and bud development.
Newly planted artichokes need frequent watering until their root systems establish in surrounding soil. Water deeply every 2-3 days for the first few weeks, then gradually reduce frequency as plants show signs of new growth.
Established artichoke plants prefer deep, infrequent watering that encourages extensive root development. Provide 1-2 inches of water per week through rainfall and irrigation combined. Deep watering promotes drought tolerance while preventing shallow root systems that struggle during dry periods.
Install drip irrigation or soaker hoses to deliver water directly to root zones while keeping foliage dry. Wet leaves create ideal conditions for fungal diseases that can damage or kill artichoke plants. Early morning watering allows any moisture on leaves to evaporate quickly.
Monitor soil moisture by inserting your finger 2-3 inches into the soil near plant bases. Water when the top layer feels dry but moisture remains at deeper levels. Avoid allowing soil to completely dry out, as water stress can cause buds to open prematurely or develop bitter flavors.
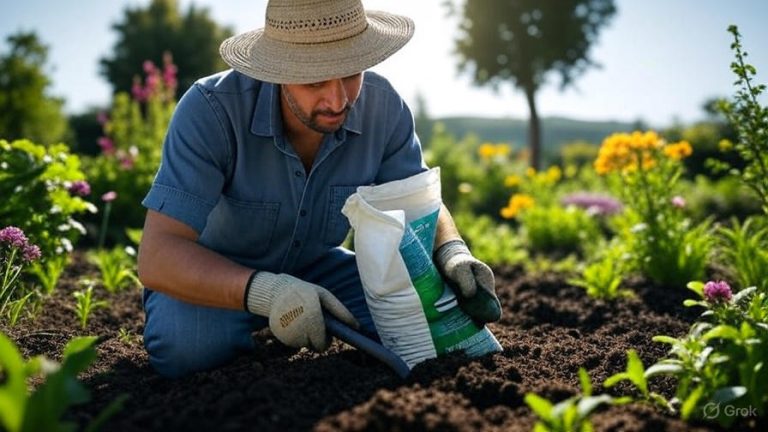
Fertilizing Your Artichoke Plants
Artichokes are heavy feeders that require regular fertilization throughout their growing season. These vigorous plants quickly deplete soil nutrients and benefit from both organic and synthetic fertilizer applications.
Apply a balanced fertilizer (10-10-10 or similar) when planting and again every 4-6 weeks during the active growing season. Side-dress established plants with compost or aged manure monthly to provide slow-release nutrients and improve soil structure.
High-nitrogen fertilizers promote lush foliage growth but can delay bud formation. Use balanced fertilizers during early growth, then switch to lower-nitrogen, higher-phosphorus formulas as buds begin developing. Phosphorus supports flower and seed development, which translates to better artichoke production.
Organic fertilizers like fish emulsion, bone meal, and kelp meal provide excellent nutrition while improving soil biology. These natural amendments release nutrients slowly and support beneficial microorganisms that enhance plant health and disease resistance.
Monitor plants for nutrient deficiency symptoms like yellowing leaves, stunted growth, or poor bud development. Nitrogen deficiency causes overall yellowing, while phosphorus deficiency creates purplish leaf tints. Potassium deficiency appears as brown leaf edges or spots.
Common Pests and Disease Management
Several pests and diseases can affect artichoke plants, but proper identification and management keep problems under control without resorting to harsh chemical treatments.
Pest Problems
Aphids commonly attack artichoke plants, clustering on tender new growth and bud undersides. These small insects suck plant juices and can transmit viral diseases. Spray infested plants with insecticidal soap or release beneficial insects like ladybugs and lacewings for biological control.
Earwigs sometimes invade developing artichoke buds, creating tunnels and damage that makes harvested buds unusable. Trap earwigs using rolled newspapers or shallow containers filled with oil placed near affected plants. Remove and destroy trapped pests regularly.
Snails and slugs can severely damage young artichoke plants, especially during wet weather. Use organic slug baits, copper barriers, or hand-picking during evening hours when these pests are most active.
Disease Issues
Crown rot affects artichokes grown in poorly drained soils or areas with excessive moisture. This fungal disease causes plant collapse and death, particularly during wet winter months. Improve drainage and avoid overwatering to prevent crown rot problems.
Powdery mildew appears as white, powdery coating on leaf surfaces during humid conditions with poor air circulation. Increase spacing between plants and avoid overhead watering to reduce humidity around foliage. Spray affected plants with baking soda solution (1 tablespoon per gallon of water) for organic control.
Botrytis blight causes gray, fuzzy growth on leaves and buds during cool, moist weather. Remove affected plant parts immediately and improve air circulation to prevent spread. Avoid working with wet plants to prevent accidentally spreading fungal spores.
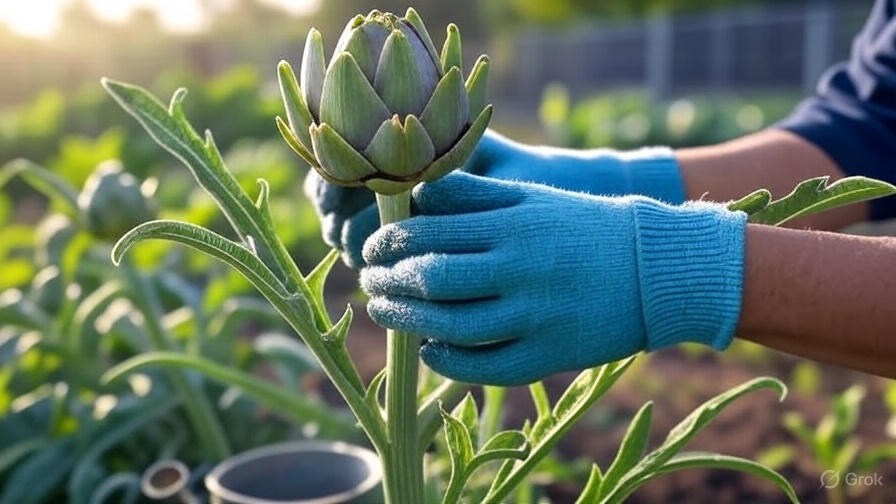
Harvesting Your Artichokes
Knowing when and how to harvest artichokes ensures the best flavor and texture from your homegrown crop. Proper timing makes the difference between tender, delicious buds and tough, inedible ones.
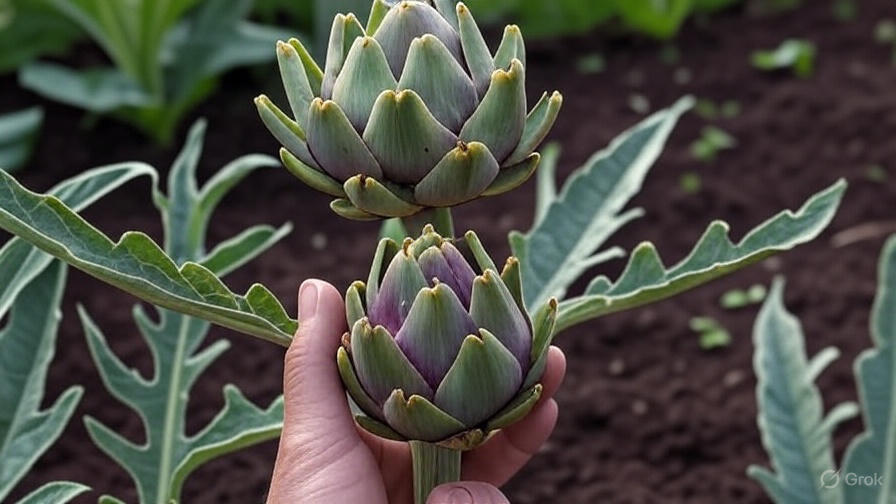
Harvest artichoke buds when they reach full size but before the scales begin opening or flowering. The ideal harvesting stage occurs when buds feel firm and tight with closely overlapping scales. Buds that start showing purple flowers have passed their prime eating stage.
Cut artichoke stems 1-2 inches below the bud using sharp, clean pruning shears. Clean cuts heal faster and reduce disease entry points. Harvest during cool morning hours when buds contain maximum moisture and flavor compounds.
The main harvest season typically spans 6-8 weeks, depending on variety and growing conditions. Plants produce a central, largest bud first, followed by smaller side shoots that develop over several weeks. Continue harvesting side shoots to encourage additional production.
Store harvested artichokes in the refrigerator for up to one week, though they taste best when used within 2-3 days of harvest. Fresh artichokes can be steamed, grilled, stuffed, or used in countless culinary applications.
Winter Care and Plant Maintenance
Proper winter care determines whether your artichoke plants survive to produce future harvests. The specific care requirements depend on your climate zone and local winter conditions.
In mild winter areas, artichokes remain semi-evergreen and may continue slow growth throughout winter months. Reduce watering frequency during dormant periods while maintaining enough moisture to prevent complete drying. Apply thick organic mulch around plant bases to insulate roots from temperature fluctuations.
Cold climate gardeners face more challenging winter care decisions. Plants may survive temperatures as low as 20°F with proper protection, but sustained freezing kills most artichoke varieties. Cut plants back to 6-8 inches after the first killing frost, then cover with thick mulch, burlap, or specialized plant protection fabric.
Some gardeners dig up artichoke roots and store them indoors during winter, replanting in spring after frost danger passes. This method works well for small numbers of plants but becomes impractical for larger artichoke patches.
Troubleshooting Common Growing Problems
Even experienced gardeners encounter challenges when growing artichokes. Recognizing and addressing common problems quickly prevents minor issues from becoming major crop failures.
Poor Bud Development
Plants that produce small, tough, or few buds often suffer from inadequate nutrition, water stress, or improper growing conditions. Increase fertilization frequency and ensure consistent soil moisture throughout the growing season. Plants grown in too much shade also produce poor-quality buds.
Premature Flowering
Artichoke buds that open into purple flowers before reaching harvestable size indicate plant stress or genetic factors. Heat stress, drought, or sudden temperature changes can trigger premature flowering. Some varieties are more prone to early flowering than others.
Leaf Problems
Yellowing, browning, or dropping leaves usually indicate watering issues, disease problems, or nutrient deficiencies. Examine plants carefully to identify the specific cause, then adjust care practices accordingly. Healthy artichoke plants maintain attractive foliage throughout their growing season.
Varieties and Cultivar Selection
Different artichoke varieties offer unique characteristics that suit various growing conditions and culinary preferences. Researching available cultivars helps you choose the best options for your specific garden situation.
‘Green Globe’ remains the most widely grown artichoke variety, producing large, flavorful buds on vigorous plants. This variety adapts well to various climates and provides reliable production for beginning artichoke growers.
‘Imperial Star’ was specifically developed for annual production in shorter growing seasons. This variety produces harvestable buds from seed in the first year, making it ideal for cold climate gardeners who treat artichokes as annuals.
‘Purple of Romagna’ offers striking purple-colored buds with exceptional flavor and tenderness. This heirloom variety attracts attention in gardens while providing gourmet-quality artichokes for special occasions.
‘Violetto’ produces smaller, elongated buds perfect for individual servings. The purple-tinged buds turn green when cooked and offer delicate flavor ideal for elegant presentations.
Companion Planting and Garden Design
Artichokes work well in companion planting schemes while creating dramatic focal points in garden designs. Their architectural form and silvery foliage complement many other plants while providing practical benefits.
Plant artichokes with Mediterranean herbs like rosemary, thyme, and oregano that share similar growing requirements. These aromatic plants may help repel some pests while creating cohesive garden themes.
Avoid planting artichokes near plants that require frequent watering or have shallow root systems that compete for surface nutrients. Deep-rooted artichokes can coexist with shallow-rooted annual vegetables if properly managed.
Use artichokes as background plants in mixed borders or as specimen plants in prominent garden locations. Their impressive size and unique texture create year-round interest even when not producing edible buds.
Conclusion
Growing artichokes successfully requires attention to detail and proper planning, but the rewards justify the effort invested. These magnificent plants provide years of delicious harvests while creating stunning garden features that impress visitors and neighbors alike. Start with quality transplants, prepare your soil thoroughly, and maintain consistent care throughout the growing season. With patience and proper techniques, you’ll soon enjoy the incomparable taste of homegrown artichokes fresh from your own garden.