How to Replace a Sprinkler Head?
Your lawn irrigation system works hard to keep your grass green and healthy. But when a sprinkler head breaks, cracks, or stops working properly, you need to fix it fast. A damaged sprinkler head wastes water and leaves dry patches across your yard.
The good news? You can replace a broken sprinkler head yourself in about 30 minutes. This guide walks you through every step of the process, from gathering your tools to testing your new sprinkler head. Let’s get your lawn watering system back in perfect shape.
Why Sprinkler Heads Break and When to Replace Them
Sprinkler heads face constant pressure from water, sun exposure, and lawn equipment. Lawnmowers are the biggest culprit—one wrong pass and you’ll hear that unmistakable crack. Freezing temperatures cause heads to split during winter months. Over time, internal parts wear out and stop functioning correctly.
You’ll know it’s time for a replacement when you see these problems:
Visible damage shows up as cracks, chips, or completely broken heads sitting in your yard. Water shoots everywhere except where it should go.
Poor spray patterns mean water only comes out one side, or the head doesn’t rotate like it used to. You’ll notice brown spots in areas that should be getting watered.
Constant leaks around the base of the head waste water and create muddy puddles. Even when the system shuts off, water keeps trickling out.
Height issues happen when heads sink into the ground or get pushed up too high by soil movement. Grass covers sunken heads, blocking the spray pattern.
Tools and Materials You Need
Before you start digging, gather everything for the job. Running back to the hardware store halfway through wastes time and lets dirt fall into your irrigation lines.
Essential tools:
- Shovel or garden trowel for digging
- Adjustable wrench or pliers
- Old towel or rag for cleanup
- Bucket for catching water
- Utility knife
Materials to buy:
- New sprinkler head (match your existing type)
- Teflon tape or pipe thread sealant
- Extra riser if yours is damaged
- Optional: PVC primer and cement (for permanent connections)
Take your broken sprinkler head to the hardware store with you. This guarantees you buy the correct replacement. Sprinkler heads come in different thread sizes, spray patterns, and heights. The person at the irrigation supply counter can match it exactly.
Step 1: Turn Off Your Irrigation System
Safety comes first. Shut down your sprinkler system completely before you start working. Find your main control valve—usually located near your water meter or in a valve box in your yard. Turn the valve clockwise until it stops.
If you have an automatic timer system, turn it off at the controller box. You don’t want the system to kick on while your hands are in the hole. Set the controller to “off” or “manual” mode. Some homeowners unplug the transformer completely to be extra safe.
Wait a few minutes after shutting off the water. This lets pressure drain from the lines. You’ll get less water shooting out when you remove the broken head.
Step 2: Dig Around the Damaged Sprinkler Head
Time to get your hands dirty. Use your shovel or trowel to carefully dig around the broken sprinkler head. Start about 6 inches away from the head in a circle. Dig down slowly, watching for the pipe connection below.
Most residential sprinkler heads connect to risers at depths between 6 to 12 inches. Take out small amounts of soil at a time. You want to expose the entire riser and fitting without damaging the underground pipes.
Set the dirt on a tarp or in a bucket. This keeps your work area clean and makes backfilling easier later. Pull out any grass or roots that get in your way. The more space you have to work, the easier the job becomes.
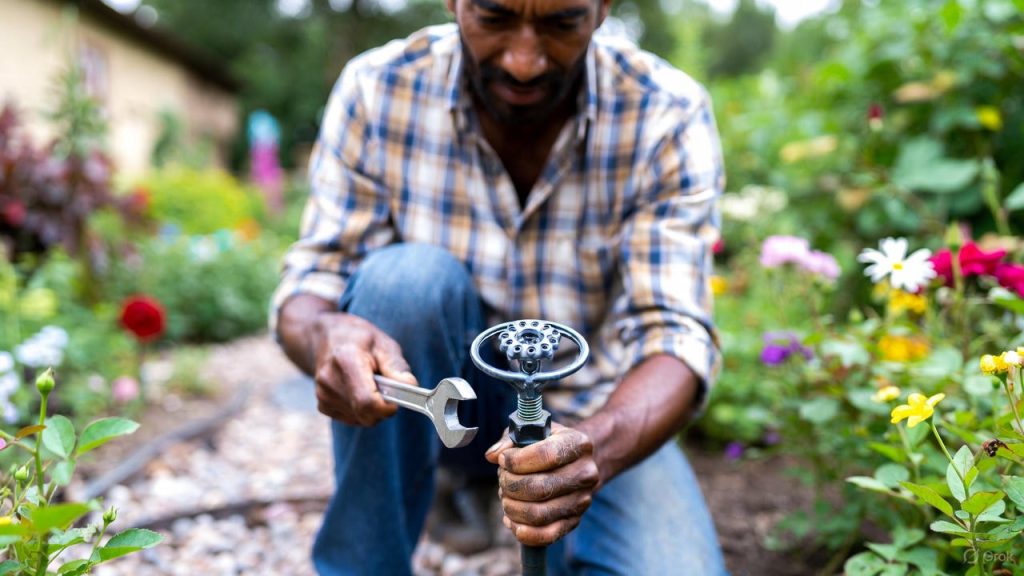
Step 3: Remove the Broken Sprinkler Head
Now you can see the full connection. The sprinkler head screws onto a riser—a short pipe that brings it up to ground level. Grip the sprinkler head body with one hand. Use your wrench or pliers to turn it counterclockwise. Lefty loosy, righty tighty.
The head should unscrew fairly easily. If it’s stuck, try these tricks:
Spray some penetrating oil like WD-40 on the threads and wait 10 minutes. The oil loosens rust and mineral buildup that causes the threads to seize.
Use channel lock pliers for better grip on stubborn heads. Wrap a rag around the fitting first to avoid scratching the threads.
Be gentle with the riser. These plastic pipes crack easily if you twist too hard. Hold the riser steady with one hand while turning the head with the other. This prevents stress on the underground connection.
Step 4: Inspect the Riser and Threads
Take a close look at the riser now that the old head is off. Check for cracks, splits, or damage to the threaded fitting. A damaged riser needs replacing before you install the new head.
Examine the threads carefully. They should be clean and intact. Use your utility knife to scrape away dirt, old grass, or mineral deposits stuck in the threads. A wire brush works great for this too.
If the riser looks damaged, you’ll need to cut it off and install a new one. Cut below the damaged section with a PVC pipe cutter or hacksaw. Install a new riser using PVC cement. Let it dry for at least 30 minutes before screwing on your new sprinkler head.
For threads in good shape, just clean them thoroughly. Wipe everything down with your rag. Even small bits of dirt can cause leaks in the connection.
Step 5: Prepare Your New Sprinkler Head
Unbox your new sprinkler head and check that all parts are included. Most heads come with the nozzle already installed, but some require assembly. Read the manufacturer’s instructions that come in the package.
Wrap the threads with Teflon tape for a watertight seal. Start at the base of the threads and wrap clockwise (the same direction you’ll screw it on). Use 3-4 wraps of tape. Stretch the tape slightly as you wrap so it sticks to the threads. Smooth it down with your finger.
Some irrigation pros prefer pipe thread sealant instead of tape. This paste goes on the male threads and creates an excellent seal. Let it get tacky for a minute before threading the connection. Either method works well—just don’t use both at the same time.
Check that you have the right nozzle installed for your zone. Spray heads come with different nozzles for various spray patterns: full circle (360 degrees), half circle (180 degrees), or quarter circle (90 degrees). Match the pattern to your landscape needs.
Step 6: Install the New Sprinkler Head
Thread the new head onto the riser by hand. Turn it clockwise, keeping the threads aligned. It should screw on smoothly without forcing. Hand-tighten it first to make sure the threads engage properly.
Once hand-tight, use your wrench to give it another quarter turn. Don’t overtighten—you’ll crack the plastic. Snug is good enough. The Teflon tape or sealant creates the seal, not brute force.
Make sure the sprinkler head sits at the correct height. The top of most pop-up heads should sit flush with or slightly above the soil level. Rotor heads and spray heads have specific height requirements based on the model. Check your instruction sheet.
If the head sits too low, you might need a longer riser. Too high? Cut the riser down or add a flush cap fitting that sits lower. Getting the height right prevents the sprinkler from hitting hardscape or getting buried by grass.
Step 7: Adjust the Spray Pattern and Direction
Most sprinkler heads have adjustable features. Spray heads let you control the arc—how many degrees of coverage you get. Rotor heads have adjustable arc and radius settings. Make these adjustments now, before you bury everything.
To adjust spray direction: Twist the entire sprinkler head body. Line up the left edge of the spray pattern with the left edge of your watering zone. For fixed spray heads, the nozzle might rotate independently—check your model instructions.
To adjust the arc: Look for a small screw or adjustment slot on top of the head. Use a flathead screwdriver or the adjustment key that came with your sprinkler. Turn clockwise to reduce the arc, counterclockwise to increase it. Test it by hand to see how far the spray travels.
To adjust throw distance: Some heads have a radius reduction screw. Turning this screw decreases how far water shoots out. This helps balance coverage across your entire zone.
Take your time with these adjustments. Getting them right means better coverage and less water waste.
Step 8: Test the System
Before you backfill the hole, test your work. Turn the water back on at the main valve. Walk to your controller and manually start the zone where you just worked. Watch what happens.
The new sprinkler head should pop up smoothly and spray water in the pattern you set. Look for these signs of a good installation:
Water sprays evenly across the coverage area without dead spots. The head rotates smoothly if it’s a rotor type. No water leaks around the base connection. The head pops up to full height and retracts completely when the zone shuts off.
If you see leaks at the connection, shut the water off and tighten the head another quarter turn. Persistent leaks mean you need to remove the head, add fresh Teflon tape, and try again.
Watch the spray pattern carefully. Make fine adjustments to the arc and direction while the system runs. This shows you exactly where the water lands. You might need to tweak it a few times to get perfect coverage.
Step 9: Backfill and Clean Up
Everything works great? Time to fill in your hole. Use the soil you removed earlier. Add it back in layers, packing it down gently around the riser. Don’t dump all the dirt in at once—you’ll create air pockets that cause the head to sink later.
Firm up each layer with your hands or the back of your shovel. The soil should be snug around the fitting but not so tight that it stresses the riser. Fill to ground level, leaving the sprinkler head clear.
Replace any grass you removed. If you dug out sod in a clean piece, you can put it right back over the area. Water it in to help it re-establish roots. Otherwise, spread some grass seed over the bare spot and keep it moist for the next two weeks.
Clean your tools and put everything away. Wipe down your wrench and shovel to prevent rust. Store unused Teflon tape in a dry spot for next time.
Common Problems and Quick Fixes
Even with careful installation, you might run into issues. Here’s how to solve the most common problems:
Water pressure seems weak: Your nozzle might be partially clogged. Unscrew the nozzle from the top of the head and rinse it under water. Use a thin wire or toothpick to clear debris from the tiny holes. Mineral buildup clogs these holes over time.
The head doesn’t pop up fully: Check for dirt or grass blocking the riser. Dig down and make sure the head has room to extend. Sometimes the spring mechanism inside the head gets weak and needs replacing. Most manufacturers sell rebuild kits with new springs and seals.
Water shoots in the wrong direction: You probably need to realign the head. Twist the body while the system runs so you can see exactly where water lands. Some heads have a locking collar that you need to loosen before rotating.
The coverage isn’t uniform: Mismatched nozzles cause this problem. All sprinkler heads in one zone should have similar flow rates. Check that your new head matches the others in that zone. You might need a different nozzle with a lower or higher flow rate.
The head wobbles or tilts: The riser connection isn’t tight enough, or the soil around it is too loose. Turn off the water, tighten the connection, and pack soil more firmly around the base.
Maintenance Tips for Longer Sprinkler Head Life
Keep your irrigation system running smoothly with these simple maintenance tasks:
Trim grass around heads regularly. Grass grows over pop-up heads and blocks the spray pattern. Every few weeks, trim back any grass that creeps toward your sprinkler heads. Use a string trimmer carefully—hitting the head damages it.
Flush your lines twice a year. Remove the heads at the end of each zone and run water through the lines. This flushes out sand, dirt, and debris that accumulate inside pipes. Do this in spring before starting the system and in fall before winterizing.
Winterize in cold climates. Blow out your lines with compressed air before temperatures drop below freezing. Any water left in the system expands when it freezes, cracking pipes and heads. Hire a professional if you’re not comfortable doing this yourself.
Check for clogs monthly. Walk your yard when the system runs. Look for heads that aren’t popping up or spray patterns that look weak. Clean nozzles as soon as you notice reduced flow.
Mark your heads. Use small flags or stakes to show where sprinkler heads are located. This prevents you from driving over them with heavy equipment or accidentally hitting them while doing yard work.
When to Call a Professional
Most sprinkler head replacements are simple DIY jobs. But some situations call for expert help:
You find extensive pipe damage underground. Cracked or broken pipes need proper repair with the right fittings and cement. A pro has the tools and experience to do this correctly.
Your system has constant low pressure across all zones. This points to bigger problems like a leak in the main line or issues with your backflow preventer. These repairs require specialized knowledge.
You’re not sure what type of system you have. Older irrigation systems might use galvanized pipe instead of PVC. Working with metal pipes requires different tools and techniques.
Electrical problems with your controller or valves. If zones won’t turn on or the timer isn’t working, you might have wiring issues. Irrigation technicians can diagnose and fix electrical problems safely.
You need to replace multiple heads across your entire system. A professional can do this efficiently and make sure all zones have matched precipitation rates for the best coverage.
Choosing the Right Replacement Head
Not all sprinkler heads work the same way. Your yard might have different types in different zones. Here’s what you need to know:
Pop-up spray heads are the most common in residential systems. They’re perfect for smaller areas and tight spaces. Water sprays in a fixed pattern—full circle, half circle, or quarter circle. These work best for areas under 15 feet.
Rotor heads rotate back and forth, covering larger areas. They shoot water farther and use it more efficiently than spray heads. Rotors work great for big lawn areas and can cover up to 50 feet. They’re also better for slopes since water goes out slower.
Bubbler heads deliver water at ground level without any spray. Use these for watering trees, shrubs, and flower beds. They put water exactly where you want it without overspray.
Drip irrigation emitters aren’t technically sprinkler heads, but they connect to the same system. These deliver water drop by drop directly to plant roots. Super efficient for gardens and landscaping beds.
Buy the same type of head that was there before. Mixing different types in one zone creates problems with water distribution. All the heads in a zone should run at the same flow rate to water evenly.
Understanding Your Irrigation System Layout
Your yard likely has multiple zones that water different areas. Each zone has its own valve and runs independently. Knowing your system layout helps when you need to replace heads or make adjustments.
Walk your property while each zone runs. Notice which heads operate together—those are in the same zone. Different zones usually water distinct areas: front lawn, back lawn, side yard, flower beds, and so on.
Most residential systems have 3 to 8 zones. Larger properties might have more. Each zone should have similar sun exposure and plant types. Shady areas need less water than full-sun lawns. Grouping plants with similar water needs in the same zone saves water and keeps everything healthy.
Take photos or draw a simple map of your system. Mark where each head is located and which zone it belongs to. This makes future repairs much easier. Note the spray pattern and type of head at each location. Store this information with your home maintenance records.
Water Efficiency and Smart Watering
A properly working sprinkler head does more than just keep your grass green—it saves water and money. Broken or misaligned heads waste hundreds of gallons every time you water.
Check your coverage patterns regularly. Heads should overlap slightly so every spot gets water. Gaps in coverage create dry patches. Too much overlap wastes water by hitting the same area multiple times.
Run your system early in the morning, between 4 AM and 9 AM. Less water evaporates in cooler temperatures. Wind is usually calm at dawn, so water goes exactly where you aim it. Evening watering leads to fungus and disease because grass stays wet overnight.
Adjust your timer seasonally. Grass needs more water in hot summer months and less in spring and fall. Cut back watering when it rains. Many modern controllers have rain sensors that skip watering cycles automatically after storms.
Look into smart irrigation controllers if you’re ready to upgrade. These devices connect to weather data and adjust your watering schedule based on actual conditions. They learn your yard’s needs and can cut water use by 30% or more.
Final Thoughts
Replacing a sprinkler head is one of those home maintenance jobs that sounds harder than it actually is. With basic tools and about 30 minutes of work, you can fix broken heads and get your irrigation system running perfectly again.
The key steps are simple: shut off the water, dig carefully around the old head, remove it without damaging the riser, and install the new head with proper sealing. Take your time with adjustments to get the spray pattern exactly right. Test everything before you backfill, and you’ll avoid having to dig it up again.
Regular maintenance catches problems before they become expensive repairs. Walk your yard monthly when the sprinklers run. Look for broken heads, clogged nozzles, and poor coverage patterns. Fix small issues right away instead of waiting for them to get worse.
Your lawn depends on a well-maintained irrigation system. Every head needs to work properly for even coverage and healthy grass. Now you have the knowledge to keep your system in top shape. The next time you hear that crunch of a lawnmower hitting a sprinkler head, you’ll know exactly what to do.