How to Install an Irrigation System?
So you want a green, lush lawn without dragging a hose around every other day? Great news — you can install your own irrigation system, save money on watering, and keep your plants happy all season long. This guide walks you through the whole process from start to finish. No fancy tools. No prior experience needed.
In this article
Let’s get into it.
Why Install an Irrigation System in the First Place?
Think about how often you water your yard manually. It takes time. It wastes water. And half the time, you either over-water or under-water your plants.
A home irrigation system solves all of that. It delivers the right amount of water to the right spots at the right time. Your grass stays green. Your flower beds stay healthy. And you get your weekends back.
Here are a few solid reasons to go ahead with it:
- Saves water — drip irrigation and sprinkler systems use up to 50% less water than hand watering
- Saves time — set it, forget it, and let the timer do the work
- Better plant health — consistent moisture means stronger roots and fewer diseases
- Adds value to your property — a well-watered landscape boosts curb appeal
Once it’s in the ground, you’ll wonder why you waited so long.
Types of Irrigation Systems to Know About
Before you dig anything, you need to know what kind of system fits your yard.
1. In-Ground Sprinkler System
This is the most common type for lawns. Underground pipes connect to pop-up sprinkler heads. When the system runs, the heads pop up, spray water, then retract back into the ground.
Great for: large lawns, grass areas, open spaces.
2. Drip Irrigation System
Drip systems deliver water slowly, right at the root zone. Small emitters sit along flexible tubing. Water drips out drop by drop.
Great for: garden beds, flower borders, shrubs, vegetable gardens, and potted plants.
3. Soaker Hose System
A soaker hose is a porous tube that sweats water along its entire length. It’s simple, affordable, and easy to install.
Great for: raised beds, rows of vegetables, hedges.
4. Above-Ground Sprinkler System
These are basic sprinklers you attach to a garden hose. They sit above ground and spray water in a pattern.
Great for: renters, small yards, temporary setups.
For most homeowners doing a full install, an in-ground sprinkler system or drip system makes the most sense. This guide focuses on those two.
Tools and Materials You’ll Need
Get everything ready before you start. Nothing slows down a project like running back to the hardware store three times.
Tools:
- Trenching shovel or rented trencher machine
- Pipe cutter or hacksaw
- Measuring tape
- Flags or spray paint (for marking)
- Drill (for drip system clamps)
- Garden trowel
- Wire strippers (for wiring the timer)
Materials for In-Ground Sprinkler System:
- PVC pipes (usually ¾ inch or 1 inch diameter)
- PVC fittings (elbows, tees, couplings)
- Sprinkler heads (rotary, fixed, or pop-up)
- Backflow preventer
- Automatic timer or irrigation controller
- Valve box and zone valves
- Pipe glue (PVC cement) and primer
- Pipe thread tape (Teflon tape)
- Main shut-off valve
Materials for Drip Irrigation:
- Drip irrigation tubing (½ inch main line)
- Micro-tubing or emitter tubing (¼ inch)
- Drip emitters (1 GPH, 2 GPH depending on plant needs)
- Filter and pressure regulator
- Tubing stakes
- End caps or goof plugs
- Timer with drip setting
You can buy kits at any home improvement store. They often include most of what you need in one box.
Step 1: Plan Your Layout First
This step saves you a ton of headaches later. Grab a pencil and sketch your yard on paper. Note:
- Where your water source is (outdoor faucet or water main)
- Location of flower beds, lawn areas, trees, and shrubs
- Slopes, shaded areas, and sun-heavy spots
- Any obstacles like sidewalks, driveways, or utility lines
Call 811 before you dig. Seriously. In the US, this is a free service that marks underground utility lines so you don’t hit gas, electric, or cable. It’s the law in most states. Other countries have similar services — check before you start.
Divide your yard into zones. Each zone runs separately. Group plants with similar water needs together. For example:
- Zone 1: Lawn/grass
- Zone 2: Flower beds
- Zone 3: Vegetable garden
- Zone 4: Trees and shrubs
Each zone connects to its own valve. The controller tells each valve when to open and close.
Step 2: Check Your Water Pressure
Your home’s water pressure determines how many sprinkler heads you can run on one zone. Too many heads on one zone and the water pressure drops — your sprinklers barely dribble.
You need a water pressure gauge. Screw it onto an outdoor faucet, turn the water on fully, and read the pressure. Most homes sit between 40–80 PSI (pounds per square inch). Ideal sprinkler pressure is around 30–50 PSI after you account for losses.
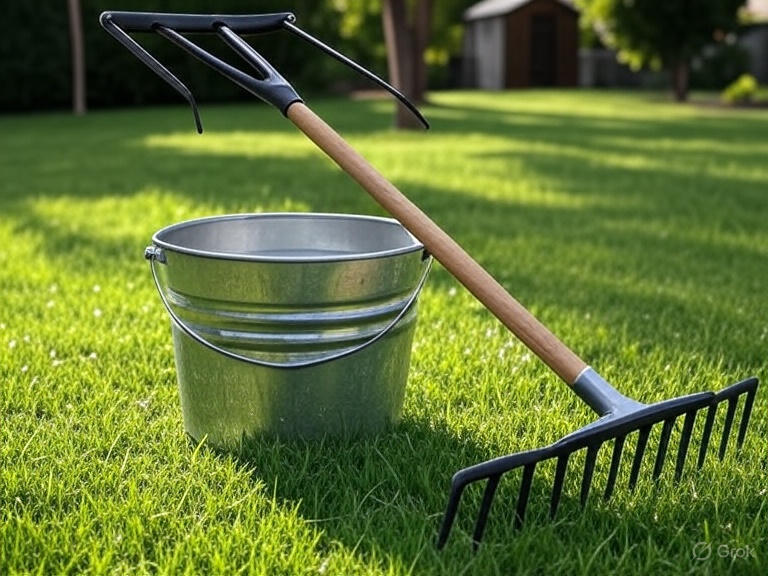
Also check your flow rate — how many gallons per minute (GPM) your faucet delivers. Plug the faucet into a bucket for 15 seconds and multiply the result by 4. That’s your GPM.
This tells you how many sprinkler heads or emitters you can run at once without losing pressure. Most sprinkler heads use about 1–3 GPM each. Do the math per zone.
Step 3: Connect to the Water Source
For an In-Ground System:
You’ll tap into your main water line or connect directly to an outdoor faucet. For a full in-ground system, most people connect to the main line just after the water meter. This requires shutting off your main water supply.
Here’s the basic process:
- Shut off the main water
- Cut into the supply pipe
- Install a tee fitting
- Add a backflow preventer (required by code in most areas — it stops irrigation water from flowing back into your drinking water)
- Install a pressure regulator if your pressure runs above 80 PSI
- Run the supply line to your valve manifold
The valve manifold is where all your zone valves sit together. Each valve controls one irrigation zone.
For a Drip System via Outdoor Faucet:
This is much simpler. Just connect a:
- Y-splitter (so you can still use the faucet)
- Timer
- Filter
- Pressure regulator
- Then your main drip tubing
All of these connect in line, right at the spigot. No digging into main lines needed.
Step 4: Trench the Ground (In-Ground Systems)
This is the heavy work. Trenching means digging narrow channels in the ground where your pipes will run.
You have two options:
Hand digging — Use a flat spade or trenching shovel. Slow, but works fine for small yards.
Renting a trencher — A trencher machine cuts clean, narrow trenches fast. Worth renting for yards over 500 square feet. Costs around $150–$250 per day.
Trench depth rules:
- Warm climates: 6–8 inches deep
- Cold climates (where ground freezes): 12 inches deep minimum
Keep your trenches as straight as possible. Mark them first with spray paint or flags. Follow your plan.
Dig out a slightly wider area where valves and fittings will sit. You need room to work with your hands.
Step 5: Lay the Pipes
Now you run your PVC pipes through the trenches.
For PVC pipe:
- Measure each run and cut pipe to length with a pipe cutter or hacksaw
- Dry-fit all pieces first (no glue yet) to make sure everything connects right
- Clean pipe ends with PVC primer
- Apply PVC cement to both the pipe end and the inside of the fitting
- Push them together firmly and hold for 30 seconds
- Let all connections cure for at least 2 hours before running water
Work from the water source outward. Install tee fittings where sprinkler heads will go.
Pro tip: Use flexible poly pipe instead of rigid PVC if you’re a beginner. It bends around curves easily, cuts with scissors, and connects with barbed fittings — no glue needed.
Step 6: Install the Sprinkler Heads or Drip Emitters
Sprinkler Heads:
Pop-up sprinkler heads screw directly onto a riser that connects to your pipe. Make sure the top of the head sits flush with or just slightly below the soil surface. When the system runs, they pop up above the grass. When it stops, they retract.
Types of heads:
- Fixed spray heads — spray a set pattern. Good for small areas.
- Rotor/rotary heads — rotate and cover larger areas. Good for big lawns.
- MP rotator heads — slow, multi-stream rotation. Excellent water efficiency.
Space heads so their spray patterns overlap slightly. This ensures full coverage with no dry spots.
Drip Emitters:
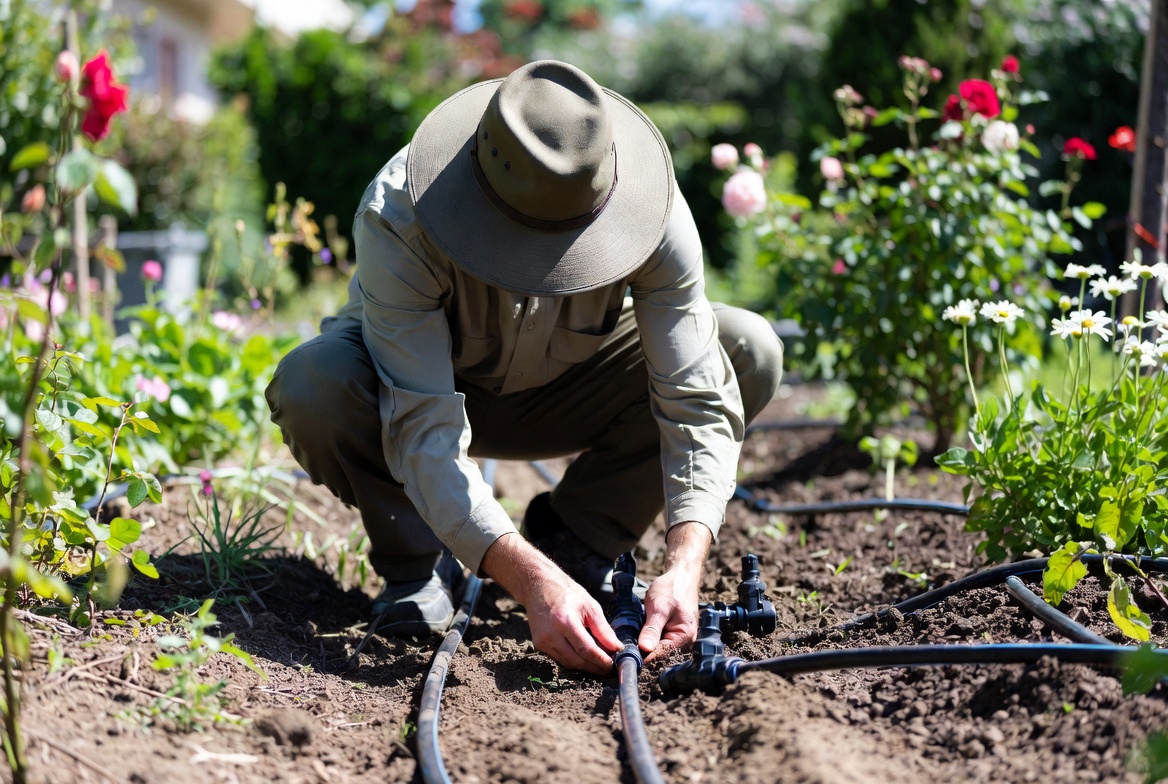
For drip systems, punch holes in your main tubing using a hole punch tool. Insert barbed fittings and connect ¼-inch micro-tubing. At the end of the micro-tube, insert a drip emitter directly near the plant’s root zone.
Secure tubing to the ground with stakes every 12–18 inches. Emitters come in different flow rates (0.5 GPH, 1 GPH, 2 GPH). Use higher flow rates for large shrubs and trees, lower rates for small plants.
Cap the end of each main tube with an end cap. This keeps pressure in the line.
Step 7: Install the Zone Valves
Zone valves are electric valves that open and close when the controller sends a signal.
Install them in a valve box buried at ground level. This keeps them accessible without being exposed to the elements. Valve boxes are plastic boxes with a removable lid.
Each valve has two wires — one connects to the controller, one connects to a common wire shared across all valves.
Wire connections:
- Use direct-bury wire rated for outdoor use
- Run the wire through the trenches alongside your pipes
- Connect valve wires to the controller terminals inside your home or garage
Follow the wiring diagram in your valve manual. It’s simpler than it sounds.
Step 8: Set Up the Irrigation Controller (Timer)
The controller is the brain of your system. It tells each zone when to turn on, how long to run, and how often.
You can use:
- Basic timer — manual programming, no Wi-Fi
- Smart irrigation controller — connects to Wi-Fi, adjusts watering based on weather, controllable via smartphone app
Smart controllers are worth the extra cost. They can save up to 30–50 gallons per day by skipping watering on rainy days.
Mount the controller indoors near a power outlet, or use a weatherproof outdoor model. Run the zone wires from the valves back to the controller. Each zone wire connects to a numbered terminal.
Program your schedule:
- Set which days each zone waters
- Set the start time
- Set the run time per zone (usually 10–20 minutes for sprinklers, 30–60 minutes for drip)
Step 9: Install the Backflow Preventer
This is critical. A backflow preventer stops contaminated water from flowing backwards into your household drinking water.
Most municipalities require one by code. Don’t skip it.
Common types:
- Atmospheric vacuum breaker (AVB) — basic protection, installed above ground near valves
- Pressure vacuum breaker (PVB) — better protection, sits above highest irrigation point
- Reduced pressure zone (RPZ) — highest level of protection, required in commercial settings
For most residential systems, a PVB works well. Install it on the supply line before the valves, at least 12 inches above the highest sprinkler head.
Step 10: Backfill the Trenches and Test the System
Before you cover anything up, test the whole system.
- Turn the water back on slowly
- Check every fitting for leaks
- Run each zone from the controller one at a time
- Watch the sprinklers pop up and spray
- Look for uneven coverage, misting (too much pressure), or heads pointing the wrong way
- Adjust sprinkler arc and range using the adjustment screw on top of each head
Fix any leaks now. Tighten connections. Replace any cracked fittings.
Once everything works properly, backfill the trenches. Push the soil back in, tamp it down gently, and cover with grass seed or mulch where needed.
Step 11: Fine-Tune Your Watering Schedule
A set-and-forget schedule sounds great, but you need to dial it in over the first few weeks.
Watering guidelines:
- Lawn/grass: 1–1.5 inches of water per week (including rain)
- Vegetable garden: 1–2 inches per week depending on temperature
- Flower beds: 1 inch per week
- Trees: deep watering once a week, longer duration
Watch your lawn. If you see brown patches, increase the run time or check coverage. If you see puddles or runoff, reduce run time or split into two shorter cycles.
Cycle and soak: Instead of one 20-minute run, set two 10-minute runs with a 30-minute break in between. Water soaks in better and reduces runoff, especially on slopes.
Common Mistakes to Avoid
Even experienced DIYers make these mistakes. Learn from them before you start.
Not calling 811 — You could hit a gas line. Always call before you dig.
Skipping the pressure check — Too much pressure makes sprinklers mist. Too little means weak coverage.
Mixing head types in one zone — Fixed spray heads and rotary heads have very different application rates. Mixing them means some areas get too much water while others stay dry.
Not overlapping spray patterns — If sprinkler coverage doesn’t overlap, you’ll get dry strips in your lawn.
Installing too deep or too shallow — Too deep and you can’t adjust or fix heads. Too shallow and a lawn mower will clip them.
No filter on drip lines — Debris clogs emitters fast. Always use a filter at the water source.
Winterizing Your Irrigation System
If you live in a cold climate, you must winterize your system before the first freeze. Water left in pipes expands when it freezes and cracks pipes and fittings. Repairs are expensive.
Here’s how to winterize:
- Shut off the water supply to the irrigation system
- Turn off the controller (or set it to “rain” or “off” mode)
- Open the manual drain valves if your system has them
- Use an air compressor to blow out the lines — connect it to the blow-out port and run each zone for 2–3 minutes at 50 PSI for PVC, or 25 PSI for poly pipe
- Repeat until no more water sprays from the heads
- Wrap above-ground backflow preventers with insulation foam
In spring, slowly reopen the water supply and check for any damage before running the full system.
Drip Irrigation Maintenance Tips
Drip systems are low maintenance, but they do need occasional attention.
- Flush the lines at the start of each season — remove end caps and let water run for a few minutes to flush out sediment
- Check emitters for clogs — a toothpick can clear a clogged emitter; replace if damaged
- Inspect tubing for cracks, splits, or pest damage (rodents sometimes chew through drip tubing)
- Clean the filter every few months — unscrew it, rinse with clean water, reinstall
A well-maintained drip system can last 10–15 years easily.
Cost Breakdown: What to Expect
Installation costs vary based on yard size and system type.
| System Type | DIY Cost | Professional Install |
|---|---|---|
| Drip system (small garden) | $50–$150 | $300–$600 |
| In-ground sprinklers (small yard) | $300–$700 | $1,500–$3,500 |
| In-ground sprinklers (large yard) | $700–$1,500 | $3,500–$8,000 |
| Smart controller upgrade | $80–$200 | $150–$300 |
DIY saves you 60–70% compared to hiring a contractor. The tools you buy can be reused for future repairs too.
Final Thoughts
Installing your own irrigation system is totally doable. Yes, it takes a weekend and some elbow grease. But once it’s in the ground, it runs itself.
You save time every single week. Your water bill drops. Your plants get consistent moisture. And your yard looks great without any extra effort from you.
Start small if you’re nervous. Put in a simple drip system for your garden beds first. Get the feel for it. Then tackle the in-ground sprinkler system for the lawn.
The key steps to remember:
- Plan your layout and zones first
- Call 811 before you dig
- Check water pressure and flow rate
- Install a backflow preventer
- Lay your pipes and connect your heads or emitters
- Wire and program your controller
- Test everything before you backfill
- Winterize if you live in a cold climate
Take it one step at a time, follow this guide, and you’ll have a fully working irrigation system up and running before you know it. Your grass will thank you.

Hi, I’m Mary, the founder of GardenCure.com. I’m passionate about creating healthy, beautiful gardens and well-kept lawns. I share practical experience and trusted advice on garden and lawn gear that truly works. With the support of my dedicated research team, our writers produce honest, in-depth reviews using reliable, authentic sources—helping you choose the right tools with confidence for your outdoor space.