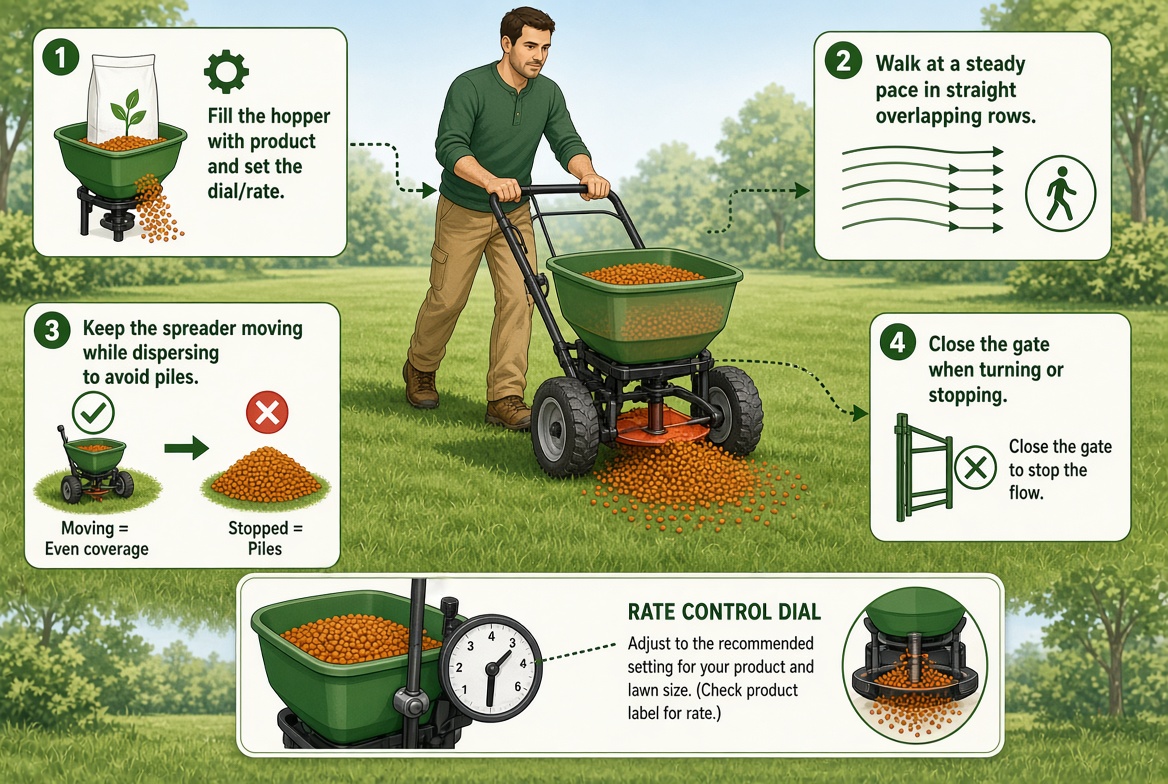
How to Use a Broadcast Spreader?
If you want a lawn that looks thick, green, and healthy, a broadcast spreader is one of the best tools you can own. It helps you spread seed, fertilizer, and other lawn products evenly across your yard without wasting time or money. But if you have never used one before, it can feel a little confusing at first. Don’t worry. This guide will walk you through everything step by step, using plain and simple words so you can follow along with ease.
In this article
By the end of this article, you will know how to set up your spreader, load it correctly, walk the right pattern, and clean it up after use. Let’s get started.
What Is a Broadcast Spreader?
A broadcast spreader is a tool that throws seed, fertilizer, or granular products out in a wide, fan-shaped pattern as you walk. It spins the material out from a small disc at the bottom, so it covers more ground in less time compared to a drop spreader, which only releases material directly below it.
Broadcast spreaders come in a few different styles:
- Push spreaders – These have wheels and you walk behind them, pushing as you go.
- Handheld spreaders – These are small, hand-crank tools that you carry and turn with your hand.
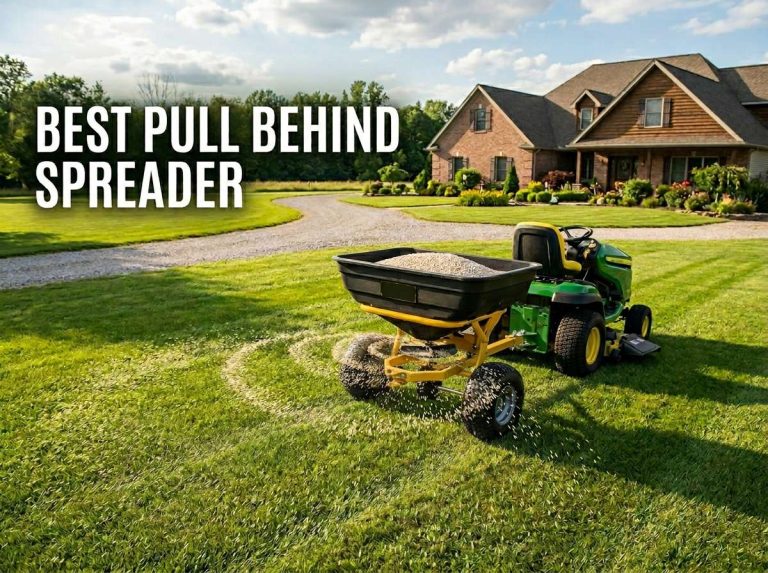
- Tow-behind spreaders – These attach to a lawn tractor or ATV and cover large areas quickly.
Each type works a bit differently, but the basic idea stays the same: you fill it with product, set the flow rate, and walk (or drive) in a pattern that covers your whole lawn evenly.
Why Use a Broadcast Spreader Instead of Spreading by Hand?
Some people try to spread fertilizer or seed by hand, tossing it out with their fingers. This might sound easy, but it almost never gives even results. You end up with patches that get too much product and other spots that get none at all. This causes uneven growth, burnt patches from too much fertilizer, or bare spots where nothing was applied.
A spreader solves this problem. It gives you control over how much product comes out and spreads it in a wide, even pattern. This means your lawn grows more evenly, and you also avoid wasting expensive fertilizer or seed by using too much in one area.
Step 1: Pick the Right Spreader for Your Yard
Before you even load anything into your spreader, think about the size of your yard. A small yard, maybe a quarter acre or less, works well with a handheld or small push spreader. A medium to large yard usually calls for a full-size push spreader. If you have a huge property, a tow-behind model attached to a mower or ATV will save you a lot of time and effort.
Also think about the type of lawn products you plan to use most often. Some spreaders handle fine granules better, while others work best with larger pellets. Check the spreader’s settings to see if it can handle the range of products you want to apply.
Step 2: Read the Product Label Carefully
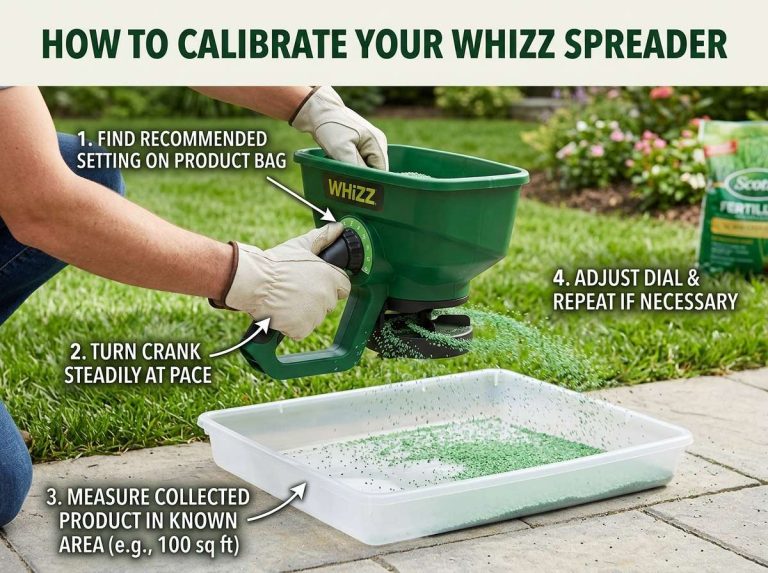
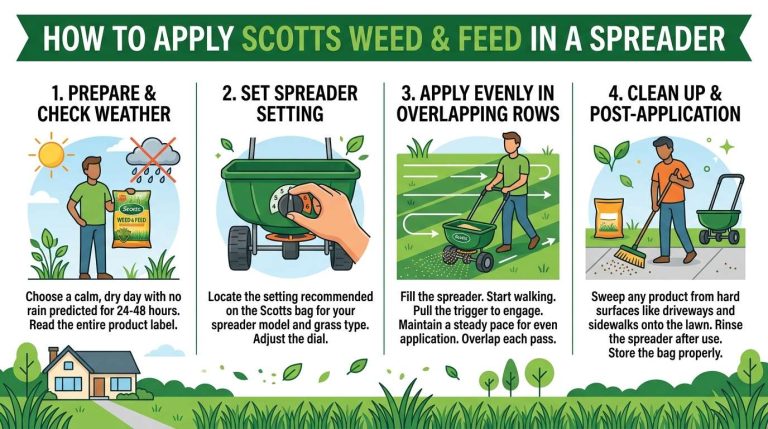
This step matters more than people think. Every bag of fertilizer, seed, or weed killer comes with a label that tells you the correct settings for different spreader brands. Most labels include a chart showing which number to set your spreader dial to, based on your spreader’s brand and model.
Skipping this step is one of the biggest mistakes beginners make. If you guess the setting instead of checking the label, you might end up applying way too much or too little product. Too much fertilizer can burn your grass and harm nearby plants. Too little means your lawn won’t get the results you’re hoping for.
Take a minute to find your spreader brand on the label’s chart, then note the correct number before moving forward.
Step 3: Fill the Hopper the Right Way
The hopper is the container on top of the spreader that holds your seed, fertilizer, or other product. Here’s how to fill it properly:
- Close the spreader’s flow gate first, so nothing spills out while you’re filling it.
- Place the spreader on a hard surface like a driveway or sidewalk, not directly on your grass. This way, if any product spills, it won’t create a burnt patch or a spot with extra seed.
- Pour the product into the hopper slowly, using a bag or scoop to avoid dust clouds or spills.
- Fill it only to the level suggested by the manufacturer. Overfilling can cause clogs or uneven flow.
Once it’s filled, double-check that the flow gate is still closed before you start walking.
Step 4: Set the Spreader to the Right Rate
Now it’s time to set the dial based on the number you found on the product label earlier. Most spreaders have a numbered dial near the handle that controls how much product falls out with each pass.
If your spreader brand isn’t listed on the label, don’t panic. Many labels include a general guide based on spreader type (broadcast vs. drop), and most manufacturers also offer settings charts on their websites. A quick search using your spreader’s model name plus the product name should give you the answer.
It helps to start on a slightly lower setting your first time using a new product. You can always go over your lawn a second time with a lighter pass if needed, but it’s much harder to fix a lawn that got too much fertilizer at once.
Step 5: Walk the Right Pattern
This part is where a lot of people get confused, but it’s actually simple once you understand the basic idea.
Walk at a Steady Pace
Your walking speed affects how much product gets released per square foot. Walk too fast, and you might not put down enough. Walk too slow, and you risk applying too much. Aim for a steady, normal walking pace, about the same speed you’d use taking a regular stroll.
Use the Edge-First Method
Start by walking around the outer edges of your lawn first, along the border, driveway, sidewalks, and garden beds. This creates a clear boundary. After that, fill in the middle section using straight, overlapping rows.
Overlap Your Passes Slightly
When you walk back and forth across your lawn, make sure each pass slightly overlaps the one before it. Most spreaders throw material out about 2 to 4 feet on each side, depending on the model and setting. If you don’t overlap a little, you’ll end up with thin stripes across your lawn where the spreader missed. On the other hand, overlapping too much wastes product and can lead to overly thick spots.
A good trick is to picture your lawn split into rows the width of your spreader’s throw pattern, then walk each row so it just touches the edge of the row before it.
Turn Off the Flow at Corners and Turns
When you’re about to turn around at the end of a row, close the flow gate first. This stops the spreader from dumping extra product in one spot while you turn. Once you’re lined up straight again, open the gate and keep walking.
This small habit prevents those dark green or burnt patches you sometimes see at the corners of lawns, caused by too much fertilizer piling up in one place.
Step 6: Handle Tricky Areas Carefully
Not every part of your yard is a simple rectangle. Curved edges, tree circles, flower beds, and narrow strips near fences all need a bit of extra care.
For these areas:
- Slow your pace slightly to control the flow better.
- Consider using a handheld spreader for very small or oddly shaped spots.
- Keep the spreader a few feet away from garden beds, ponds, or vegetable patches unless the product label says it’s safe near those areas.
- Watch for hard surfaces like sidewalks or driveways nearby, and sweep any stray granules back onto the grass after you’re done. Leaving fertilizer on pavement can wash into storm drains when it rains, which isn’t good for local waterways.
Step 7: Water the Lawn (If the Product Calls for It)
Many fertilizers and seed products need water right after application to work properly. Check the label to see if watering is recommended. If so, use a hose or sprinkler system to give the lawn a light, even watering session soon after you finish spreading.
For seed especially, keeping the soil moist during the first couple of weeks helps it germinate and take root. Dry soil can cause new seed to fail before it even has a chance to sprout.
Step 8: Clean Your Spreader After Every Use
This step gets skipped a lot, but it really shouldn’t be. Fertilizer and other lawn chemicals can be corrosive over time, meaning they slowly eat away at metal parts if left inside the hopper.
Here’s a simple cleaning routine:
- Empty out any leftover product back into its original bag, if possible, so nothing goes to waste.
- Rinse the hopper and moving parts with a hose to remove dust and residue.
- Dry the spreader with a cloth or let it air dry in a shaded spot before storing it.
- Check the wheels, gears, and flow gate for any buildup that could cause clogs next time.
- Store the spreader in a dry place, away from direct sun and rain, to keep it working well for years.
A little maintenance after each use goes a long way toward making your spreader last much longer.
Common Mistakes to Avoid
Even with the best intentions, beginners often run into a few common issues. Here are some to watch for:
- Skipping the label instructions – Always check the correct setting instead of guessing.
- Filling the hopper on the grass – This causes spill damage right where you fill it.
- Walking too fast or too slow – Try to keep a steady, even pace.
- Forgetting to close the gate during turns – This leads to burnt spots at corners.
- Not overlapping passes – This causes stripes across the lawn.
- Ignoring wind conditions – On a windy day, lightweight granules can blow off course, so try to spread on calmer days when possible.
- Skipping cleanup – Leftover chemicals can damage your spreader’s parts over time.
Keeping these tips in mind will help your lawn care routine go much smoother.
Tips for Getting the Best Results
If you want your lawn to really thrive, here are a few extra tips worth trying:
- Spread in two directions. Instead of only walking north to south, do a second pass going east to west. This crisscross pattern, sometimes called a double application, helps fill in any gaps missed during the first pass. Just remember to cut your rate in half for each direction so you don’t apply double the amount overall.
- Check the weather forecast first. Rain right after applying fertilizer can wash it away before it has a chance to soak in. Try to apply products on a calm day with little wind and no heavy rain expected for at least a day or two.
- Apply during the right season for your grass type. Cool-season grasses and warm-season grasses each have different growing periods, so timing your application to match your grass type’s active growth phase gives better results.
- Test your soil first. A basic soil test can tell you exactly what nutrients your lawn needs, so you’re not guessing which fertilizer type works best.
- Measure your yard. Knowing the exact square footage of your lawn helps you buy the right amount of product and avoid running out halfway through.
Final Thoughts
Using a broadcast spreader doesn’t have to feel complicated. Once you get the hang of filling it properly, setting the right rate, and walking a steady overlapping pattern, it becomes second nature pretty quickly. The key steps to remember are simple: read the label, fill on a hard surface, set the correct rate, walk at an even pace with slight overlap, close the gate during turns, water if needed, and clean the spreader afterward.
With a little practice, you’ll be able to give your lawn even, healthy coverage every time you spread seed or fertilizer. Over time, this leads to thicker grass, fewer bare patches, and a yard that looks great from the sidewalk all the way to the back fence. Grab your spreader, check that label, and give your lawn the care it deserves.

Hi, I’m Mary, the founder of GardenCure.com. I’m passionate about creating healthy, beautiful gardens and well-kept lawns. I share practical experience and trusted advice on garden and lawn gear that truly works. With the support of my dedicated research team, our writers produce honest, in-depth reviews using reliable, authentic sources—helping you choose the right tools with confidence for your outdoor space.