How To Adjust Pop Up Sprinkler Heads
Pop-up sprinkler systems are a common way to keep lawns hydrated and healthy. Learning how to adjust pop up sprinkler heads helps you ensure that water hits the grass instead of your driveway or sidewalk. This guide explains the basic mechanics of these devices and provides clear steps for tuning your system. You will learn how to modify spray patterns and distance to get the most efficient results from your irrigation setup.
In this article
Key Takeaways
- Adjusting sprinkler heads prevents water waste and ensures uniform coverage.
- Most nozzles feature a small screw on top for distance control and a ring for arc adjustment.
- Regular inspection of your system helps identify clogged or misaligned heads quickly.
- Simple hand tools are usually sufficient for most minor irrigation adjustments.
How Pop-Up Sprinkler Systems Work
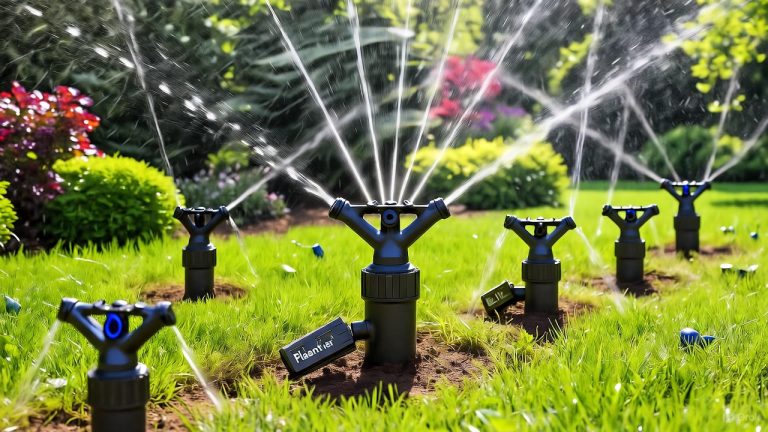
Pop-up sprinklers remain hidden below the soil surface when they are not in use. When the irrigation timer activates the water pressure, the internal piston rises to push the nozzle above the grass level. Once the head is fully extended, the water flows through the nozzle to create a specific spray pattern. These devices rely on water pressure to maintain their height and spray radius during the watering cycle. If the pressure is too low, the heads may not rise high enough to clear the grass. If the pressure is too high, the water might mist or drift away from the target area. Proper adjustments ensure the system operates within its design limits.
Tools You Need for Sprinkler Adjustments
You do not need a complex workshop to maintain or tune your sprinkler heads. A small flat-head screwdriver is the most common tool required for most modern irrigation components. Some brands include a specific adjustment key made of plastic or metal. These keys often have a specialized shape that fits perfectly into the adjustment slots on the nozzle or the riser. A pair of pliers can sometimes assist with gripping a stuck head, though you should use them carefully to avoid damaging the plastic casing. A soft brush is also useful for cleaning debris from around the base of the sprinkler.
Adjusting the Spray Distance and Radius
Sprinkler heads typically offer two main ways to control the water flow. You can change the distance the water travels and the angle of the spray, known as the arc. The distance control is usually a small screw located on top of the nozzle. The arc adjustment usually involves a rotating ring or a collar found just below the nozzle head.
Changing the Nozzle Arc
The arc determines how much of a circle the sprinkler covers. Some heads are fixed at 90, 180, or 360 degrees, while others are fully adjustable to meet specific needs. To adjust the arc, you typically hold the base of the sprinkler nozzle steady. Then, you turn the adjustment ring to increase or decrease the degree of the spray. Many heads feature a small arrow or indicator on the top to show where the spray begins. You can align this marker with the edge of your lawn to ensure the water starts exactly where you want it.
Modifying the Spray Distance
If water is hitting the sidewalk, you need to reduce the radius of the spray. Locate the small screw on the top of the nozzle head. Turning this screw clockwise restricts the flow of water and shortens the spray distance. Turning it counter-clockwise opens the passage to allow the water to travel further. Make small turns with your screwdriver, about a quarter-turn at a time. Run the sprinkler briefly to see how the change affects the coverage before making further adjustments.
Troubleshooting Common Sprinkler Issues
Even well-maintained systems experience small problems over time. Recognizing these signs helps you address issues before they lead to dry patches or wasted water. If you notice a head that does not rise or sprays in a strange direction, check for physical obstructions. Small rocks or soil often get lodged in the nozzle during the retraction process. Look for signs of leaks around the base of the sprinkler head. A damp spot that stays wet long after the system turns off often indicates a loose fitting or a cracked housing. Check the spray pattern for signs of wind drift or obstacles like tall grass. Sometimes, the grass grows over the head and blocks the water flow, preventing it from reaching the intended area. Inspect the filter screen if your system uses one. These small mesh screens prevent debris from entering the internal parts of the sprinkler.
Fixing Clogged Sprinkler Nozzles
A clogged nozzle often results in a weak spray or a distorted pattern. To fix this, you can unscrew the top of the nozzle while the water is off. Rinse the nozzle under clean water to remove any sand, silt, or debris. If the clog is stubborn, use a thin piece of wire to gently poke through the spray opening. Replace the nozzle back onto the riser and tighten it by hand. Avoid over-tightening, as the plastic threads can strip easily. If the spray remains weak after cleaning, check the nozzle for mineral buildup. Hard water deposits can restrict flow through the tiny openings of the nozzle. You might need to soak the nozzle in a mild vinegar solution to dissolve these minerals. Rinse it thoroughly with fresh water before reinstalling it on the riser. Test the flow by running that specific zone for a few seconds. If the spray pattern remains irregular, the nozzle might need a full replacement.
Addressing Uneven Water Coverage
Uneven coverage often happens when heads are tilted or sunken into the soil. If a head sits too low, the spray hits the edge of the grass blade instead of reaching the target area. You may need to dig carefully around the sprinkler body to straighten it. Add a bit of soil or gravel underneath the housing to raise it to the proper level. Check that all heads are vertical and perpendicular to the ground. A level surface ensures that the water distributes evenly across the entire intended zone. Observe the system while it runs to identify gaps in coverage. If one head fails to reach the next one, you might have a spacing issue that requires a nozzle with a longer throw. Ensure that the pressure remains consistent across the zone. If the last head in a line has significantly less pressure than the first, you may have a leak or a blockage in the lateral pipe. Consider the layout of your flower beds and walkways. A head that sprays onto concrete creates waste and can contribute to slippery surfaces.
Frequently Asked Questions
How do I know if my sprinkler head needs adjustment?
You should inspect your system if you notice dry patches or water pooling on hard surfaces. If the spray does not reach the intended area or hits the house, the head requires a simple tuning. Look for brown grass in areas where the spray should overlap. This often signals that a head has rotated out of position or is blocked by debris.
Can I change the spray pattern of any sprinkler head?
Most adjustable nozzles allow you to change the arc and distance easily. However, some fixed-pattern nozzles are designed for specific areas and do not offer adjustment options. Check the top of the nozzle for a small screw. This component usually controls the radius of the spray and allows for fine-tuning the reach.
What should I do if the sprinkler head won’t pop up?
Check the base for dirt or debris that might be blocking the riser. If the head remains stuck, the internal spring might be damaged, or the water pressure in that zone may be too low. Sometimes, the seal around the riser becomes stiff. Applying a small amount of silicone-based lubricant can help the head move smoothly again.
Do I need to turn off the water before making adjustments?
It is safer to turn the water off to avoid getting sprayed during the process. Some adjustments can be made while the system is running, but you must be careful to avoid the spray path. Turning off the zone at the controller prevents accidental activation. This allows you to work without the risk of sudden water pressure changes.
How often should I check my sprinkler head settings?
A quick visual check every few months is usually enough to keep things running well. Perform a more thorough inspection at the start of each season to ensure all heads are clear and properly aimed. Monitor the system after any landscaping work or lawn aeration. Soil movement can easily shift the alignment of the heads.
Conclusion
Adjusting your pop-up sprinkler heads is a straightforward task that helps you maintain a healthy lawn. By learning how to control the spray arc and distance, you can ensure that water goes exactly where it is needed most. Regular maintenance and small tweaks prevent common issues like clogs and uneven coverage. With a simple screwdriver and a bit of patience, you can manage your irrigation system effectively. Keep these steps in mind to save water and keep your landscape looking its best. Consistent attention to your sprinkler heads will provide long-term benefits for your lawn. Follow the manufacturer guidelines for your specific model when making repairs. Proper care extends the life of your components and reduces the need for costly professional service.

Hi, I’m Mary, the founder of GardenCure.com. I’m passionate about creating healthy, beautiful gardens and well-kept lawns. I share practical experience and trusted advice on garden and lawn gear that truly works. With the support of my dedicated research team, our writers produce honest, in-depth reviews using reliable, authentic sources—helping you choose the right tools with confidence for your outdoor space.