How to Change a Tire on a Lawn Mower?
If you’ve ever pushed your lawn mower across the yard and felt a flat tire dragging beneath you, you know how frustrating that can be. The good news? Changing a mower tire is not rocket science. With the right tools and a little patience, you can get back to mowing in no time.
In this article
This guide walks you through every single step. Whether you’re a total beginner or just need a refresher, you’ll be able to swap out that damaged tire all by yourself.
Why Your Lawn Mower Tire Goes Flat
Before we jump into the fix, let’s talk about why tires fail in the first place. Knowing the cause helps you prevent future problems.
Common reasons for flat lawn mower tires:
- Sharp objects – Nails, rocks, and sticks puncture the rubber
- Wear and tear – Over time, rubber gets thin and cracks form
- Under-inflation – Driving on soft tires damages the sidewalls
- Heavy use – Mowing thick grass or rough terrain wears tires faster
- Dry rot – Tires left unused crack and deteriorate
- Overloading – Running equipment on the mower adds extra weight
Most folks don’t think about their mower tires until something goes wrong. But like car tires, lawn mower tires need basic care.
Tools You’ll Need
Gather these items before you start. Having everything ready saves time and frustration.
Essential tools:
- Socket wrench set or adjustable wrench
- Jack or jack stands (lawn mower jacks work great)
- Flathead screwdriver
- Tire lever or pry bar
- New tire (if replacing) or inner tube (if repairing)
- Rubber mallet (optional but helpful)
- Work gloves
- Air pump or tire pump with pressure gauge
Nice to have:
- Tire repair patches
- Sealant for tubeless tires
- Clean rags or towels
- Bucket of soapy water
You don’t need anything fancy. Most people have half these items sitting in a garage already.
Step 1: Prep Your Mower for Tire Work
Safety comes first. A mower on the move can hurt you badly. Let’s make sure yours is secure before you touch those tires.
Here’s what you do:
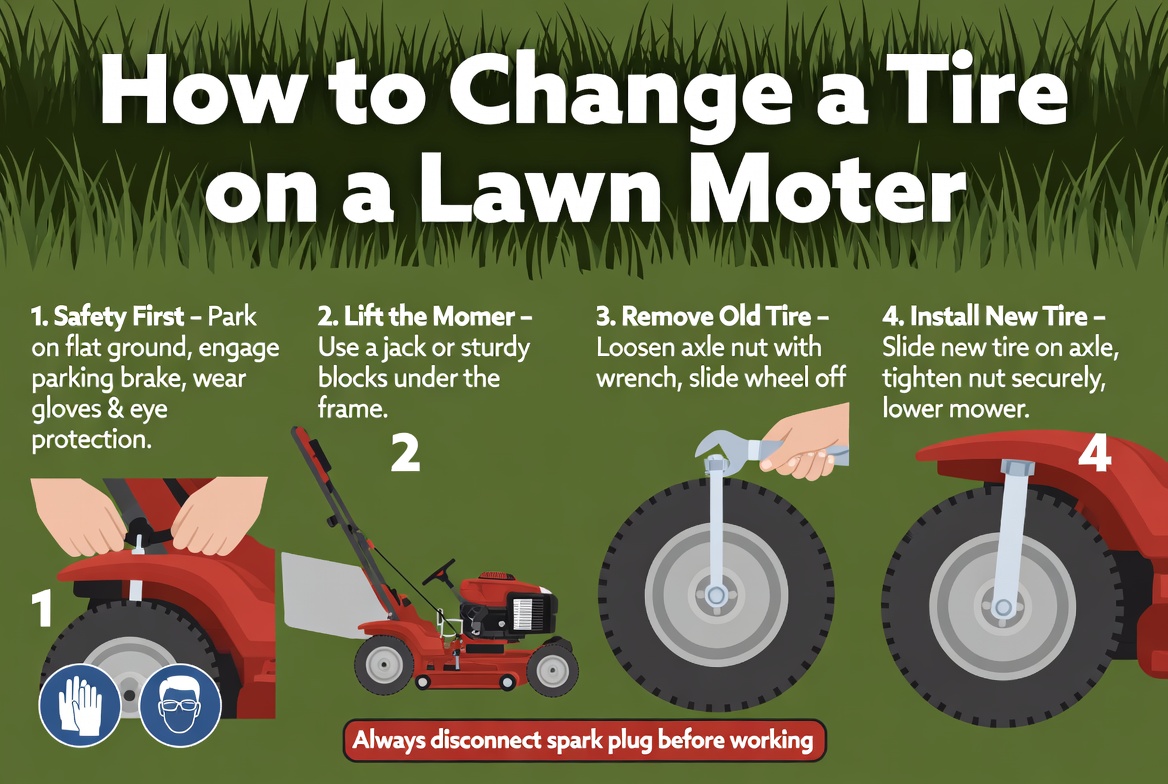
Start by parking your mower on flat, level ground. Choose a hard surface like concrete or asphalt, not dirt or grass. Soft ground lets the mower sink, which makes tire removal harder.
Turn off the engine and let it cool down completely. Wait at least thirty minutes if you just mowed. Hot metal burns, and you don’t need that pain.
Locate the fuel valve or turn off the fuel supply. This prevents gas from leaking everywhere while you work. Look for a small lever or switch near the fuel tank.
Remove the spark plug wire by twisting it gently and pulling. This stops the engine from starting accidentally while you’re under it.
Now engage the parking brake if your mower has one. This keeps the mower from rolling.
Step 2: Lift the Mower Safely
This step keeps your fingers and toes out of harm’s way. Never skip it.
You’ll use a jack to lift the wheel off the ground. Place the jack on firm ground directly under the frame, never on the tire itself.
If you don’t have a mower jack, a car jack works fine. Just be careful to support the frame properly. Look for reinforced metal spots near the axle – these are your safe lifting points.
Pump the jack slowly. Watch the tire come up, but don’t lift it too high. You just need enough space to remove the wheel and bolt.
Once the tire is off the ground, place jack stands or blocks under the frame for extra safety. Never rely on just the jack. Jacks can fail, and you don’t want a mower falling on you.
Test the setup by pushing gently on the mower. It shouldn’t move or shift. If it does, lower it and adjust the jack position.
Step 3: Remove the Lug Nuts
Now for the mechanical work. This is where it gets fun.
Look at the wheel attached to the tire. You’ll see between three and six bolts holding it tight. These are lug nuts.
Grab your socket wrench and fit it over the first lug nut. Turn it counterclockwise – that’s to the left. Don’t crank hard yet. Give it a gentle spin first.
Some nuts are tight, especially on rear wheels that take more load. Use steady pressure rather than sudden force. If one won’t budge, spray it with penetrating oil and wait five minutes.
After all the nuts spin freely, loosen them completely but leave them in place until the wheel is ready to come off. This prevents the wheel from spinning while you work.
When you’re ready, remove each nut and place them in a safe spot. I use a small cup or container so they don’t roll under the mower.
Step 4: Remove the Wheel and Tire
The moment of truth. This is where the old tire comes off.
Slide the wheel toward you gently. It should come free without much resistance. If it sticks, rock it side to side while pulling. Stubborn wheels sometimes need a little persuasion.
Lay the wheel flat on the ground once it’s free. The tire is still on the rim at this point – they’re not separate yet.
Now you need to separate the tire from the wheel. This sounds scary but it’s straightforward.
Two methods exist:
Method one: Tire lever or pry bar
A tire lever is a flat metal tool made specifically for this job. Insert the narrow end between the tire and the rim. Push down gently and the tire begins to lift off.
Work your way around the wheel. Don’t force one spot too hard – you could break the rim. Instead, lift a little here, move six inches, lift a little there.
Once you’ve broken the tire loose all around, lift it off the rim. Some tires slip off easy. Others take patience and repeated prying.
Method two: Soap and air
Fill a bucket with soapy water. Paint the entire edge where the tire meets the rim. The soap acts as lubricant.
Now pump the rim with an air pump. The soap helps the tire slip off the edge. This method works especially well for stubborn tires.
Step 5: Inspect the Wheel Rim
Before you install a new tire, check the condition of the rim. A damaged rim ruins a new tire fast.
Look for these problems:
- Rust or corrosion – Clean it off with a wire brush
- Bent edges – These prevent good tire seating
- Cracks – A cracked rim needs replacement, not just a new tire
- Dirt and debris – Wipe it clean with a rag
Spend a few minutes here. A clean rim makes everything that comes next easier.
If the rim is rusty, wire brush the rust off completely. If it’s bent, take the rim to a tire shop – they can straighten most small bends.
Step 6: Choose Your Replacement Option
You have two choices: repair the old tire or get a brand-new one. The right choice depends on the damage.
Repair an existing tire:
If the puncture is small (less than quarter-inch) and in the tread area, you can patch it. Inner tube repairs work great for lawn mower tires.
Buy a patch kit from any auto parts store. They cost five to ten dollars and include patches, glue, and sandpaper.
Follow the kit instructions. Sand the area around the puncture, apply glue, press the patch down, and let it cure. Once dry, reinstall the tire.
This works fine if you catch the problem early. Most mower owners prefer this quick fix.
Buy a new tire:
If the damage is large or the tire is old and cracked, buy a replacement. New lawn mower tires cost anywhere from thirty to seventy dollars depending on size and quality.
Know your tire size before shopping. You’ll find it written on the side of the old tire in a format like “11×4.00-4” or similar.
Take a photo of the old tire and show it to the tire shop. They’ll match you with the right replacement.
Step 7: Install the New or Repaired Tire
Getting the tire back on the rim takes patience. Rushing leads to pinched tubes and ruined tires.
Here’s the careful process:
Start with a clean rim and tire. Wipe both with a rag to remove dust and dirt.
Apply a thin layer of soapy water to the tire edge and the rim. This lubrication is your friend.
Begin working the tire onto the rim by hand. Start opposite the valve stem and work your way around.
Push the bead of the tire (the edge that sits on the rim) slowly onto the metal. Use your palms, not your fingers – this protects them from pinching.
As you go around, you’ll reach a point where the tire gets really tight. This is normal. Keep pushing steady.
When you can’t push anymore, use a tire lever if needed. Insert it gently and pry the tire edge onto the rim bit by bit. Keep the soap applied – reapply if it dries out.
Once the tire sits fully on the rim, step back and check it. The bead should be even all around with no bulges or gaps.
Now inflate slowly. Start at low pressure and check the tire alignment as pressure builds. Make sure both sides seat evenly against the rim.
Inflate to the recommended pressure listed on the tire sidewall. Don’t overinflate – this causes the tire to bulge and sit wrong.
Step 8: Reinstall the Wheel on the Mower
The wheel is back together. Now bolt it onto the mower frame.
Align the wheel with the axle. The bolt holes need to match up perfectly. You might need to wiggle the wheel a bit to line them up.
Insert the lug nuts by hand first. This keeps them from cross-threading. Once they’re hand-tight, use the socket wrench to tighten them.
Tighten in a star or cross pattern. If you have four bolts, tighten the top, then bottom, then left, then right. This spreads the pressure evenly.
Tighten firmly but not crazy tight. You want them snug, not stripped. If you hear the bolt crack or feel extreme resistance, you’ve gone too far.
Step 9: Lower the Mower
Now comes the relief of lowering it back down.
Remove the jack stands or blocks first. Make sure they’re clear so they don’t get caught under the frame.
Slowly lower the jack. Watch the mower settle onto all four tires.
Once all weight is on the tires, give the wheel a spin with your hand. It should turn freely with no binding or rubbing sounds.
Step 10: Inflate to Proper Pressure
Check your mower manual for the correct tire pressure. It’s usually printed somewhere on the frame or on the tires themselves.
Most lawn mower tires run between 8 and 15 PSI. Don’t guess – look it up.
Connect your tire pump and check the pressure gauge. Add or release air until you hit the target number.
Proper pressure matters more than people think. Too soft and the tire drags and wears fast. Too hard and the mower rides rough and the tire fails early.
Feel the tire with your hand. It should feel firm but not rock hard like a car tire.
Step 11: Test Your Work
Time to make sure everything works right.
Reconnect the spark plug wire. Push it on firmly until it clicks.
Start the mower without actually mowing. Let it idle for a minute. Listen for any strange noises from the new tire.
Push it forward and backward slowly in your driveway. Feel how the mower handles. Does it pull to one side? That means tire pressure is off between wheels.
Walk beside it and watch the new tire. It should spin smoothly without wobbling or hitting anything.
If everything looks good, you’re done. If something feels off, stop and check it before mowing.
Special Tips for Different Mower Types
Not all lawn mowers are the same. Here are tips for specific types.
Riding mowers:
Riding mowers have bigger tires and more weight. You’ll definitely need a proper jack and jack stands. Never use a small scissor jack.
The process is the same, but the tires are larger and heavier. Take your time and don’t rush.
Zero turn mowers:
These mowers are heavier and more complex. Some have different tire pressures on left and right sides for turning.
Check your manual before changing anything. Write down the original pressures before you jack up the mower.
Rotary mowers:
Smaller push mowers sometimes have quick-release wheels. These pop off without tools.
Find the quick-release lever on the side. Pull or turn it, and the wheel comes free. Reinstall by reversing the process.
Reel mowers:
Reel mowers have smaller wheels and lighter frames. You might not even need a full jack.
The same basic steps apply but everything is smaller and lighter. Be gentle because small parts damage easily.
Common Mistakes to Avoid
Learn from others’ slip-ups instead of making them yourself.
Mistake 1: Over-tightening lug nuts
Threads strip easily on lawn mower axles. Tighten firmly but don’t crank with all your strength.
Mistake 2: Inflating too high
More pressure doesn’t mean better. It just makes the mower bounce and damages tires faster.
Mistake 3: Skipping the jack stands
Jacks fail. Don’t work under a mower supported only by a jack. That’s how people get seriously hurt.
Mistake 4: Not cleaning the rim
Dirt between the tire and rim creates wobbles and bad seating. Take two minutes to clean it.
Mistake 5: Installing the tire backwards
Some tires have a specific direction. Check for arrows on the sidewall before installing.
Mistake 6: Forgetting to remove the spark plug wire
An accidental start while your hands are near moving parts causes bad injuries.
Mistake 7: Lifting too high
Higher isn’t safer. Lift just enough to remove the wheel. Extra height makes the mower less stable.
Maintenance Tips to Prevent Future Flats
Fixing tires is easy. Preventing them is easier.
Keep tires properly inflated:
Check pressure once a month during mowing season. Under-inflated tires fail fastest.
Inspect regularly:
Spend thirty seconds each time you mow looking at the tires. Spot small problems before they become big ones.
Clean the yard:
Pick up sticks, rocks, and metal before mowing. These are the main tire killers.
Rotate tires:
Moving tires front to back evens out wear. This extends tire life significantly.
Cover when storing:
During off-season, cover the mower or park it where the sun doesn’t cook the tires. UV light breaks down rubber.
Avoid obstacles:
Don’t run over curbs, rocks, or broken concrete. These puncture and bend tires immediately.
Use the right tire for the job:
All-terrain tires handle rough ground better than standard tires.
When to Call a Professional
Most tire changes are DIY-friendly. But sometimes you need a shop.
Get professional help when:
- The rim is bent and won’t hold air
- You’re not confident with the jack
- The tire won’t come off after reasonable effort
- The mower is very heavy or unusual
- You lack proper tools
There’s no shame in asking for help. A tire shop can do the job in minutes for thirty to fifty dollars in labor. That’s worth it if you’re uncomfortable working on it yourself.
Final Thoughts
Changing a lawn mower tire is a basic skill that saves money and keeps your mower running. The first time takes an hour. The second time takes thirty minutes. After that, you’ll do it in your sleep.
You don’t need special talents or expensive tools. Just take your time, follow these steps, and stay safe. Before you know it, that flat tire will be history and you’ll be back to mowing a beautiful lawn.
Remember: proper preparation and patience matter more than speed. Rushing leads to mistakes. Mistakes lead to frustration. Take the steps one at a time, and you’ll be done before lunch.
Now get out there and change that tire. You’ve got this.

Hi, I’m Mary, the founder of GardenCure.com. I’m passionate about creating healthy, beautiful gardens and well-kept lawns. I share practical experience and trusted advice on garden and lawn gear that truly works. With the support of my dedicated research team, our writers produce honest, in-depth reviews using reliable, authentic sources—helping you choose the right tools with confidence for your outdoor space.