How To Care For Daylilies
Daylilies are one of the easiest flowering perennials to grow. They return year after year, handle a range of conditions and produce bright blooms over a long season. Learning how to care for daylilies is mostly about getting the basics right: sunlight, drainage, water and a little feeding.
This guide explains what daylilies need, from planting to dividing clumps and handling common problems. It is written for beginners with no prior knowledge. Each section builds on the one before it, so you can follow along step by step.
Key Takeaways
- Daylilies prefer full sun or light shade and soil that drains well.
- Water deeply and regularly, especially during dry spells and bud formation.
- Feed lightly in spring, and mulch to protect roots and hold moisture.
- Divide overcrowded clumps every few years to keep plants blooming well.
- Watch for thrips, aphids and leaf problems, and act early when you see them.
Introduction to Daylily Care
Daylily care is simple once you know the routine. Most of the work happens at planting time and during the growing season. After that, the plants need far less attention than many other flowers.
What Are Daylilies and Why Grow Them?
Daylily Basics for New Gardeners
Daylilies belong to the genus Hemerocallis. Despite the name, they are not true lilies. Each flower lasts only one day, but a single plant produces many buds, so the display continues for weeks.
Plants grow from fleshy roots and form clumps of long, strap-like leaves. They are hardy perennials, which means they come back each year from the same roots. Gardeners often choose them for low maintenance and reliable color.
Common Daylily Types and Bloom Habits
Daylilies are grouped by when they bloom. Early bloomers open in late spring, midseason types flower in summer, and late bloomers keep going into late summer. Some varieties are evergreen in mild climates, while others are dormant in winter.
Flower size and color also vary widely. Some blooms are small and delicate, while others are large and ruffled. Picking a mix of bloom times can extend the season in your garden.
Where and When to Plant Daylilies
Picking a Sunny Spot with Good Drainage
Daylilies bloom best in full sun, which generally means six or more hours of direct light a day. They can tolerate partial shade, but flowering may be lighter. Choose a spot where water does not sit on the surface after rain.
Poor drainage is a common cause of root rot. If the soil stays soggy, consider raised beds or a slope where water can run off.
Soil Preparation and pH for Daylilies
Daylilies grow well in loose, fertile soil. Dig the bed to a depth of about one foot and mix in compost or well-rotted organic matter. This improves both drainage and nutrient supply.
Soil pH, which measures how acidic or alkaline soil is, matters less for daylilies than for some other plants. They generally tolerate a wide range, from slightly acidic to neutral. A simple soil test from a garden center or extension service can confirm your soil’s condition.
Planting Depth, Spacing and Timing
Plant daylilies so the crown, the point where roots meet the leaves, sits at or just below the soil surface. Planting too deep can reduce blooming. Space plants so their leaves have room to spread without crowding.
Spring and early fall are good planting times in most regions. Planting in cool weather gives roots time to settle before heat or cold arrives. Water well after planting to help the soil settle around the roots.
Daily and Seasonal Daylily Care
Watering Daylilies Correctly
Daylilies need regular moisture, especially while buds form and during dry spells. Water deeply once or twice a week rather than lightly every day. Deep watering encourages roots to grow downward, which helps plants handle dry periods.
Water at the base of the plant in the morning. This lets leaves dry during the day and lowers the risk of fungal problems. In rainy weather, you can skip watering.
Feeding Daylilies with Fertilizer and Compost
Daylilies are not heavy feeders. A balanced slow-release fertilizer applied in early spring usually supports strong growth and good blooming. Follow the label directions, since too much fertilizer can burn roots.
Compost is another gentle option. Spread a thin layer around the plants each spring and let rain and soil life release the nutrients slowly. Because of this, many gardeners prefer compost for beginners.
Mulching to Protect Roots and Retain Moisture
A layer of mulch, such as shredded bark or straw, helps keep soil cool and moist. It also reduces weeds that compete for water and nutrients. Spread mulch about two to three inches deep, but keep it a few inches away from the crown.
Mulch can also protect roots during cold months. In practice, a light layer after the ground freezes helps reduce heaving caused by freeze and thaw cycles.
Deadheading Spent Blooms and Removing Foliage
Deadheading means removing faded flowers. Snap off spent blooms at the base of the stem to keep the plant looking neat. Removing old flowers also helps the plant put energy into new buds.
In fall, cut back dead or yellowing foliage once it dies back. In mild climates, some evergreen types keep their leaves, so only remove damaged or browned parts. Clean up debris to reduce hiding places for pests.
Dividing and Renewing Daylily Clumps
Signs Your Daylilies Need Dividing
Dividing means digging up a clump and separating it into smaller sections. Clumps that have been in the ground for several years often become crowded. Bloom counts may drop, and the center of the clump may look thin or woody.
Most gardeners divide every three to five years. Dividing also gives you more plants to share or move to new beds.
Step-by-Step Division Process
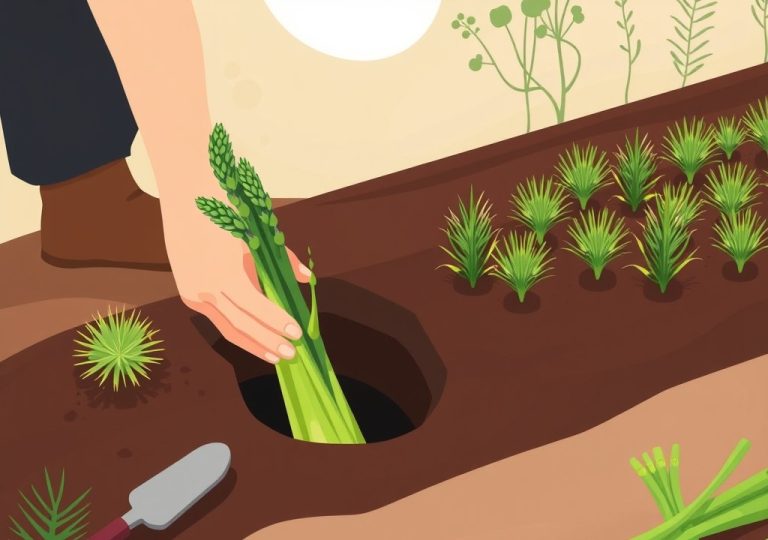
- Water the clump the day before so the soil is moist and loosens easily.
- Dig around the clump with a garden fork, starting well outside the leaves.
- Lift the clump gently and shake off excess soil.
- Pull or cut the clump into sections, each with several healthy fans of leaves and roots.
- Replant the sections at the same depth they grew before, and water well.
Division is usually best in early spring or late summer. Keep newly divided plants moist for several weeks while they establish.
Common Daylily Problems and How to Handle Them
Spotting Pests Like Thrips and Aphids
Thrips are tiny insects that feed inside flower buds and cause streaks or distorted blooms. Aphids cluster on new growth and can leave sticky residue. Both are easier to manage when caught early.
Rinse pests off with a strong spray of water, or use an insecticidal soap labeled for garden use. Check plants regularly, especially during warm weather.
Recognizing Rust, Leaf Spot and Other Diseases
Rust appears as orange or brown spots on leaves. Leaf spot causes dark, irregular marks. Both are fungal problems that spread in wet, crowded conditions.
Remove affected leaves and dispose of them rather than composting them. Water at the base of plants and improve air flow by thinning crowded clumps. Fungicides are available, but good spacing and watering habits often prevent most trouble.
Why Daylilies Stop Blooming
Several factors can reduce flowering. Too little sun is a common cause, as is planting too deep. Overcrowding, poor nutrition and drought stress can also reduce blooms.
Check the basics first: light, planting depth, spacing and watering. If the basics look fine, dividing the clump is often the fix. Give the plant a season to recover after division before expecting a full display.
Caring for Daylilies in Containers and Small Spaces
Container Choice and Drainage Needs
Daylilies can grow in pots, which suits patios, balconies and small yards. Choose a container with drainage holes at the bottom. Without them, water collects and roots can rot.
Use a good quality potting mix rather than garden soil, since garden soil compacts in pots. A container wide enough for the root clump, with room to grow, usually works best. Repot every few years, dividing the clump at the same time.
Winter Protection for Potted Daylilies
Roots in containers are more exposed to cold than roots in the ground. In colder regions, move pots to a sheltered spot such as an unheated garage or against a wall. Insulating the outside of the pot with straw or bubble wrap can also help.
Water lightly during winter only if the soil dries out completely. Wet, frozen soil can harm roots more than dryness does.
Daylily Care Compared: Sun, Shade and Climate Zones
Growing Daylilies in Full Sun Versus Partial Shade
Full sun gives the strongest flowering and the most compact growth. Partial shade, with about four to six hours of direct light, still works well for many varieties. Plants in shade often grow taller and bloom more lightly.
Deep shade is not suitable for daylilies. If your site gets very little light, consider a shade-tolerant perennial instead.
Adjusting Care for Cold and Warm Climates
In cold climates, plant in spring or early fall and mulch before the ground freezes. Choose hardy varieties suited to your zone. In warm climates, water more often during heat and provide some afternoon shade if plants wilt.
Evergreen types tend to do well in mild regions, while dormant types suit colder winters. Checking your local hardiness zone helps you pick the right variety.
Frequently Asked Questions
How often should I water daylilies?
Water deeply once or twice a week, more often during long dry spells or heat. Aim to moisten the soil to the root zone rather than watering lightly each day. Skip watering after heavy rain.
Do daylilies need fertilizer?
Most established daylilies benefit from a light feeding each spring. A balanced slow-release fertilizer or a thin layer of compost is usually enough. Follow label directions, since too much can harm roots.
Why are my daylilies not flowering?
The most common causes are too little sun, planting too deep, overcrowding and poor feeding. Drought stress can also reduce blooms. Check these factors first, then consider dividing the clump if it has become crowded.
Are daylilies toxic to pets?
Daylilies are considered toxic to cats, and can cause kidney problems if eaten. Dogs are generally less affected, though they may still have stomach upset. If you have pets, plant daylilies where animals cannot reach them, and contact a veterinarian if ingestion occurs.
When is the best time to cut back daylily foliage?
Cut back dead or yellowing foliage in fall, after it has died back naturally. In mild climates, evergreen types may keep their leaves, so only remove damaged parts. Clean up debris to reduce hiding places for pests.
Conclusion
Caring for daylilies comes down to a few simple habits. Give them sun, well-drained soil, deep watering and light feeding. Mulch, deadhead, divide crowded clumps and watch for pests and disease.
With these basics in place, daylilies reward beginners with reliable blooms year after year.
Hi, I’m Mary, the founder of GardenCure.com. I’m passionate about creating healthy, beautiful gardens and well-kept lawns. I share practical experience and trusted advice on garden and lawn gear that truly works. With the support of my dedicated research team, our writers produce honest, in-depth reviews using reliable, authentic sources—helping you choose the right tools with confidence for your outdoor space.