How to Check a Sprinkler Solenoid?
If your sprinkler zone won’t turn on, won’t turn off, or just acts weird, the solenoid is often the real problem. This small part sits on top of the sprinkler valve and controls the flow of water to that zone. When it fails, the whole zone can stop working, even if everything else in your irrigation system looks fine.
In this article
The good news is that checking a sprinkler solenoid is not hard at all. You don’t need to be an electrician or a plumber. With a few basic tools and about fifteen minutes, you can figure out if the solenoid is the reason your lawn isn’t getting watered.
This guide walks you through every step in plain, easy language, so even if you’ve never touched a sprinkler valve before, you’ll know exactly what to do.
What Is a Sprinkler Solenoid, Anyway?
A solenoid is a small electrical part attached to the top of a sprinkler valve. It looks like a little cylinder with two wires coming out of it. Your sprinkler controller sends a low voltage signal (usually 24 volts) through these wires. That signal tells the solenoid to open the valve, which lets water flow through and out to the sprinkler heads.
When you turn off a zone, the controller stops sending power, and the solenoid closes the valve again. It’s a simple on-and-off switch, but it plays a huge role. If the solenoid stops working, water either never flows, or it never stops flowing, no matter what the controller tells it to do.
Because this tiny part controls so much, it’s one of the first things to check when a sprinkler zone stops behaving normally.
Signs Your Sprinkler Solenoid Might Be Bad
Before grabbing your tools, look out for a few common warning signs. These clues can help you confirm the solenoid is causing trouble:
- The zone doesn’t turn on at all, even though the controller shows it’s active
- Water keeps running even after the zone is supposed to shut off
- You hear a faint clicking sound from the valve box, but no water comes out
- The solenoid feels unusually hot to the touch
- There’s visible corrosion, cracking, or damage on the solenoid body
- Wires near the solenoid look frayed, chewed, or loose
If any of these sound familiar, it’s a strong hint that the solenoid needs a closer look.
Tools You’ll Need
You don’t need a full toolbox for this job. Here’s what to gather before you start:
- A digital multimeter (this is the main tool for testing electrical parts)
- A small flathead or Phillips screwdriver
- Wire strippers or a small utility knife
- Waterproof wire connectors (in case you need to reconnect wires later)
- A towel or rag, since valve boxes can get muddy
- Gloves, if you like keeping your hands clean
A multimeter is the star of this whole process. It measures electrical resistance, which tells you if the solenoid coil is working the way it should.
Step 1: Turn Off Power to the Controller
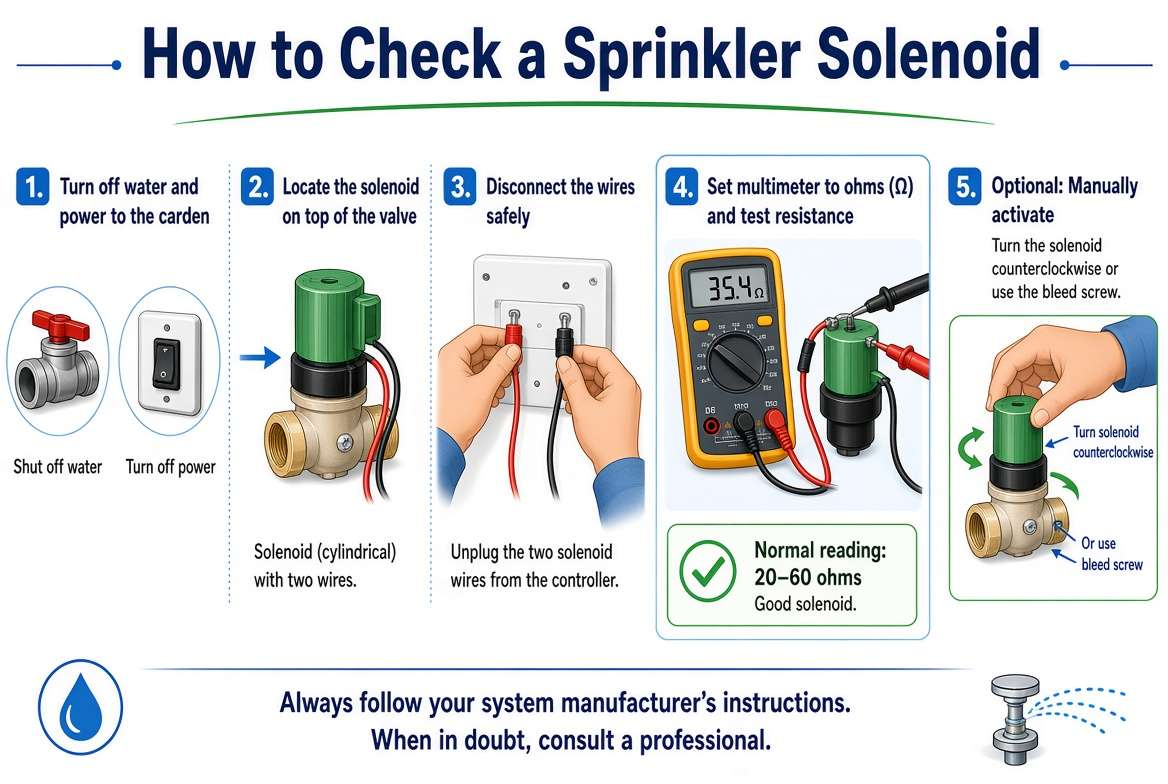
Safety comes first. Before you touch any wires, switch off your sprinkler controller or unplug it from the wall. This stops any electrical signal from reaching the valve while you’re working, so you won’t get a small shock or accidentally trigger the zone.
Even though sprinkler systems run on low voltage, it’s still smart to cut the power. It also keeps the valve from opening or closing unexpectedly while your hands are inside the valve box.
Step 2: Find and Open the Valve Box
Sprinkler valves usually sit inside a small plastic or green box buried in the yard, near the area they water. Look for a rectangular lid, sometimes with grass growing over the edges. Pop the lid open using your screwdriver or by hand.
Inside, you’ll see one or more valves, each with a solenoid on top. If you have several zones, each valve should be labeled or connected to a numbered wire, matching the zone number on your controller.
Wipe away any dirt or standing water with your towel so you can see the wiring clearly.
Step 3: Locate the Solenoid Wires
Each solenoid has two wires coming out of it. One wire is usually a common wire, often colored white, and it connects to every solenoid in the box. The other wire is a zone-specific wire, usually a different color, connecting to one solenoid only.
These wires typically link up with the field wires running back to your controller through waterproof connectors. Gently separate the connector so you can access the bare wire ends without pulling anything loose.
Step 4: Disconnect the Solenoid Wires
Before testing, disconnect the solenoid wires from the field wires. This step matters because testing while everything is still connected can give you a false reading, since the controller’s wiring might interfere with the result.
Carefully twist apart the waterproof connectors and separate the solenoid’s two wires from the rest of the system. Set the field wires aside so they don’t touch anything metal or wet.
Step 5: Set Up Your Multimeter
Turn on your multimeter and set it to measure resistance. This setting is usually marked with the ohm symbol, which looks like an omega (Ω). Choose a range around 200 ohms if your multimeter has manual settings, since most solenoids fall somewhere between 20 and 60 ohms.
If your multimeter is auto-ranging, you can skip this and it’ll adjust on its own.
Step 6: Test the Solenoid With the Multimeter
Now comes the actual test. Touch one multimeter probe to each of the solenoid’s two exposed wire ends. It doesn’t matter which probe touches which wire, since resistance doesn’t care about direction.
Watch the screen for a reading. Here’s how to read the results:
- A reading between 20 and 60 ohms usually means the solenoid coil is healthy
- A reading of zero or very close to zero often points to a short inside the coil
- A reading that shows “OL” or infinite resistance means the coil is broken, and there’s no electrical path at all
If your multimeter shows a number in that healthy range, the solenoid coil itself is likely fine, and the problem might be somewhere else, like the wiring, the controller, or the valve diaphragm.
If the reading shows nothing or an infinite value, the coil has failed, and you’ll need a new solenoid.
Step 7: Check for a Physical Blockage or Stuck Diaphragm
Sometimes the solenoid passes the electrical test, but the valve still doesn’t open or close properly. In that case, the issue could be with the valve’s diaphragm instead of the solenoid itself.
To check this, unscrew the solenoid from the top of the valve body (usually it twists off counterclockwise). Peek inside and look for the small rubber diaphragm. Dirt, sand, or small debris can get stuck under it, keeping the valve from sealing shut or opening all the way.
Rinse the diaphragm gently with clean water and remove any grit you find. Put everything back together and test the zone again once the solenoid is reconnected.
Step 8: Do a Manual Bleed Test
Most solenoids have a small bleed screw on top or on the side. Turning this screw manually lets water flow through the valve, bypassing the electrical signal completely.
Turn the bleed screw slowly, about a quarter turn, and see if water starts flowing to the sprinkler heads. If water flows fine during a manual bleed but not when triggered by the controller, this points to an electrical issue rather than a valve blockage.
Make sure to close the bleed screw again once you’re done testing, so the valve returns to normal operation.
Step 9: Reconnect and Retest
Once you’ve finished checking the solenoid, twist the wires back together using fresh waterproof connectors. Loose or corroded connections are a sneaky cause of irrigation problems, so it’s worth using new connectors rather than reusing old, worn-out ones.
Close up the valve box, turn your controller back on, and run a manual test cycle for that zone. Watch closely to see if water flows properly and shuts off when it’s supposed to.
Common Reasons a Sprinkler Solenoid Fails
A few everyday culprits tend to cause solenoid trouble over time:
- Age and wear: solenoids don’t last forever, and coils weaken with years of use
- Water damage: valve boxes often fill with water, and that moisture creeps into the solenoid over time
- Rodent damage: mice and other small critters love chewing on buried wires
- Debris buildup: sand, dirt, and mineral deposits can jam the internal diaphragm
- Electrical surges: power spikes from storms can fry the coil instantly
- Loose wiring: connections that work loose slowly reduce power flow until the solenoid stops responding
Knowing the cause can help you prevent the same issue from happening again down the road.
How to Replace a Bad Sprinkler Solenoid
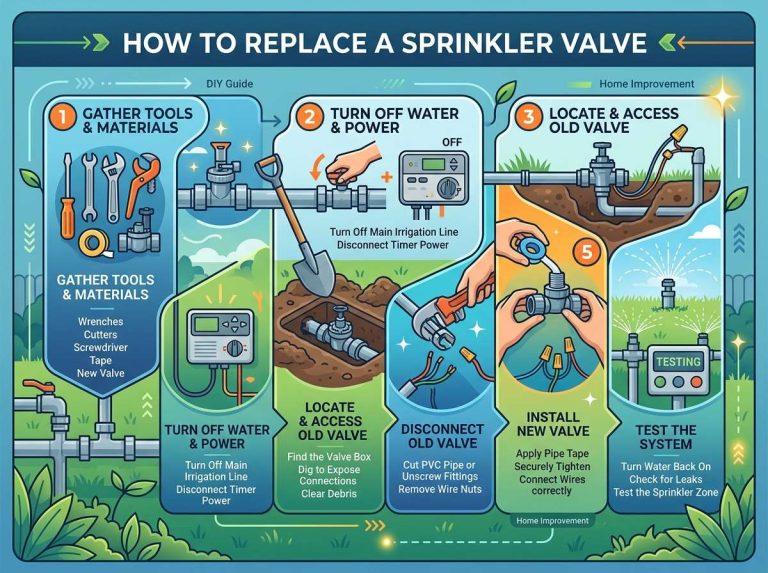
If your test shows a dead solenoid, replacing it is a quick fix. Here’s the basic process:
- Turn off the controller and shut off the main water supply to the valve
- Twist the old solenoid counterclockwise to remove it from the valve body
- Grab a new solenoid that matches your valve brand and model
- Screw the new solenoid in clockwise until it’s snug (don’t overtighten it)
- Reconnect the wires with waterproof connectors
- Turn the water supply back on and test the zone
Most solenoids cost very little and are sold at hardware stores or garden centers, so this repair won’t put much strain on your wallet.
Tips to Keep Your Sprinkler Solenoids Working Longer
A little care goes a long way toward avoiding future headaches:
- Check valve boxes once a season for standing water or debris
- Use waterproof grease on wire connections to block moisture
- Keep valve box lids closed tightly to keep pests and dirt out
- Flush your irrigation lines occasionally to clear out sand and grit
- Replace old, cracked wire connectors before they cause corrosion
- Avoid running the system during freezing temperatures, since ice can crack solenoid housings
Small habits like these can add years to the life of your sprinkler valves.
Frequently Asked Questions
Can a bad solenoid cause a zone to run nonstop? Yes. If the internal coil sticks or the diaphragm stays stuck open, water can keep flowing even after the controller sends the shut-off signal.
Do all solenoids read the same resistance number? No, resistance varies by brand and model, generally landing somewhere between 20 and 60 ohms. Check your solenoid’s manual or manufacturer listing for the exact expected range.
Is it normal for a solenoid to hum quietly? A soft hum during operation is normal. Loud buzzing, clicking without water flow, or complete silence usually signals trouble.
Can I test a solenoid without removing it from the valve? You can, but disconnecting the wires from the controller side first gives a cleaner, more accurate reading during a resistance test.
How long do sprinkler solenoids typically last? Most solenoids last several years with normal use, though harsh weather, poor drainage, or old wiring can shorten their lifespan.
Wrapping Up
Checking a sprinkler solenoid is one of those repairs that sounds intimidating but turns out to be pretty simple once you break it down step by step. Grab a multimeter, cut the power, disconnect the wires, and take a resistance reading. From there, you’ll know right away if the coil is working or if it’s time for a replacement.
A healthy solenoid keeps your whole irrigation system running smoothly, so catching problems early saves water, saves money, and keeps your lawn looking its best all season long.

Hi, I’m Mary, the founder of GardenCure.com. I’m passionate about creating healthy, beautiful gardens and well-kept lawns. I share practical experience and trusted advice on garden and lawn gear that truly works. With the support of my dedicated research team, our writers produce honest, in-depth reviews using reliable, authentic sources—helping you choose the right tools with confidence for your outdoor space.