How to Replace a Sprinkler Valve?
Your sprinkler system keeps your lawn green and healthy. But when a valve starts acting up, your watering schedule falls apart. The good news? You can replace a sprinkler valve yourself. You don’t need special skills or expensive tools. This guide walks you through everything you need to know.
In this article
What Is a Sprinkler Valve and Why You Need to Replace It
A sprinkler valve controls water flow in your irrigation system. It opens to let water through and closes when you don’t need watering. Think of it like a gate for your water supply.
Over time, valves wear out. Dirt and minerals build up inside them. Sometimes they just break. When this happens, your lawn suffers. You might notice certain areas of your yard stay dry while others flood. Some zones won’t turn on at all.
Replacing a valve isn’t as hard as it sounds. Most homeowners can handle this job in an afternoon. You’ll save money by doing it yourself instead of calling a professional landscaper.
Signs Your Sprinkler Valve Needs Replacement
Before you start, make sure you actually have a bad valve. Here are the main warning signs:
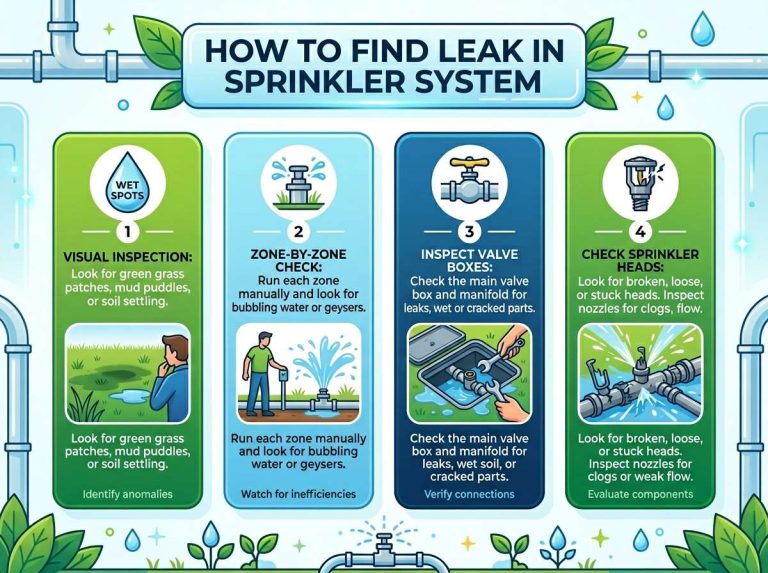
Water keeps flowing even when the system shuts off. If one section of your yard gets waterlogged and muddy while the rest looks normal, you have a leaking valve. This valve can’t hold water back anymore.
One zone doesn’t get water at all. The sprinkler head pops up but no water comes out. You’ve checked the sprinkler head itself and it works fine. The problem sits in the valve.
Water sprays from the valve body. Cracks in the plastic or metal housing cause leaks. These leaks waste water and reduce pressure in your system.
The valve makes loud clicking or buzzing sounds. Strange noises mean the internal parts are struggling. The solenoid might be failing.
Some zones run slower than others. Water pressure seems weak from certain sprinkler heads while others work great. A stuck or partially closed valve blocks water flow.
You see mineral buildup around the valve. White, crusty deposits form on the outside. This buildup also affects what’s inside the valve.
If you see any of these signs, it’s time to replace the valve.
Tools and Materials You’ll Need
Gather everything before you start. Running back to the store halfway through is annoying.
Basic tools:
- Adjustable wrench or pipe wrench
- Screwdrivers (both flat and Phillips head)
- Pliers
- Teflon tape
- New sprinkler valve (same size as your old one)
- Valve box (if replacing the box too)
Optional but helpful:
- Socket set
- Shovel
- Bucket of water
- Hose clamp tool
- Valve key
You probably already own most of these tools. The main expense is the new valve itself. Quality valves cost between $25 and $75 depending on the type.
Types of Sprinkler Valves
Not all valves are the same. Knowing your valve type helps you pick the right replacement.
Solenoid valves are the most common. They use electricity to open and close. When your controller sends a signal, the solenoid activates and opens the valve. These valves work great for automatic systems. They’re reliable and fairly cheap.
Manual ball valves work without electricity. You turn a handle to open or close them. Gardeners use these for zones they want to control by hand. They’re simple and durable.
Check valves prevent water from flowing backward. They’re often part of zone valves or installed separately in low spots. These keep your system working correctly.
Combination valves do multiple jobs. They combine a solenoid valve with a manual shut-off and sometimes a check valve. This type takes up less space.
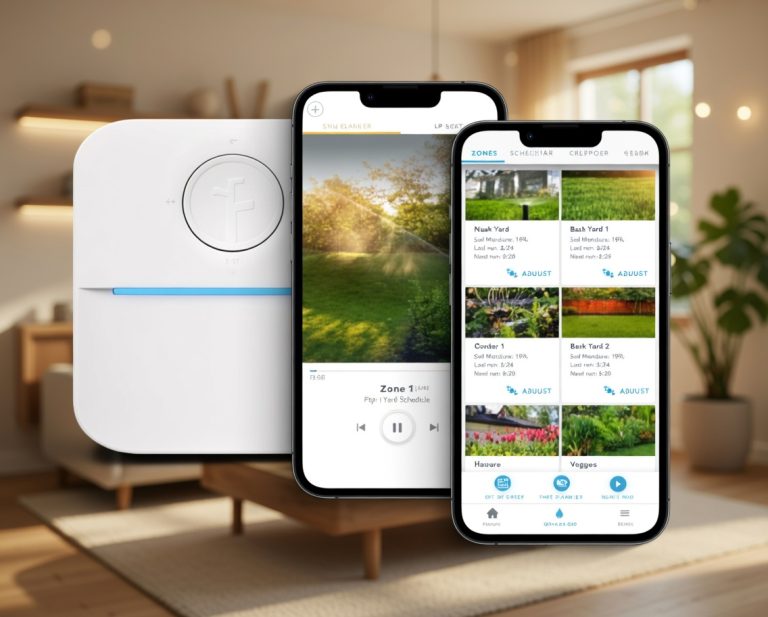
Smart valves connect to apps on your phone. They’re newer and more expensive but offer great control and water-saving features.
Most home systems use solenoid valves. If that’s what you have, this guide covers your replacement process.
Finding and Accessing Your Sprinkler Valve
Your valve might be easy to spot or hiding in a box underground. Let’s find it first.
Walk along your sprinkler lines. Follow the pipes from your main water source. The valve sits somewhere along this line. It controls water flow to a specific zone or section.
Many systems have a valve box. This plastic box sits above ground or slightly below grade. It protects the valve and makes it easier to reach. Valve boxes are usually green, brown, or gray.
Open the box lid if there is one. Inside you’ll see the valve plus the wire connections. The solenoid sits on top. This electromagnetic piece activates when the controller sends power.
If you don’t see a valve box, look along the main water line coming from your house or well. The valve might be above ground or in a pit. Trace the wires from the solenoid to figure out which valve controls which zone.
Take pictures of the setup before you start. Photos help you remember how everything connects.
Turning Off Your Water System
Safety first. Always shut off the water before working on the valve.
Find your main water shut-off valve. This is usually near your house, where the water line enters from the street or well. Turn this valve clockwise until it stops. Don’t force it.
Next, turn off the controller or timer. This cuts power to the solenoid valves. Some controllers have a main switch. Others require you to flip a breaker in the electrical panel.
Open a sprinkler head on the zone you’re working on. Let any remaining water drain out. This relieves pressure in the line.
Wait a few minutes. Make sure no more water flows. Your system is now safe to work on.
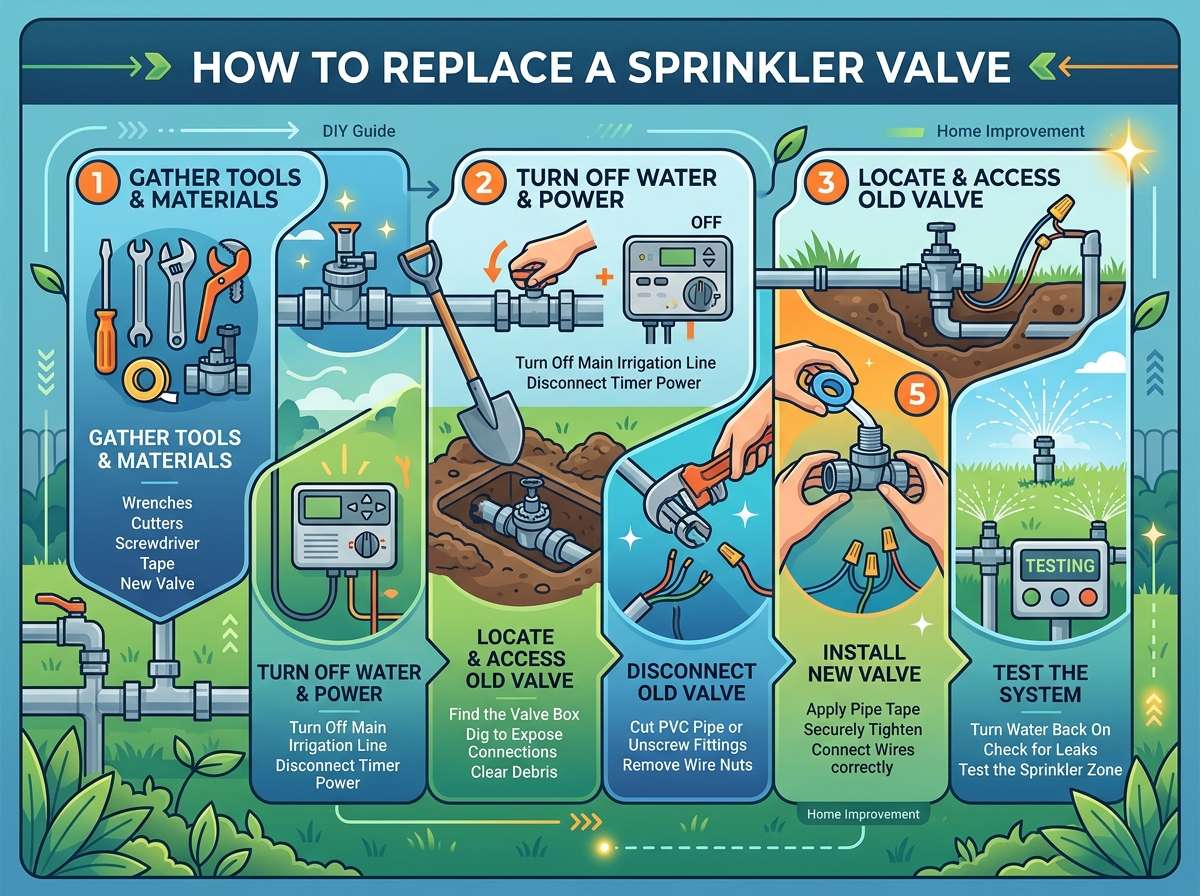
Step-by-Step Valve Replacement Process
Now for the actual replacement. This is easier than you think.
Step 1: Unscrew the Solenoid
The solenoid sits on top of the valve body. It’s a small cylinder with wires attached. Locate the bolt or nut holding it in place. Use your wrench to turn it counterclockwise. This usually takes just a few turns.
Gently pull the solenoid straight up and away from the valve. Be careful with the wires. Note where they connect. Take a picture before unplugging them.
Disconnect the wires by gently pulling them apart. Some connections use small clips. Others are just pushed together. Be gentle so you don’t damage the connectors.
Set the solenoid aside. You’ll reuse it on the new valve.
Step 2: Remove the Old Valve
The valve body connects to two pipes. One brings water in. The other sends water out. These connections use threaded fittings.
Use your wrench to hold the fitting nut while you turn the pipe. This prevents the pipe from rotating and twisting. Turn the nut counterclockwise to loosen it.
Once loose, finish unscrewing by hand. Let the pipe separate from the valve. You might get some water drips. That’s normal.
Do the same for the outlet pipe.
Now the old valve sits free. Lift it out of the valve box or from where it was mounted.
Inspect the pipes. If they’re damaged, kinked, or old, now is a good time to replace them too. Most DIYers just reuse the existing pipes and focus on the valve replacement.
Step 3: Clean the Connections
This step makes the new valve work better. Use a damp cloth to wipe away dirt and mineral deposits from the pipe ends. Inside the threaded connections, you might see buildup. Rub it away gently.
Clean threads prevent leaks. Take your time here.
Step 4: Wrap the Threads with Teflon Tape
Teflon tape prevents leaks at the connections. Wrap it around the male threads (the part that screws into the fitting) several times. Three to four wraps usually works.
Wrap tape clockwise around the pipe. This direction matches how the threads screw together.
Teflon tape is cheap and works really well. You can find it at any hardware store for a couple of dollars.
Step 5: Install the New Valve
Position the new valve in the space where the old one was. Make sure it faces the right direction. Water enters from the inlet side and leaves through the outlet.
Check the arrow on the valve body. It shows which way water flows. Make sure this arrow points the right direction.
Screw the inlet pipe onto the new valve. Start by hand to avoid cross-threading. Once hand-tight, use your wrench to tighten it more. Don’t over-tighten. You want it snug, not cranked down hard.
Do the same for the outlet pipe.
Double-check both connections. They should be firm but not overly tight.
Step 6: Attach the Solenoid
The solenoid screws back onto the new valve the same way it came off. Line it up and screw it down. Tighten with your wrench until it’s snug.
Now reconnect the wires. Push the connectors back together. They should click into place. Make sure they’re fully seated. Loose connections mean the valve won’t open when called for.
Take another picture to confirm everything looks right.
Turning Water Back On and Testing
You’ve installed the new valve. Time to test it.
Go back to your main shut-off and turn the water back on. Do this slowly. Open the valve gradually so pressure builds up slowly. This prevents water hammer and damage to your system.
Turn the controller back on. Set it to run that zone manually for a few minutes.
Walk back to your valve. Does water flow to the sprinkler heads? Listen and watch carefully.
If water flows correctly, great! Your replacement worked. If not, check your connections. Make sure the inlet and outlet pipes are attached correctly. Verify the solenoid wires are seated properly.
Let the zone run for a few minutes. Check the valve and connections for leaks. Damp areas are normal right after installation. Give it a minute. Small leaks sometimes stop on their own as water pressure settles.
If water actively sprays or streams from a connection, turn off the water. Tighten that fitting another quarter turn. Turn water back on and check again.
Don’t overtighten trying to fix leaks. This damages the threads and makes problems worse. A gentle adjustment usually solves the issue.
Dealing with Difficult Valves
Sometimes old valves don’t cooperate. Here’s what to do when things get stuck.
Stuck fittings: If a pipe won’t unscrew, spray it with penetrating oil. Let it soak for 15 minutes. Try again. Repeat if needed. Patience beats force.
Broken threads: If threads strip, you’ll need to replace the pipe too. This happens rarely but is possible on really old systems. Your hardware store can help you find the right replacement pipe size.
Buried valves: If the valve sits deep in soil, dig around it carefully. You need room to turn wrenches. Clear away enough dirt so you can work comfortably.
Multiple connections: Some valves have three or four connections. Take careful notes about which pipe was where before you disconnect anything.
No valve box: If there’s no box, you’re working in a pit or trench. Make sure the area is dry. Bail out water if needed. Working in mud is messy and dangerous.
Sprinkler Valve Maintenance Tips
Replacing a valve is work. Prevent future problems with simple maintenance.
Run a flush cycle at the start of the season. This clears out dirt and debris in the lines. Turn on your main water supply without using the controller. Let water run through the system at each zone for a few seconds. This flushes the pipes.
Check connections twice a year. Tighten any fitting that looks loose. Leaky connections waste water and money.
Look for mineral buildup. White crusty deposits mean minerals are clogging your system. Install a filter on the main line if you have hard water. This extends valve life.
Protect the valve box. Keep the lid on. This prevents debris from falling into the valve and shielding the solenoid from sun damage.
Winterize your system in cold climates. Drain all water from the lines and valves before freezing weather arrives. Frozen water expands and cracks valves.
Inspect the solenoid regularly. Look for cracks in the plastic housing or corrosion on the connections. These signs mean a solenoid replacement is coming soon.
Keep the area around valves clear. Trim grass and remove rocks. Easy access makes maintenance and future repairs simpler.
Common Mistakes to Avoid
Learn from others’ mistakes.
Installing the valve backward. The inlet and outlet matter. Water must flow in the right direction. Check the arrow on the valve body before tightening connections.
Over-tightening connections. You don’t need a wrench at full strength. Tight is good. Too tight breaks threads and damages fittings.
Forgetting to turn off water. This creates a flood. Always shut off the system before you start.
Using the wrong replacement valve. Valves come in different sizes. Bring your old valve to the store and match it up exactly.
Not cleaning the threads. Dirt creates weak connections and leaks. Spend the extra minute cleaning.
Skipping the Teflon tape. This little step prevents big leaks. Don’t skip it.
Disturbing the pipes. If your new valve leaks but the old one didn’t, you might have kinked a pipe during removal. This reduces water flow and creates pressure problems.
Forgetting to bleed air from the system. After turning on water, open one sprinkler head and let it run for 30 seconds. This gets rid of air in the lines.
When to Call a Professional
Most valve replacements are DIY jobs. But some situations call for professional help.
If you have a complex system with many zones and connections. Professionals understand complicated setups better than first-timers.
If your pipes are galvanized steel or old. These are harder to work with. Professionals have experience getting them loose without breaking them.
If you’re not comfortable working with water lines. Leaks cost money. Professionals guarantee their work.
If there’s corrosion or damage you don’t understand. A pro can spot problems you might miss.
If your system uses smart valves or special components. These need specialized knowledge.
If you encounter a buried main line problem. This is beyond typical valve replacement and needs expert help.
A professional usually charges $100 to $300 for a valve replacement. DIY costs about $30 to $75 for the new valve itself.
Sprinkler System Parts You’ll Want to Know
Learning sprinkler terminology helps you shop for parts and understand your system better.
Valve body is the main part that controls water flow.
Solenoid is the electrical component that opens the valve.
Inlet and outlet are the water connections on the valve.
Valve seat is the internal opening that water passes through.
Diaphragm is a rubber part inside that moves to open and close the valve.
Bleeder screw is a small bolt that lets air escape from the system.
Bonnet is the top part of the valve that covers the internal parts.
Coil is the electrical wire wrapped around the solenoid.
Manifold is a block that holds multiple valves together.
Zone is one section of your watering system controlled by one valve.
Upgrading to a Better Valve
If you’re replacing a valve anyway, consider upgrading.
Brass valves last longer than plastic ones. They cost a bit more but work great in harsh conditions.
Larger diameter valves handle more water pressure. If you’re adding more sprinkler heads, a bigger valve helps.
Anti-siphon valves prevent backflow. This protects your drinking water. Some areas require them by law.
Angle valves work better in tight spaces. They bend 90 degrees so pipes line up with your setup better.
Flow control valves let you adjust water pressure. This helps if some zones get too much water.
Smart valves might seem fancy, but stick with basic models for your first replacement. Master the basics before exploring advanced options.
Seasonal Sprinkler Care Beyond Valve Replacement
A single valve replacement is just one part of sprinkler system care.
Spring start-up means checking all zones, inspecting all sprinkler heads, and adjusting spray patterns.
Summer adjustments involve changing watering times as temperatures shift and plants grow.
Fall inspection requires checking for clogs and damage before winter arrives.
Winter preparation means draining the system in cold climates to prevent freezing damage.
These tasks keep your whole system healthy for years.
Troubleshooting After Replacement
Sometimes the system acts weird after you install a new valve.
Water runs from multiple zones at once. You might have the inlet and outlet switched. Turn off water, swap the connections, and try again.
One zone stays on even when others are off. The solenoid wires might not be fully connected. Check and reseat them.
Water pressure seems low everywhere. You might have closed the main shut-off partially. Open it all the way.
Water sprays slowly from one zone. A kink in the pipe reduces flow. Inspect the pipes you worked with and straighten any bends.
The system runs but one zone gets almost no water. You might have installed a check valve backward, or the solenoid isn’t opening fully.
Most of these problems have simple fixes. Take your time and think through what might cause the behavior you’re seeing.
Planning Your Next Steps
You’ve successfully replaced a sprinkler valve. You’re now part of a group of homeowners who maintain their own systems. It’s a skill that saves money and keeps your lawn healthy.
Next time a zone stops working, you’ll know what to do. You might even help neighbors with their systems.
Start planning your next sprinkler project. Maybe you’ll add another zone. Maybe you’ll install a new controller with app control. The possibilities grow once you understand how your system works.
Share what you learned with friends. Teaching others about sprinkler maintenance builds confidence in them too.
Final Thoughts
Replacing a sprinkler valve is easier than you probably thought. It takes an afternoon and basic tools. The money you save makes it worthwhile.
Your lawn gets the water it needs. Your system works properly again. You’ve joined the DIY crowd that fixes their own irrigation problems.
Remember: turn off the water, take pictures, clean the threads, use Teflon tape, and test carefully. Follow these steps and you’ll do great.
The next time someone asks if they can replace a sprinkler valve themselves, you can tell them yes. You did it. So can they.
Your green lawn thanks you. Your wallet thanks you. Now get out there and tackle that valve.

Hi, I’m Mary, the founder of GardenCure.com. I’m passionate about creating healthy, beautiful gardens and well-kept lawns. I share practical experience and trusted advice on garden and lawn gear that truly works. With the support of my dedicated research team, our writers produce honest, in-depth reviews using reliable, authentic sources—helping you choose the right tools with confidence for your outdoor space.