How to Use a Soaker Hose?
Watering your garden doesn’t have to be a tough job. If you spend hours dragging a regular hose around or standing in the hot sun holding a sprinkler, it’s time to learn about soaker hoses. This simple tool makes watering your plants a breeze and saves you money on your water bill at the same time.
In this article
A soaker hose is one of the best ways to keep your garden happy and healthy. It drips water right where your plants need it most. In this guide, you’ll learn everything you need to know to use a soaker hose like a pro. Let’s get started.
What Is a Soaker Hose and How Does It Work?
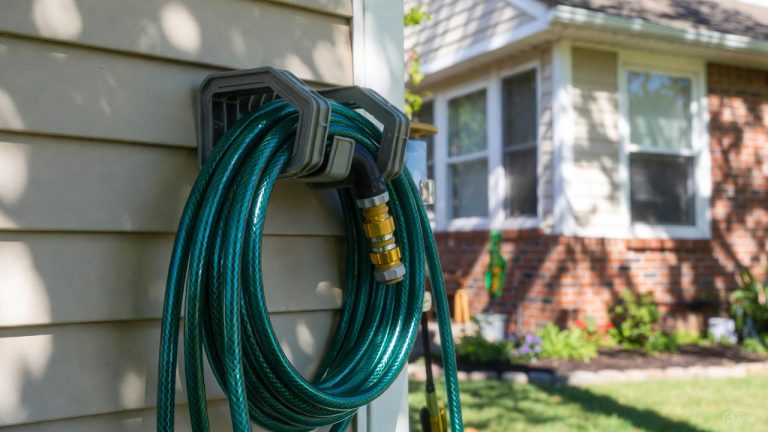
A soaker hose is a special type of garden hose that has tiny holes all along its length. When you turn on the water, it slowly drips out through these small openings instead of spraying water everywhere like a regular hose. Think of it as a hose that sweats water instead of gushing it out.
The water flows out at a low rate, usually around 0.5 gallons per foot per hour. This slow release gives water time to soak into the soil where it does the most good. Your plants drink it up rather than it running off or evaporating in the sun.
Most soaker hoses are made from recycled rubber or plastic. They’re tough and built to last through many growing seasons. You can find them in different lengths and sizes at any garden center or online store. Common lengths include 25 feet, 50 feet, and 100 feet, so you can pick the right size for your space.
Why Choose a Soaker Hose Over Other Methods?
Soaker hoses beat other watering methods in many ways. Let’s look at why they’re so popular with gardeners everywhere.
Saves Water Like Nothing Else
A soaker hose uses about 50 percent less water than sprinklers or hand watering. Since water comes out slowly and directly at the soil, there’s no waste. Sprinklers throw water everywhere, including on leaves and paths. Much of it never reaches the roots. A soaker hose delivers water exactly where roots are, so every drop counts.
Keeps Plant Leaves Dry
When you water plant leaves with a regular hose or sprinkler, it can cause problems. Wet leaves attract fungus and disease. A soaker hose keeps water off the foliage and puts it right at the base of your plants instead. This helps prevent leaf diseases and keeps your plants healthier.
Saves You Time
Set it and forget it. Once you lay out your soaker hose and turn it on, you don’t have to stand around watering. You can go inside, enjoy your coffee, or work on other projects. The hose does the job while you relax. Many people use timers with their soaker hoses to water plants at the best times without lifting a finger.
Costs Less Money Over Time
Your water bill will drop when you use a soaker hose. You also won’t waste water on areas that don’t need it. A good soaker hose costs between 10 and 30 dollars, depending on the length and quality. The money you save on your water bill pays for it quickly.
Works Well in Different Types of Gardens
You can use a soaker hose in vegetable gardens, flower beds, shrub borders, and anywhere else you grow plants. It works on flat ground and on slopes too. This makes it one of the most flexible watering tools you can own.
Types of Soaker Hoses Explained
Not all soaker hoses are the same. Let’s look at the main types so you can pick the right one for your needs.
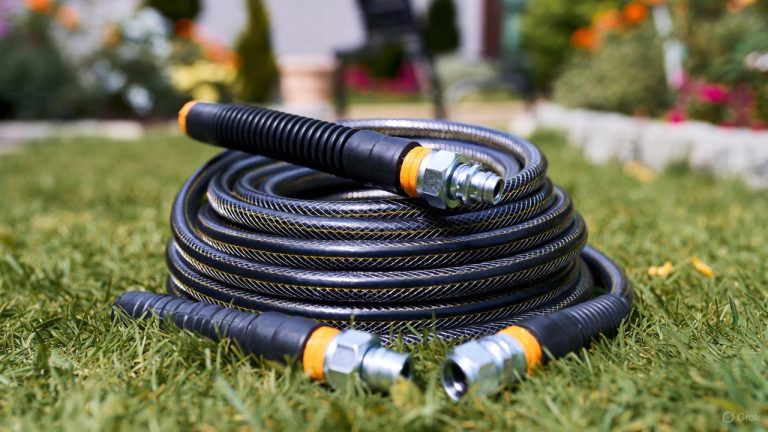
Porous Hoses
These hoses have tiny holes all along their length that let water seep out slowly. The holes are so small that they don’t clog easily. Porous hoses work well on flat ground and deliver water at a steady rate. They’re usually made from rubber and last a long time.
Drip Hoses
Drip hoses look a bit different from porous hoses. They have small openings or emitters spaced out along the hose. Water comes out in tiny amounts at each spot. Drip hoses give you more control over where water goes. You can adjust emitters or add new ones to water specific plants.
Spray Hoses
Some hoses have tiny sprayers instead of holes. They spray water in small amounts rather than dripping. Spray hoses work well for hanging baskets and potted plants. They’re a good choice if you want a little more water coverage in certain spots.
Soaker Soaker Hose Kits
You can buy complete kits that have the soaker hose plus connectors, stakes, and timers. These kits make it easy to set up an entire watering system without hunting for parts. Kits are great if you’re new to drip irrigation and want everything you need in one box.
How to Set Up Your Soaker Hose System
Setting up a soaker hose is simple and takes less than 30 minutes. Here’s how to do it right.
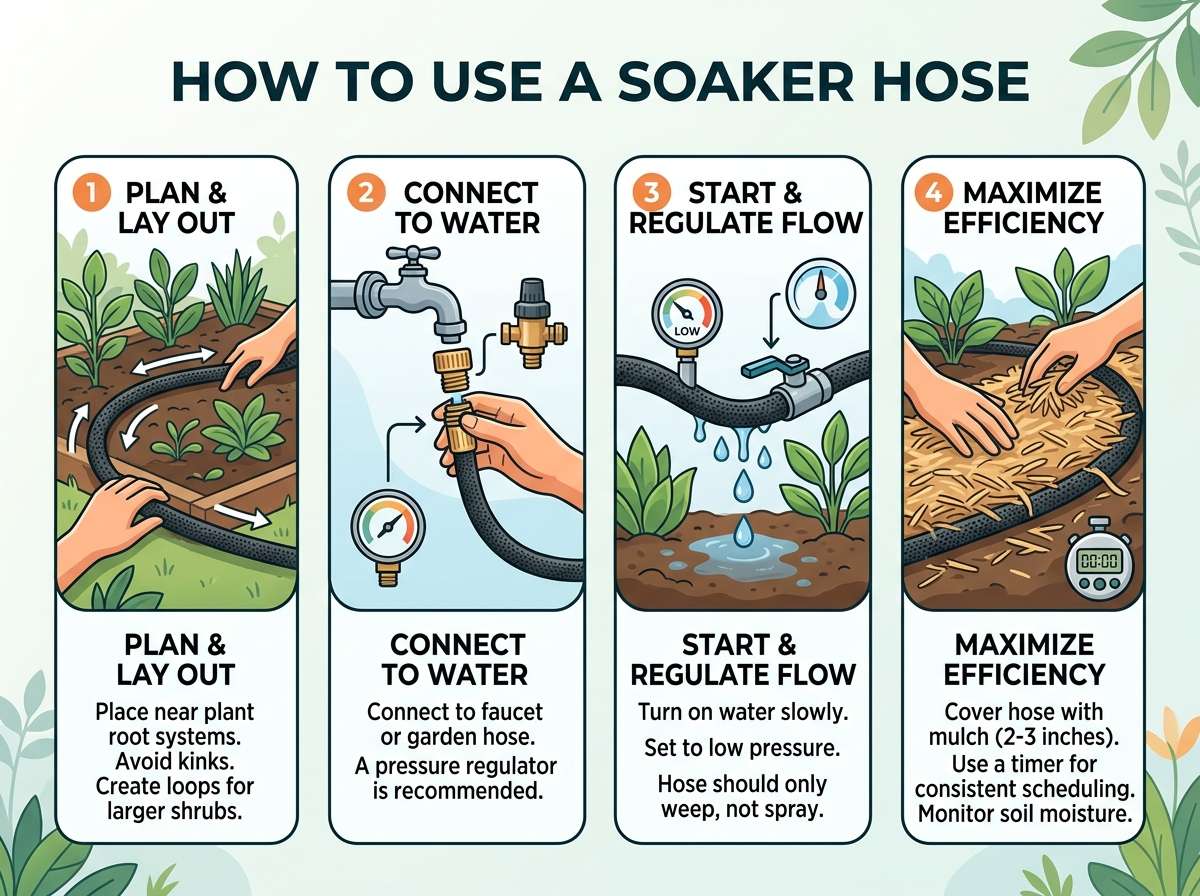
Step One: Plan Your Layout
Walk around your garden and look at where you want to water. Think about which plants need the most water and where you’ll attach the hose. Mark the areas you’ll cover. Most plants benefit from water right at their base, so plan to run your hose as close to the roots as possible.
Step Two: Gather Your Supplies
You’ll need a few basic items. Get your soaker hose, connectors, stakes or clips to hold it in place, an end cap or plug, and a timer if you want one. You’ll also want a regular faucet or spigot to attach the hose to. Make sure everything is in good shape before you start.
Step Three: Attach to Your Faucet
Take the soaker hose and connect it to your outdoor faucet using a connector. Make sure it’s tight so water doesn’t leak out. If you want to connect multiple hoses together, use connector pieces to join them end to end. The connection should be snug but not so tight that you can’t loosen it later.
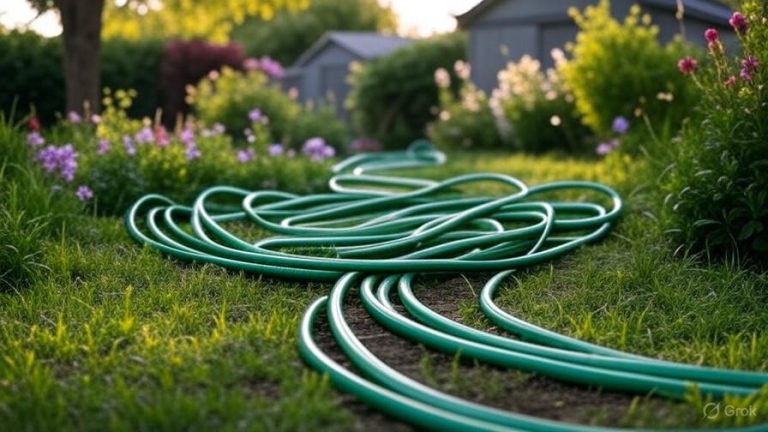
Step Four: Lay Out the Hose
Place your soaker hose along the base of your plants. You can lay it on top of the soil or hide it under mulch. Many people hide their soaker hoses under mulch to make them look nicer and keep them out of the sun. If you put it under mulch, lay the hose first, then cover it with 2 to 3 inches of mulch.
Step Five: Secure the Hose
Use stakes, landscape pins, or clips to hold the hose in place. This keeps it from moving around and getting tangled. Space the stakes about 3 feet apart. This stops the hose from shifting during watering and helps water reach plants consistently.
Step Six: Cap the End
Put an end cap on the far end of the hose. This stops water from running out and wastes none of the pressure. Many soaker hoses come with end caps included, but you can buy them separately if you need one.
Step Seven: Test Everything
Turn on the water for a few minutes and walk along your hose. Look for leaks at the connections and check that water is coming out all along the hose. If you see dry spots, you might need to adjust the hose or add more soaker lines.
Getting the Water Pressure Just Right
Water pressure matters when you use a soaker hose. Too much pressure and you’ll waste water. Too little and water won’t flow all the way to the end of the hose.
Finding Your Sweet Spot
Most soaker hoses work best at low pressure. Start with your faucet only quarter or half open. Turn it up slowly until you see water dripping from the holes. You don’t want a full stream, just a steady drip all along the hose. Once you find this setting, mark it on your faucet so you remember it next time.
Using a Timer for Even Better Control
A timer lets your soaker hose run on its own schedule. Attach a battery-powered or electric timer to your faucet, then connect your hose to the timer. Set it to run early in the morning or in the evening when less water evaporates. Many timers let you set how long the hose runs and how often it waters. This takes all the guesswork out of watering.
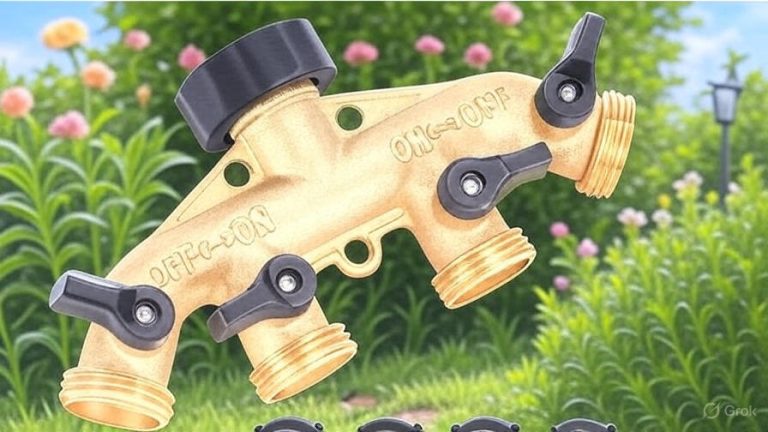
Handling Multiple Hoses
If you connect several soaker hoses to one faucet, water pressure drops across all of them. You may need to turn your faucet up higher to get good flow in hoses that are farthest away. Some people use a splitter valve and multiple timers to run different sections on different schedules. This gives you better control and helps prevent dry spots.
Best Practices for Using Your Soaker Hose
Now that you know how to set up your hose, let’s talk about how to use it the right way.
Water in the Early Morning
The best time to water with a soaker hose is early in the morning, before the sun gets hot. Water soaks deeper into the soil and less evaporates. Morning watering also lets any moisture on the soil surface dry off before evening, which helps prevent fungal issues.
How Long Should You Water?
Most plants need about 1 inch of water per week. With a soaker hose that drips about 0.5 gallons per foot per hour, you’d need to run your hose for 2 hours to deliver 1 inch to a 100-foot hose. This varies based on soil type and plant needs. Sandy soil drains fast so plants need more frequent watering. Clay soil holds water longer, so plants need less.
Check Your Soil Before Watering
Stick your finger 2 inches into the soil. If it feels moist, your plants have enough water. If it’s dry, turn on your hose. This simple test keeps you from overwatering, which is one of the top ways gardeners hurt their plants.
Don’t Forget About Rainy Days
When it rains, you might not need to use your soaker hose. If you have a timer, you can turn it off during rainy spells. If you can’t reach your timer, just remember that your plants got water from the rain. Most plants do fine with less supplemental watering during wet seasons.
Watch for Clogs and Leaks
Now and then, inspect your soaker hose for clogs and damage. If you live in an area with hard water, mineral buildup can block the holes. Flush your hose at the end of each season by removing the end cap and letting water run through. If you find leaks, try tightening connections. If that doesn’t work, you might need to buy a patch kit or replace that section.
Soaker Hose Watering Tips for Different Plants
Different plants have different water needs. Let’s look at how to use your soaker hose for common garden plants.
Vegetable Gardens
Vegetables are thirsty plants. They need steady moisture to produce well. Run your soaker hose 2 to 3 times a week during hot weather. Space hoses so they run along each row of vegetables. This keeps moisture even across your garden and helps vegetables grow big and tasty.
Flower Beds
Flowers need water but not as much as vegetables. Most flower beds do well with soaker hose watering once or twice a week. Lay your hose through the bed so it reaches all your plants. Annual flowers need more water than perennials, so you might run your hose more often during the hottest months.
Shrubs and Trees
Young trees and shrubs need regular water their first year. Arrange your soaker hose in a circle around the base, about 1 to 2 feet away from the trunk. Water deeply but less often than you would flowers. Once shrubs and trees are established, they need less water from your soaker hose.
Container Plants
You can use soaker hoses for pots too. Lay a short piece of soaker hose in the soil of large containers. This keeps the soil evenly moist without overwatering. Container plants dry out faster than garden beds, so check them daily and water as needed.
Delicate Seedlings
New seedlings need gentle watering. A soaker hose delivers water slowly and steadily, which is perfect. Just make sure the water pressure is low enough that it doesn’t disturb the soil around young plants.
Troubleshooting Common Soaker Hose Problems
Sometimes things don’t work perfectly. Here’s how to fix the most common issues.
Water Isn’t Coming Out
Check that your faucet is open. Look for kinks in the hose and straighten them out. Feel along the hose for clogs. If the end cap is on too tight, loosen it. Run water through the hose at high pressure for a minute to flush out any blockages.
Pressure Drops Along the Hose
If water flows well at the start but stops before the end, you have a long hose issue. The faucet pressure might not be strong enough to push water all the way. Try using a shorter hose or connecting a booster pump. Some people run soaker hoses in sections instead of one long line.
Leaks at the Connections
Tighten the connectors with a wrench. If that doesn’t work, buy new washers. These cheap rubber rings create a seal between pieces. Old washers crack and leak. Swap them out for fresh ones and your leak should stop.
Water Pooling in One Spot
This means the hose is sinking or the soil is sloped. Lift the hose and use stakes to hold it at the right height. On slopes, run the hose horizontally instead of up and down. This gives water time to soak in instead of running downhill.
Holes Getting Plugged
Hard water minerals can block the tiny holes. Attach a filter between your faucet and hose. Or flush your hose every month with high-pressure water. At the end of the season, drain your hose completely and store it in a cool place to extend its life.
Maintaining Your Soaker Hose Year After Year
Good care keeps your soaker hose working for many years.
Seasonal Cleanup
At the end of the growing season, drain your hose completely. Remove it from your garden and coil it loosely. Let it dry in the sun for a day. Once it’s dry, store it in a garage or shed away from direct sunlight. Sun can break down the rubber or plastic over time.
Winter Storage
In cold climates, don’t leave your soaker hose outside during winter. Water inside the hose can freeze and crack it. Bring it inside and store it on a shelf or hook. Keep it away from tools or anything sharp that could puncture it.
Spring Setup
Before you install your hose again, check it for damage from storage. Run water through it to make sure it still flows well. Replace any pieces that look worn. If you stored it for several months, flush it to clear any dust or debris.
Regular Inspection
During the growing season, walk your hose every couple of weeks and look for problems. Check connections for leaks. Feel along the hose for soft spots or cracks. The sooner you spot issues, the easier they are to fix.
Repair Kits
Keep a soaker hose repair kit handy. It should have patch materials for small holes and extra connectors and washers. These kits cost only a few dollars and save you from buying a whole new hose when you have minor damage.
Soaker Hose vs. Other Watering Methods
You might wonder how soaker hoses stack up against other ways to water your garden. Let’s compare.
Hand Watering with a Hose
Hand watering gives you complete control, but it’s tiring and you’ll spend a lot of time doing it. You waste water because you water paths and areas that don’t need it. Your plants might get uneven water coverage. Soaker hoses deliver more consistent watering without the work.
Sprinkler Systems
Above-ground sprinklers spray water in a circular pattern, but wind can push water away from plants. Sprinklers wet plant leaves, which can lead to disease. They’re not as efficient as soaker hoses. Underground sprinkler systems are expensive to install and repair. Soaker hoses cost way less.
Drip Irrigation
Drip systems with individual emitters give you the most control over water placement. They’re great for large gardens. But they’re pricier than soaker hoses and take more time to set up. For small to medium gardens, a simple soaker hose does the job better and costs less.
Soaker Hoses Win for Most Home Gardeners
Soaker hoses offer the best balance of cost, ease of use, and water savings for most people. They’re cheaper than drip systems, more efficient than sprinklers, and less work than hand watering.
Making Your Garden More Efficient
Using a soaker hose is just one way to make your garden healthier and use less water. Here are some other ideas.
Mulch Keeps Water In
Spread 2 to 3 inches of mulch over your soil around plants. Mulch stops water from evaporating and keeps soil cooler. It also keeps weeds down, so you spend less time pulling them. Lay your soaker hose under the mulch for a neat look.
Plant Groupings by Water Needs
Put plants that need lots of water together. Group plants that like it dry in another spot. This way, you can use different watering schedules and not waste water on plants that don’t need it.
Improve Your Soil
Add compost or other organic material to your soil. Good soil holds water better and reduces runoff. Plants in healthy soil need less frequent watering. Spend time building great soil and your soaker hose will be even more effective.
Choose Plants Smart
Pick plants that match your climate and rainfall. Native plants that grow wild in your area need less water than exotic plants. As you learn what grows well in your garden, you can adjust your watering schedule.
Getting Started With Your Soaker Hose Today
You now know everything you need to use a soaker hose like an expert. It’s time to get started.
Start small if you’re new to soaker hose watering. Buy one hose and use it in your biggest vegetable bed or most important flower patch. See how it works for you. Once you get comfortable with it, you can add more hoses to other parts of your garden.
Don’t stress about getting everything perfect on the first try. Gardening is all about learning as you go. If your plants don’t look great this season, you’ll do better next time. Most gardeners find that their plants look healthier and grow better once they switch to soaker hose watering.
The money you save on your water bill and the extra free time you get are nice bonuses. But the real reward is watching your garden thrive with less effort and stress.
Pick up a soaker hose this week. Lay it out in your garden. Turn on the water and feel good knowing you’re watering the smart way. Your plants will thank you with better growth and healthier leaves. Your wallet will thank you too when you see that lower water bill.
Soaker hose watering is one of the best decisions any gardener can make. Jump in and start growing a better garden today.

Hi, I’m Mary, the founder of GardenCure.com. I’m passionate about creating healthy, beautiful gardens and well-kept lawns. I share practical experience and trusted advice on garden and lawn gear that truly works. With the support of my dedicated research team, our writers produce honest, in-depth reviews using reliable, authentic sources—helping you choose the right tools with confidence for your outdoor space.