How to Apply Lime to Your Lawn?
Your grass is looking a little sad. The soil feels off. You’ve heard about lime, but you’re not sure where to start. Don’t worry. Applying lime to your lawn is way easier than it sounds, and I’m here to walk you through every single step.
In this article
Why Your Lawn Needs Lime in the First Place
Before we get into the how, let’s talk about the why. Your lawn needs lime for one main reason: soil pH balance.
Think of soil pH like a scale that goes from very acidic to very basic. Most grass loves neutral soil. When your soil gets too acidic, your grass struggles. It can’t absorb nutrients properly. It gets weaker. Disease moves in. Weeds take over. That’s where lime comes in.
Lime raises your soil pH. It makes acidic soil less acidic. Your grass gets happy again. It grows thicker, greener, and stronger.
Signs Your Lawn Needs Lime
How do you know if your grass is actually acidic? Look for these clues:
- Your lawn is thin or has bald spots
- Moss is spreading across your yard
- You see lots of clover or other weeds popping up
- You feed your grass but nothing seems to help
- The grass looks pale or yellowish
You might have acidic soil if you live in an area with a lot of rain. Wet climates tend to have acidic soil. If you’re not sure, do a soil test. Most local garden centers can test your soil for free or cheap. The test tells you exactly where your pH sits.
The Two Types of Lime You Should Know About
Not all lime is the same. You’ve got two main options.
Ground Limestone (Calcium Carbonate)
This is the most common type. It’s exactly what it sounds like: limestone that’s been ground into a fine powder. You’ll see it labeled as “ground limestone” or “agricultural lime.” This type works steadily over time. It doesn’t act fast, but it lasts longer in your soil. Most homeowners use this one.
Hydrated Lime (Calcium Hydroxide)
This stuff works faster than ground limestone. You’ll get results quicker. However, it can burn your grass if you’re not careful. It’s also more expensive. For most people doing this themselves, ground limestone is the better choice.
Pro tip: Stay away from quicklime. It’s dangerous and not made for lawns.
Getting Your Soil Test Done (Yes, Really Do This)
This step saves you money and time. A soil test tells you:
- Your current pH level
- How much lime you actually need
- Other nutrients your soil might be missing
Call your local cooperative extension office or check their website. They can tell you how to collect a soil sample. Usually, you dig a small hole, scoop some soil from different spots in your lawn, mix it together, and send it in.
Wait for the results. They’ll come back with a report. The report says something like “Your pH is 5.8. We recommend applying X pounds of lime per thousand square feet.”
This number is gold. Use it.
Calculating How Much Lime You Need
The amount of lime depends on three things:
- Your current soil pH
- Your target pH (usually around 6.5 for grass)
- Your lawn size
Your soil test gives you the exact amount to use. But here’s a general guide:
If your soil is very acidic (below 6.0), you might need 50 to 100 pounds of lime per 1,000 square feet. If it’s only slightly acidic (around 6.2), you might need 25 to 50 pounds.
To figure out your lawn size, measure the length and width. Multiply them together. That’s your square footage. If your lawn is 100 feet long and 50 feet wide, that’s 5,000 square feet.
Don’t guess on the amount. Too much lime can raise your pH too high, and that causes problems too. Use your soil test results.
When Is the Best Time to Apply Lime?
Timing matters more than people think.
Fall is the absolute best time. Apply lime in fall, and it has the whole winter to break down and work its way into the soil. By spring, your lawn is ready to take off. Early fall is perfect. You get good results with your spring lawn care.
Spring works too, but it’s not ideal. Lime needs time to work. Spring gives you less time before summer hits.
You can apply lime anytime your grass isn’t actively growing fast. That means avoid the peak growing season in your area. If you’re in a cool climate, skip summer. If you’re in a warm climate, skip winter.
Don’t apply lime right before rain, but rain a day or two after is fine. Rain helps work it into the soil.
Preparing Your Lawn Before Spreading Lime
Your lawn needs to be ready.
Mow your grass short first. Really short. You want the lime to reach the soil, not get caught in tall grass. Cut your grass about half an inch shorter than normal.
Check for thatch. Thatch is that dead grass layer on top of the soil. If it’s thick, dethatch first. Lime needs to get to the soil to work. Thick thatch gets in the way.
If your lawn has major problems, consider aerating. Aeration pokes holes in the soil, letting lime get deeper. This is especially helpful if your soil is compacted. Compacted soil is hard and packed down. Lime can’t move through it easily.
The Tools You’ll Need
You don’t need much. Here’s what works:
For Spreading Lime
The best tool is a spreader. Two types exist:
Drop spreader: This looks like a wheelbarrow with a handle. You fill it with lime, walk across your lawn, and it drops the lime straight down. It’s very even. It’s also slower. Use a drop spreader if your lawn is small or if you want super even coverage.
Broadcast spreader: This looks like a cone-shaped hopper on wheels. As you walk, a spinning disk throws the lime out in all directions. It covers more ground fast. It works great for bigger lawns. The coverage is pretty even if you overlap your passes.
You can also rent a spreader from a garden center. Most cost around $20 to $40 for the day.
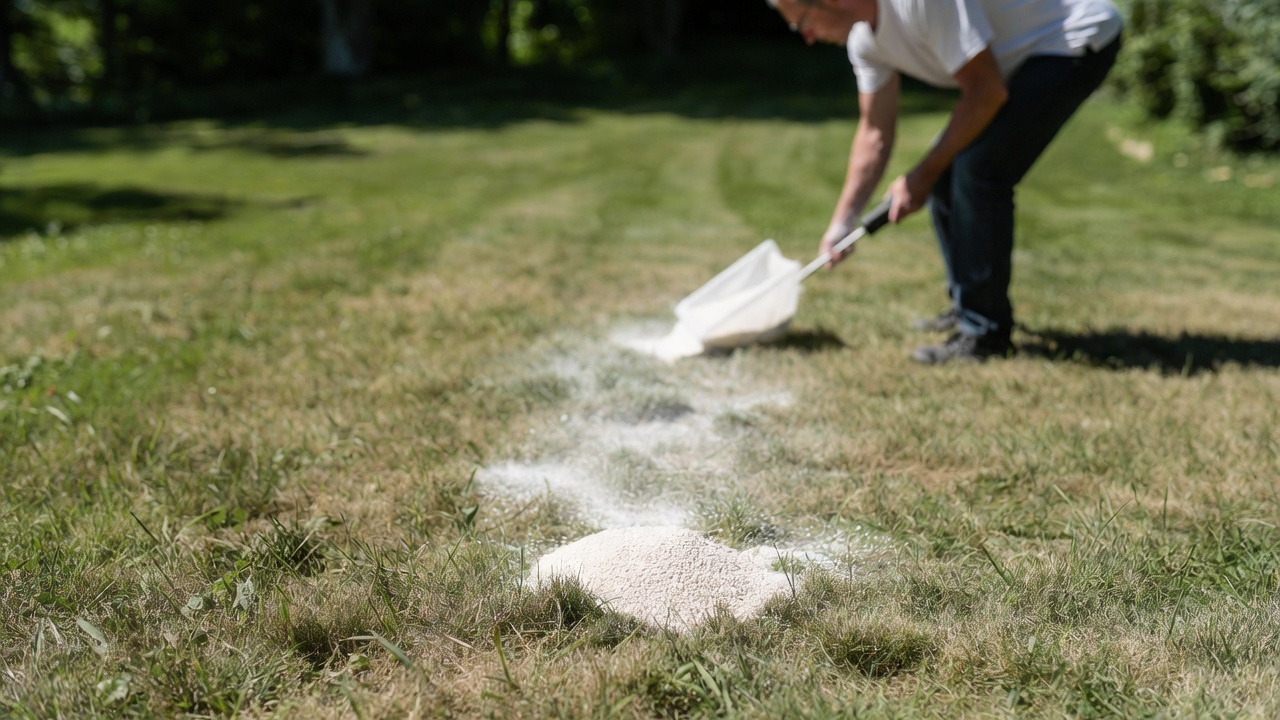
If you don’t have a spreader and can’t rent one, you can spread lime by hand using a shovel or scoop. It’s a lot more work, and coverage isn’t as even. But it works.
Other Supplies
- Gloves (lime is chalky and dries your hands)
- A dust mask (don’t inhale lime dust)
- Long sleeves (keeps lime off your skin)
- Sturdy shoes
- Your soil test results
Step-by-Step: How to Apply Lime to Your Lawn
Alright, here’s the moment. Let’s actually do this.
Step 1: Prepare Your Spreader
If you’re using a spreader, read the instructions first. Every spreader is a little different. Set the spreader to the recommended setting based on your lime type and how much you need to apply per 1,000 square feet.
Fill the hopper with lime. If you have a lot of lime to apply, do it in sections. Divide your lawn into manageable chunks.
Step 2: Start at One Edge
Walk to one edge of your lawn. It doesn’t matter which edge. Start there.
Walk in a straight line across your lawn while pushing the spreader. Keep a steady pace. If you go too fast, you spread lime too thinly. Too slow, and you apply too much.
Overlap your paths slightly. Overlap by about 12 inches. This makes sure you don’t miss any strips.
Step 3: Work Back and Forth
Turn around at the end of the lawn. Walk back in the opposite direction, slightly overlapping your last path. Keep doing this until you’ve covered your whole lawn.
The goal is even coverage. You shouldn’t see thick spots or bare spots when you’re done.
Step 4: Check for Missed Areas
Walk around and look for any areas you might have missed. If you see spots with no lime, do a small pass over those areas.
Step 5: Water It In
After you’ve spread all the lime, water your lawn. Water helps the lime move into the soil. You don’t need to soak it. A normal watering is fine. Light rain works too.
Spreading Lime by Hand: The Low-Tech Way
No spreader? No problem.
Use a shovel to scoop lime from a pile. Toss it out evenly across your lawn. It takes longer. You use your arms instead of a machine. But it works.
The trick is consistency. Scoop roughly the same amount each time. Toss it about the same distance. This keeps your coverage fairly even.
It’s hard to be perfect with this method. You might end up with slightly thicker coverage in some spots. That’s okay. As long as you’re close to your target amount, you’ll see improvement.
What Happens After You Apply Lime
You’re done spreading. Now what?
Lime doesn’t work overnight. Ground limestone works slowly. You’ll see results over the next few weeks. The grass doesn’t suddenly turn green. But you’ll notice improvements. The grass grows faster. Moss disappears. Weeds are fewer. Nutrients work better.
Hydrated lime works faster. You might see changes in a week or two.
After about three months, your lawn should look noticeably better. The soil pH starts stabilizing. Your grass gets thicker and greener.
Can You Apply Too Much Lime?
Yes, and you should avoid it.
Too much lime raises your pH too high. When pH gets too high (above 7.5 or so), grass struggles. Iron and other nutrients become locked up. Your grass turns yellow. New problems replace the old ones.
This is why the soil test is so important. Use the exact amount recommended. Don’t eyeball it. Don’t add extra “just in case.”
If you do apply too much, you can’t just undo it. Wait. Time and weather gradually balance it out. Or, next time, do a soil test and apply sulfur to lower the pH back down.
Do You Need to Reapply Lime?
Yes, eventually.
Lime doesn’t last forever in your soil. Rain and natural processes gradually wash it away or break it down. Every few years, your soil gets acidic again.
How often? That depends on your area and how acidic your soil naturally gets. Most people reapply every 3 to 5 years.
After the first application, do another soil test. The test tells you if you need more lime yet.
Common Mistakes People Make When Applying Lime
Learn from others’ mistakes.
Mistake 1: Skipping the Soil Test
This is huge. People guess at how much lime to use. Then they apply way too much or too little. The soil test is cheap and saves you from this disaster.
Mistake 2: Applying Lime at the Wrong Time
Applying lime in spring before your grass’s peak growing season means the lime doesn’t have time to work. Fall is genuinely better.
Mistake 3: Not Mowing Short First
Tall grass traps lime. The lime never reaches the soil. Mow short. Let the lime get to where it needs to go.
Mistake 4: Spreading Unevenly
Streaky application causes your lawn to look patchy. Go slow. Overlap your passes. Keep your pace steady.
Mistake 5: Forgetting to Water
Water helps lime start working. A quick watering after application moves the lime into the soil faster.
Mistake 6: Not Waiting
People get impatient. They apply lime and expect a perfect lawn next week. Lime takes time. Ground limestone especially takes weeks to months. Be patient.
Special Situations
What if You Have a New Lawn?
If you’re seeding a new lawn, apply lime before planting if you need it. Do your soil test first. Apply lime. Wait a week or two. Then seed. This sets your new grass up for success from day one.
What About Lawns with Thatch?
Thick thatch blocks lime from reaching the soil. Dethatch first. Then apply lime. The lime can actually help break down some thatch over time.
Do I Need to Lime Every Year?
No. Most lawns only need lime every few years. Annual applications are overkill. They waste money and can push your pH too high. Stick to the soil test schedule.
What About Fertilizer and Lime Together?
Some products combine lime and fertilizer. These combo products work fine. Just don’t double up. Don’t add lime and fertilizer separately if they’re already combined. Check the label.
The Bottom Line
Applying lime to your lawn isn’t scary. It’s straightforward. Do a soil test. Follow the recommendation. Spread the lime evenly. Water it in. Wait for results.
Your lawn will thank you. The grass grows thicker. Weeds disappear. Moss moves out. Your lawn becomes healthier, greener, and stronger.
The most important thing? Don’t skip the soil test. It’s the difference between a great result and a waste of money.
Frequently Asked Questions About Lime Application
Can I Apply Lime in Winter?
It’s not ideal, but you can. Lime works best when soil isn’t frozen. Cold soil slows the process. If you must apply in winter, do it early winter before the ground freezes solid.
Is Lime Safe for Pets?
Lime is generally safe for pets once it’s watered in. Keep pets off the lawn while you’re spreading and for a few hours after. Once it’s been watered and settled, it’s fine.
What’s the Difference Between Lime and Dolomite?
Dolomite is a type of limestone that contains magnesium. If your soil test says you need dolomite specifically, use that. If it just says lime, regular ground limestone is fine.
Can I Use Wood Ash Instead of Lime?
No. Wood ash is not the same. Don’t use it as a substitute. Stick with proper agricultural lime.
Do I Need Lime if My Grass Looks Okay?
Not necessarily. If your lawn looks great and you don’t see moss or problems, a soil test might show your pH is already fine. Only apply lime if you need it.
How Long Does Lime Take to Work?
Ground limestone: 3 to 6 weeks for noticeable improvement, months for full effect. Hydrated lime: 1 to 2 weeks for noticeable improvement.
What If I Applied Too Much Lime?
Wait it out. The soil naturally re-acidifies over time. Or, do a soil test, and if pH is too high, apply sulfur to lower it. Next time, use exact amounts.
Can I Apply Lime in Summer?
It’s not the best time. Lime can stress grass during heat. Fall and spring are better. If you must, apply to a cool day and water well.
Should I Lime My Whole Yard or Just Problem Areas?
Do your whole lawn if the soil test shows your whole yard is acidic. If only certain spots are bad, you could spot-treat those areas. Most of the time, the whole lawn needs it.
Do I Have to Use a Spreader?
No. You can spread by hand. It’s just more work and harder to keep even. A spreader makes the job easier and results more consistent.
Final Thoughts
Your lawn deserves the chance to thrive. Acidic soil holds it back. Lime fixes that. The process is simple: test, measure, spread, water, and wait.
Take action this fall. Get that soil test done. Apply the lime. In a few weeks, you’ll see the difference. Your grass will be greener, thicker, and healthier.
Your lawn will thank you. Trust me on this one.

Hi, I’m Mary, the founder of GardenCure.com. I’m passionate about creating healthy, beautiful gardens and well-kept lawns. I share practical experience and trusted advice on garden and lawn gear that truly works. With the support of my dedicated research team, our writers produce honest, in-depth reviews using reliable, authentic sources—helping you choose the right tools with confidence for your outdoor space.