How to Plant Carrot Plants?
Growing carrots in your backyard garden brings a special kind of joy. You pull up that bright orange root, brush off the soil, and taste the sweetness you nurtured from a tiny seed. Anyone can grow carrots successfully once they learn the simple secrets these root vegetables need to thrive.
In this article
Carrots grow best when you start them right. This guide walks you through everything from preparing your soil to harvesting perfect roots. You’ll learn how to avoid common mistakes and discover tips that lead to bigger, sweeter carrots.
Getting Your Garden Ready for Carrot Seeds
The foundation of great carrots starts beneath the surface. Carrots need loose, well-drained soil that lets their roots grow long and straight. Compacted or rocky soil creates twisted, stunted carrots that look funny but don’t taste as good.
Start by checking your garden bed location. Carrots love full sun, which means at least 6-8 hours of direct sunlight daily. They can handle partial shade, but you’ll get smaller roots and longer growing times. Pick a spot that drains well after rain since waterlogged soil causes rot.
Now dig deep. Carrots can grow 6-12 inches long depending on the variety. Your soil needs to be loose and rock-free to that depth. Use a garden fork to break up compacted earth, working down at least 12 inches. Remove every stone, stick, and hard clump you find. Each obstacle forces the growing root to split or curve around it.
Your soil texture makes or breaks your carrot crop. Sandy loam works perfectly because it drains well while holding enough moisture. Clay soil needs serious help. Mix in lots of organic matter like aged compost, peat moss, or coconut coir. These amendments lighten heavy clay and improve drainage. Work them in thoroughly until the soil feels fluffy and crumbly in your hands.
Test your pH levels if possible. Carrots prefer slightly acidic to neutral soil between 6.0 and 6.8. You can buy simple pH test kits at garden centers. If your soil runs too acidic, add some lime. If it’s too alkaline, sulfur brings it down. Most gardens fall in the right range naturally.
The Right Time to Plant Your Carrot Seeds
Timing separates successful carrot growers from frustrated ones. Carrots are cool-season crops that prefer mild temperatures. They handle light frost but struggle in extreme heat.
Spring planting works best in most regions. Sow your seeds 2-4 weeks before your last expected frost date. The soil should reach at least 45°F, though 50-85°F works even better. Cold soil delays germination and can cause seeds to rot before sprouting.
Fall crops taste sweeter than spring ones. Plant seeds 10-12 weeks before your first expected fall frost. Cool autumn temperatures trigger carrots to produce more sugars, creating that incredible sweetness. These late-season carrots often become the best you’ve ever tasted.
You can extend your harvest through succession planting. Sow new seeds every 2-3 weeks throughout the growing season. This strategy gives you fresh carrots from spring through fall instead of one big harvest all at once.
Preparing and Planting Your Carrot Seeds
Carrot seeds look tiny and delicate. These small seeds need special care to germinate properly. The good news is that once you understand their needs, growing them becomes straightforward.
Create shallow furrows in your prepared bed. Your rows should run about 12-18 inches apart. Use a hoe handle or stick to make grooves roughly 1/4 to 1/2 inch deep. Carrot seeds need light to germinate, so planting too deep stops them from sprouting.
Sprinkle the seeds thinly along each furrow. Try to space them about 1 inch apart, though this takes practice with such tiny seeds. Many gardeners mix their carrot seeds with sand or used coffee grounds. This mixture makes it easier to see where you’ve planted and helps distribute seeds more evenly.
Cover the seeds lightly with fine soil or compost. Press down gently with your hand to ensure good seed-to-soil contact. Water immediately using a gentle spray. Strong water pressure can wash away these lightweight seeds.
Some gardeners use radish seeds as row markers. Radishes germinate quickly and mark where you planted your slower-sprouting carrots. You’ll harvest the radishes long before they compete with your carrots for space.
Keeping Your Carrot Seeds Moist Until They Sprout
Here’s the tricky part that frustrates many first-time carrot growers. Carrot seeds take 14-21 days to germinate. During this entire period, the soil surface must stay consistently moist. Let it dry out even once, and your germination rate plummets.
Water gently twice daily if needed. Morning and evening work well for most climates. Use a fine spray or misting nozzle that won’t disturb the seeds. The top inch of soil should feel damp but never soggy or flooded.
A covering helps retain moisture and speeds germination. Lay burlap sacks, floating row covers, or damp newspapers over your planted rows. These covers keep the soil from drying out in sun and wind. Check daily and water through the covering if needed. Remove it immediately once you see green shoots emerging.
Some gardeners swear by the board method. Place wooden boards directly over your planted rows. The boards trap moisture and warm the soil. Check every day, and remove the boards the moment seedlings appear. Leave them too long, and you’ll get pale, weak sprouts.
Thinning Your Carrot Seedlings
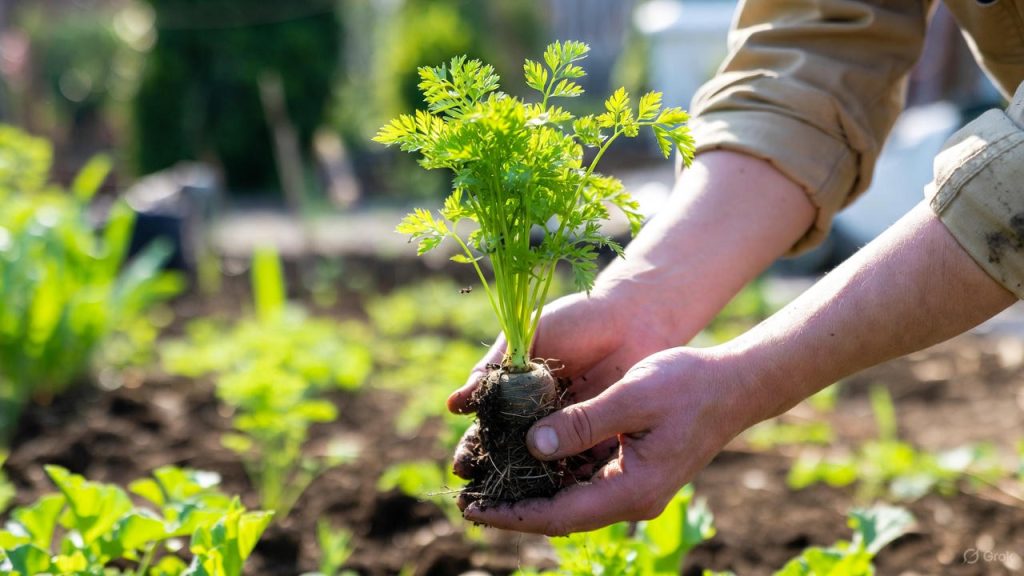
Your seeds sprouted into a carpet of green shoots. Congratulations! Now comes an important step many people skip. Thinning your seedlings gives each carrot room to develop properly.
Wait until seedlings reach about 2 inches tall. Then start removing extras so remaining plants stand 2-3 inches apart. This spacing gives mature carrots enough room to size up without competing for nutrients and water.
Thinning feels wasteful, but crowded carrots stay small and misshapen. Use small scissors to snip off unwanted seedlings at soil level rather than pulling them. Pulling disturbs the roots of nearby plants you want to keep.
You can eat your thinnings. These baby carrot tops taste great in salads, bringing a mild carrot flavor to fresh greens. Just wash them well and toss them in.
Some people prefer pelleted carrot seeds. Seed companies coat individual seeds in clay, making them larger and easier to space properly at planting. Pelleted seeds cost more but save you the thinning step later.
Watering Your Growing Carrots
Consistent moisture produces the best carrots. Irregular watering causes splits, cracks, and bitter flavors. Your goal is to keep soil evenly moist about 6-8 inches deep throughout the growing season.
Young seedlings need more frequent watering since their roots are shallow. Water lightly every few days, keeping the top few inches moist. As plants mature, water less often but more deeply. This encourages roots to grow downward seeking moisture.
Most carrot beds need about 1 inch of water per week. Your finger makes a great moisture meter. Stick it 2-3 inches into the soil. If it feels dry at that depth, water your carrots. If it feels moist, wait another day or two.
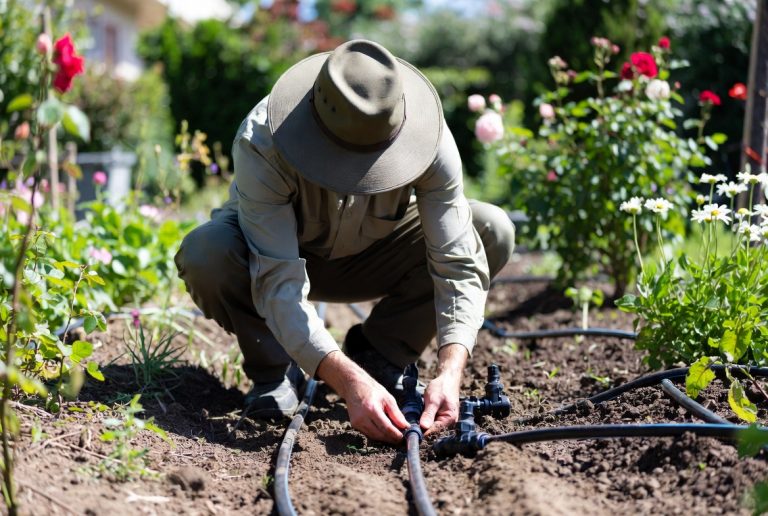
Drip irrigation or soaker hoses work beautifully for carrots. These systems deliver water directly to the root zone without wetting foliage. Overhead sprinklers waste water and can promote fungal diseases on leaves.
Mulch helps maintain even soil moisture. Spread 2-3 inches of straw, grass clippings, or shredded leaves around your carrot plants once they’re established. Mulch also suppresses weeds and keeps soil cooler in summer heat.
Feeding Your Carrot Plants
Carrots need balanced nutrition but aren’t heavy feeders. Too much nitrogen creates lush green tops with small, hairy roots. You want your plants to focus energy on root development, not leaf production.
Skip fresh manure or high-nitrogen fertilizers. These materials push excessive leaf growth and cause forked, misshapen roots. If you added compost while preparing your bed, your carrots probably have all the nutrition they need.
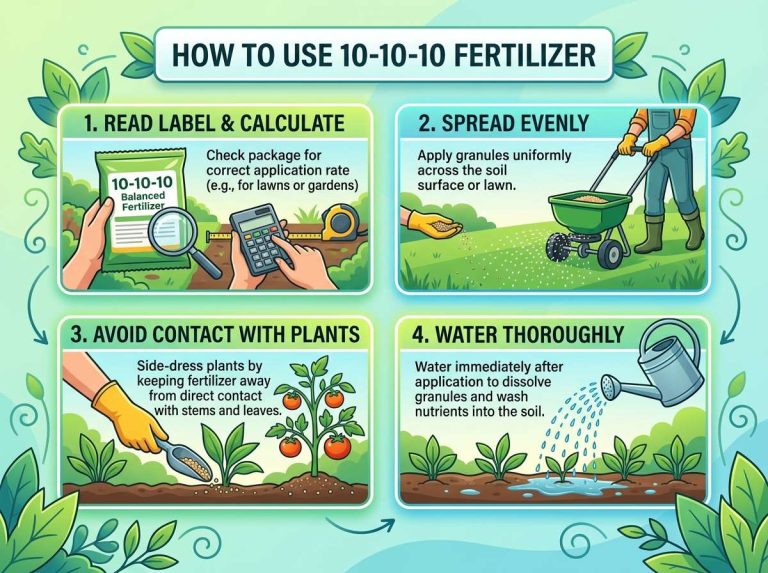
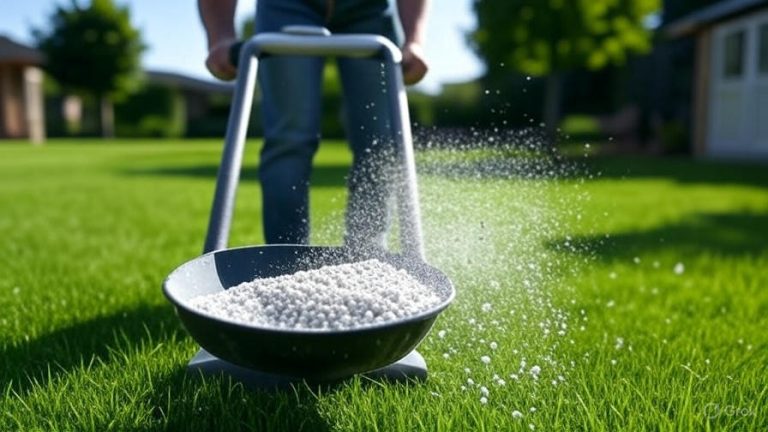
Side-dress with a balanced fertilizer about 4-6 weeks after planting. Choose something with equal or lower nitrogen compared to phosphorus and potassium, like a 5-10-10 blend. Sprinkle it lightly along the rows about 3 inches from the plants, then water it in.
Wood ash provides potassium that helps root development. Sprinkle a light coating over your carrot bed once or twice during the season. Too much raises soil pH, so use sparingly.
Your carrot foliage tells you how they’re doing. Dark green, healthy leaves mean happy plants. Pale or yellowing leaves might signal nutrient deficiency. Overly lush, deep green foliage suggests too much nitrogen.
Managing Weeds Around Your Carrots
Weeds steal water, nutrients, and sunlight from your carrots. Young carrot seedlings grow slowly and can’t compete with aggressive weeds. Stay on top of weeding from day one.
Hand-pull weeds carefully while your carrots are small. Their shallow roots disturb easily, so work gently around the base of each plant. Morning weeding works best since soil is usually moister and weeds pull out more easily.
A good mulch layer stops most weeds before they start. Wait until your carrot seedlings reach 3-4 inches tall, then apply your mulch. Pull any existing weeds first, then spread your mulch material between rows and around plants.
Avoid deep hoeing or cultivating near carrot plants. These tools damage shallow feeder roots and can nick developing carrot roots. Surface cultivation works fine between rows but stay several inches away from your plants.
Flame weeding works great between rows before your carrots emerge. A propane torch quickly kills weed seedlings. Stop flame weeding once your carrots sprout since they’re just as vulnerable to heat as weeds.
Protecting Your Carrots from Pests
Several insects consider carrots a delicious target. The carrot rust fly causes the most damage in many regions. Adult flies lay eggs near plants, and larvae tunnel into roots, leaving brown trails and ruining your crop.
Floating row covers provide excellent protection. Install them right after planting and leave them in place all season. These lightweight fabrics let in sun and rain while blocking flying insects. Secure the edges with soil or landscape staples so pests can’t sneak underneath.
Carrot weevils attack foliage and roots. You’ll notice notched leaf edges if these beetles are feeding. Hand-picking works for small infestations. Pick them off in early morning when they’re sluggish from cool temperatures.
Aphids sometimes cluster on carrot foliage, sucking plant juices and spreading diseases. A strong spray of water knocks them off. Insecticidal soap controls heavy infestations. Ladybugs and lacewings eat aphids naturally, so encourage these beneficial insects in your garden.
Wireworms tunnel through roots, creating holes and tunnels. These pests live in soil for years and are hard to control. Crop rotation helps since wireworms prefer grassy areas. Avoid planting carrots where lawn grew recently.
Deer and rabbits love carrot tops. Fencing is your best defense. A 3-foot fence stops rabbits. Deer need 8-foot fencing or electric wire. Some gardeners plant carrots inside fenced vegetable gardens to keep out these hungry mammals.
Recognizing and Preventing Carrot Diseases
Leaf blight appears as brown or yellow spots on foliage. This fungal disease spreads in wet, humid conditions. Space plants properly for good air circulation. Water at soil level rather than overhead. Remove infected leaves immediately and destroy them.
Cavity spot creates small brown lesions on carrot roots. This disease thrives in alkaline, calcium-deficient soils. Maintain proper pH levels and add gypsum if your soil needs calcium. Crop rotation prevents buildup of disease organisms.
Root rot turns carrots soft, mushy, and foul-smelling. Poorly drained soil causes most cases. Fix drainage problems before planting. Raised beds work great in areas with heavy clay or high water tables.
White mold sometimes appears as fluffy white growth on carrots, especially during storage. This fungal problem starts in the garden when temperatures stay cool and humidity runs high. Harvest promptly when roots mature. Cure and store carrots properly to prevent mold development.
Aster yellows comes from a bacteria-like organism spread by leafhoppers. Infected plants show twisted, yellowed growth and bitter-tasting roots. No cure exists, so remove and destroy infected plants immediately. Control leafhoppers with row covers or insecticides.
Knowing When Your Carrots Are Ready to Harvest
Most carrot varieties mature in 60-80 days from planting. Check your seed packet for the expected days to maturity. But don’t rely solely on calendar dates. Several signs tell you when carrots reach peak readiness.
Look at the shoulders. The top of each carrot pushes up slightly above the soil surface as it matures. You’ll see a ring of orange emerging. Once this diameter reaches 3/4 to 1 inch across, your carrots are probably ready.
Pull one test carrot to check size and flavor. Grab the green tops close to the crown and pull straight up with steady pressure. Wiggle it side to side if needed. Rinse it off and taste it raw. Perfect carrots are sweet, crunchy, and flavorful.
Baby carrots taste sweeter than full-size ones. Harvest some young if you prefer that tender texture and concentrated flavor. You can start pulling carrots whenever they reach finger thickness.
Don’t leave mature carrots in the ground too long. Overmature roots get woody, tough, and bitter. They also crack and split more easily. Hot weather makes carrots bolt to seed, ruining their eating quality.
Cold improves flavor. Carrots exposed to light frost develop extra sweetness. Some gardeners wait for frost to hit before harvesting fall crops. Just don’t let carrots freeze solid in the ground.
Harvesting Your Carrot Crop
Harvest day brings excitement and satisfaction. You finally get to see and taste the results of your work. Proper harvesting technique prevents breaking or damaging your carrot roots.
Water your bed thoroughly the day before harvesting. Moist soil releases roots more easily than dry, hard ground. Carrots break off if you try pulling them from dry soil.
Loosen soil around each plant with a garden fork. Push the fork into the soil 4-6 inches away from the row, then gently lever back to lift and loosen the bed. Work down the entire row this way.
Grasp the green tops near the crown and pull straight up with firm, steady pressure. Don’t yank or jerk. Most carrots slide out easily after loosening the soil. Stubborn ones might need more leverage with your garden fork.
Brush off excess soil immediately. Don’t wash carrots you plan to store. The protective soil layer helps them keep longer. You can leave a thin coating of dirt on roots destined for the storage cellar.
Twist or cut off the green tops right away. Leave about 1/2 inch of stem attached to the crown. The foliage pulls moisture from roots during storage. Remove it promptly to keep carrots crisp and fresh.
Storing Your Harvested Carrots
Fresh carrots keep for months with proper storage. Your storage method depends on how many carrots you grew and how long you want them to last.
Short-term storage in your refrigerator works for a few weeks. Trim tops, brush off dirt, and place carrots in perforated plastic bags. The crisper drawer maintains ideal humidity. Don’t wash them before refrigerating since moisture encourages rot.
Root cellars provide perfect conditions for long-term storage. Pack harvested carrots in boxes or bins filled with damp sand, sawdust, or peat moss. Layer carrots so they don’t touch each other. Keep your storage area at 32-40°F with high humidity. Properly stored carrots last 4-6 months.
Some gardeners leave carrots in the ground all winter. This works in mild climates where soil doesn’t freeze solid. Cover your rows with a thick mulch layer of straw or leaves. Dig carrots as needed throughout winter. They’ll stay fresh and sweet in their natural environment.
Blanching and freezing preserves carrots for cooking. Scrub them clean, peel if desired, and cut into slices or sticks. Blanch in boiling water for 2-3 minutes, then plunge into ice water. Drain well, pack in freezer bags, and freeze. Frozen carrots work great in soups, stews, and cooked dishes.
Dehydrating creates shelf-stable carrot chips and pieces. Slice carrots thin and uniform. Arrange on dehydrator trays and dry until brittle. Store in airtight containers in a cool, dark place. Rehydrate for cooking or eat them as crunchy snacks.
Growing Different Carrot Varieties
Hundreds of carrot varieties exist, each with unique characteristics. You can grow different colors, shapes, sizes, and flavors. Experimenting with varieties makes gardening more fun and puts unusual vegetables on your table.
Nantes types have cylindrical roots with blunt tips. They grow 6-7 inches long with exceptional sweetness and crisp texture. ‘Scarlet Nantes’ and ‘Bolero’ are popular choices that perform well in most gardens.
Chantenay carrots are short and thick with broad shoulders. These stubby roots reach only 4-5 inches long but pack great flavor. They excel in heavy or rocky soil where longer varieties struggle. ‘Red Core Chantenay’ is a classic variety.
Imperator carrots produce those long, slender roots you see in grocery stores. They can reach 10-12 inches in loose, deep soil. ‘Tendersweet’ and ‘Apache’ provide excellent flavor and storage quality.
Danvers varieties give you medium-length roots with good adaptability. They tolerate various soil types better than other classes. ‘Danvers Half Long’ has been grown for over 100 years and remains popular.
Round carrots solve the problem of shallow or rocky soil. ‘Paris Market’ and ‘Thumbelina’ grow into golf-ball shapes just 1-2 inches across. These cute carrots mature quickly and taste incredibly sweet.
Purple, yellow, white, and red carrots offer rainbow colors. ‘Purple Haze’ has purple skin with orange flesh inside. ‘Yellowstone’ provides bright yellow roots. ‘White Satin’ produces creamy white carrots. These colorful varieties aren’t just pretty; they bring different nutritional profiles and flavors.
Saving Carrot Seeds for Next Year
Growing your own seeds saves money and maintains varieties you love. Carrots are biennials that flower and set seed in their second year. This makes seed saving a bit more involved than with annual crops.
Save seeds only from open-pollinated or heirloom varieties. Hybrid carrots don’t breed true from seed. Their offspring show all sorts of different characteristics instead of matching the parent plant.
Choose your best plants for seed saving. Select several carrots with ideal size, shape, color, and flavor. Leave them in the ground over winter or dig and store them, then replant in spring.
Carrots that overwinter in the ground send up flower stalks in spring. These tall stalks produce umbrella-shaped white flower clusters called umbels. Insects pollinate the flowers, and seeds form over summer.
Let seed heads mature fully on the plant. They’ll turn brown and dry. Cut entire umbels and hang them upside down in a paper bag. Seeds fall out as they dry completely. Rub seed heads between your hands to release remaining seeds.
Clean your seeds by winnowing away chaff. Pour seeds from one container to another in front of a fan. Light debris blows away while heavier seeds drop into your container. Store cleaned seeds in paper envelopes in a cool, dry, dark place. Carrot seeds remain viable for 3 years.
Carrots cross-pollinate with wild Queen Anne’s Lace and other carrot varieties. Isolate different varieties by at least 1/4 mile to keep seeds pure. This distance requirement makes seed saving challenging in neighborhoods where multiple gardeners grow carrots.
Common Carrot Growing Problems and Solutions
Even experienced gardeners face challenges when growing carrots. Understanding common problems helps you diagnose and fix issues quickly.
Forked or twisted roots result from obstacles in the soil. Rocks, hard clumps, or fresh manure all cause deformities. The solution is prevention through thorough soil preparation. Sift out rocks and break up clumps before planting.
Hairy roots develop from excess nitrogen. Too much fertilizer, especially fresh manure, makes carrots grow excessive root hairs. These fuzzy carrots taste fine but look unappealing. Use balanced fertilizer and avoid nitrogen-rich amendments.
Splitting and cracking happen when carrots get irregular water. A dry spell followed by heavy rain or watering causes roots to expand too quickly. Their skin splits open. Maintain consistent soil moisture all season to prevent this problem.
Green shoulders appear when root tops get exposed to sunlight. The green part tastes bitter. Hill soil or mulch around the crown of each plant to block light. Harvest promptly when carrots mature.
Bitter flavor comes from stress. Hot weather, drought, or poor soil all make carrots taste bitter. Grow carrots during cool seasons and maintain good growing conditions. Fall-harvested carrots after frost taste sweetest.
Poor germination frustrates many carrot growers. Old seeds, inconsistent moisture, or planting too deep all reduce germination rates. Use fresh seeds, keep soil moist until sprouts emerge, and plant at the correct shallow depth.
Small roots happen when carrots face too much competition. Crowded plants, thick weeds, or poor soil all stunt growth. Thin seedlings properly, control weeds, and ensure rich, loose soil.
Growing Carrots in Containers
Don’t let limited space stop you from growing carrots. Container gardening works beautifully for these root crops. You just need to match your container size to your carrot variety.
Choose containers at least 12 inches deep for standard carrots. Shorter varieties like Chantenay or round types need only 6-8 inches of depth. Width matters less than depth, but wider containers hold more plants.
Drainage is critical. Your containers must have adequate drainage holes in the bottom. Sitting in waterlogged soil kills carrots quickly. Elevate containers slightly or use pot feet to ensure excess water escapes.
Fill containers with high-quality potting mix, not garden soil. Potting mix stays loose and fluffy, giving roots room to expand. Garden soil compacts in containers, restricting growth. Mix in some compost for added nutrition.
Sow seeds the same way you would in ground beds. Sprinkle thinly, cover lightly, and keep moist until germination. Thin seedlings to proper spacing once they emerge.
Container carrots dry out faster than in-ground plants. Check soil moisture daily and water when the top inch feels dry. Container growing works great on sunny patios, balconies, or anywhere you have space and sun.
Companion Planting with Carrots
Some plants help carrots grow better when planted nearby. Others compete or cause problems. Strategic companion planting creates a healthier, more productive garden.
Onions, leeks, and chives make excellent carrot companions. Their strong scent confuses carrot rust flies, reducing pest damage. Plant these alliums in alternating rows with your carrots.
Lettuce and carrots grow well together. Lettuce has shallow roots that don’t compete with deep carrot roots. The lettuce shades soil, keeping it cool and moist. Harvest your lettuce before carrots need the space.
Radishes serve multiple purposes alongside carrots. They germinate quickly and mark your rows. You harvest radishes long before they compete with developing carrots. Some people believe radishes help break up soil for carrot roots.
Tomatoes benefit from nearby carrots. The carrots’ deep roots break up compacted subsoil, helping tomato roots penetrate deeper. They don’t compete since they occupy different soil levels.
Avoid planting carrots near dill, parsnips, or celery. These relatives attract similar pests and diseases. Keeping them separated reduces problems.
Don’t plant carrots after legumes like beans or peas. These crops leave excess nitrogen in soil, causing carrots to produce hairy, forked roots. Wait a season or grow a different crop in that spot.
Growing Organic Carrots
Many gardeners prefer organic methods that avoid synthetic chemicals. Growing organic carrots successfully depends on building healthy soil and using natural pest and disease control.
Start with rich compost and organic matter. These materials feed soil microorganisms that make nutrients available to plants. Add compost annually to maintain soil fertility and structure.
Rotate your crops each year. Never plant carrots in the same spot two years running. Move them to a different bed that hasn’t grown carrots or related crops. This breaks pest and disease cycles naturally.
Use organic fertilizers like fish emulsion, kelp meal, or aged manure. These products release nutrients slowly and improve soil biology. Apply them according to package directions, being careful not to over-fertilize.
Manage pests with physical barriers and biological controls. Row covers exclude flying insects. Hand-picking removes beetles and caterpillars. Beneficial insects like ladybugs and lacewings eat pest insects naturally.
Organic fungicides like copper or sulfur sprays control diseases when needed. Use them sparingly and only when problems appear. Prevention through proper spacing, watering, and crop rotation works better than treatment.
Organic certification requires three years of chemical-free growing. Keep detailed records of everything you add to your soil and spray on plants. Follow organic standards if you plan to sell certified organic produce.
Making the Most of Your Carrot Harvest
You grew beautiful carrots. Now comes the fun part—eating them! Fresh carrots taste completely different from store-bought ones. That sweetness and crunch make all your work worthwhile.
Raw carrots make the perfect snack. Wash, peel if desired, and eat them whole or cut into sticks. Fresh carrot sticks with hummus or ranch dip satisfy hunger in a healthy way. Pack them in school lunches or bring them to work.
Roasted carrots develop incredible caramelized sweetness. Toss them in olive oil, salt, and pepper. Roast at 425°F for 25-30 minutes until tender and slightly browned. Add fresh herbs like thyme or rosemary for extra flavor.
Carrot soup makes a warming, nutritious meal. Simmer chopped carrots with onions, garlic, and broth until tender. Blend until smooth and creamy. Add a swirl of cream or coconut milk for richness.
Shredded carrots add color and nutrition to countless dishes. Toss them into salads, slaws, or sandwiches. Mix them into muffins, cakes, or quick breads. Carrot cake made with fresh-grated carrots tastes infinitely better than versions using store-bought carrots.
Juice your carrots for a nutritious drink. Fresh carrot juice provides concentrated vitamins and minerals. Mix it with apple, orange, or ginger for flavor combinations that beat anything from a bottle.
Pickle your carrots for tangy, crunchy snacks that last months. Quick pickles in vinegar brine take just 24 hours. Properly canned pickled carrots remain shelf-stable for a year.
Your Carrot Growing Journey Starts Now
Growing carrots transforms your garden and your plate. These sweet, crunchy roots grow easily once you understand their simple needs. Loose soil, consistent moisture, and patience during germination set you up for success.
Start small if you’re new to gardening. A 4-foot row provides plenty of carrots for fresh eating while you learn the process. Expand your planting next year after you’ve gained confidence and experience.
Every garden brings different challenges. Your soil type, climate, and growing season affect your results. Don’t get discouraged by setbacks. Each season teaches valuable lessons that make you a better gardener.
The taste of a sun-warmed carrot pulled fresh from your garden beats anything from a grocery store. That flavor, that crunch, that satisfaction of growing your own food—these rewards make every bit of effort worthwhile.
Get your seeds, prepare your soil, and plant those first rows. Your carrot-growing adventure awaits. Before you know it, you’ll be pulling up beautiful orange roots and sharing your harvest with family and friends.

Hi, I’m Mary, the founder of GardenCure.com. I’m passionate about creating healthy, beautiful gardens and well-kept lawns. I share practical experience and trusted advice on garden and lawn gear that truly works. With the support of my dedicated research team, our writers produce honest, in-depth reviews using reliable, authentic sources—helping you choose the right tools with confidence for your outdoor space.