How to Create a Water Sink in Backyard?
A water sink in your backyard is one of the best additions you can make. It gives you a clean place to wash your hands, clean tools, and prep food outdoors. Building a backyard water sink doesn’t have to be hard. You can do it yourself with some basic tools and supplies.
In this article
In this guide, I’ll walk you through every step. You’ll learn how to pick the right spot, get your materials, and build a sink that works perfectly for your needs. Let’s get started.
Why You Need a Backyard Sink
Before we jump into the building process, let’s talk about why a backyard sink is so useful.
A backyard sink saves you time. You don’t have to run inside your house when you need to clean up. This is great when you’re gardening, grilling, or doing yard work. You can wash your hands right where you are.
An outdoor sink keeps your house clean too. Mud and dirt won’t get tracked inside. Your kitchen stays nicer, and you use less water in the long run. Plus, your family stays healthier because everyone can wash up outside before coming in.
A backyard sink adds value to your home. Buyers love homes with great outdoor spaces. An outdoor water sink shows that you thought about making your yard functional and nice.
Finding the Right Location
The spot you pick for your sink is super important. Take time to think about where it should go.
Look for a flat area first. Your sink needs level ground so water flows right. If the ground slopes, water won’t drain properly. Spend a few minutes checking different spots in your yard. Use a simple level to test the ground.
Think about water drainage too. You don’t want water sitting near your house foundation. Don’t put your sink too close to where you sit outside. Wet ground around your seating area gets annoying fast. Look for a spot that drains toward your garden or a low spot in your yard.
Consider how far the water will travel. The closer your sink is to your water source, the easier it is to hook up. If you have a spigot or outdoor water line nearby, that’s perfect. Your project becomes simpler and costs less.
Shade is your friend here. A sink in full sun gets hot. You’ll have warm water in summer, which sounds nice at first. But the ground around it gets muddy and slippery. Trees or a covered area work great. If you can’t get shade, that’s okay too.
Think about foot traffic. You want your sink where people actually walk in your yard. Putting it somewhere hidden means you won’t use it much. Place it where it’s easy to reach from your garden, patio, or outdoor kitchen area.
Gathering Your Materials
You need certain items to build your backyard water sink. Let’s go through a basic list.
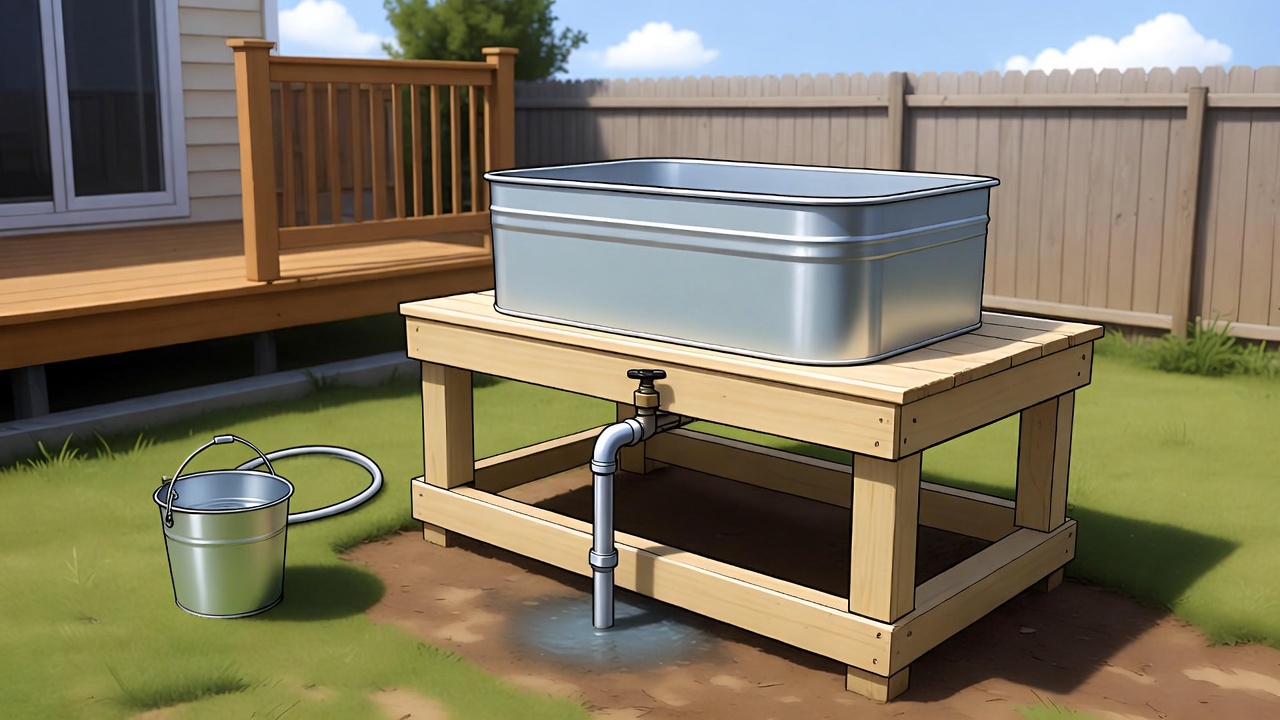
For the basin: You’ll need a sink itself. Old kitchen sinks work great. You can find used sinks at salvage yards, thrift stores, or online. You can also buy a new stainless steel outdoor sink. Galvanized metal tubs work too if you want something smaller and cheaper.
For the stand: You need something sturdy to hold your sink. Cedar wood is perfect because it doesn’t rot fast. You’ll need four posts and some cross beams. Concrete blocks also work well. Metal stands made from pipes are stylish and long-lasting.
For the water supply: You’ll need flexible hose that connects to your water line. Get a hose that’s rated for outdoor use. Brass fittings last longer than plastic ones. Pick up a small outdoor faucet or spigot. Some people use regular outdoor hose bibs, which is fine.
For drainage: You need a drain pipe that carries water away. PVC pipes are cheap and easy to work with. Get a P-trap to keep bad smells from coming up. You’ll also need a drain cover to catch big pieces of trash.
Basic tools: Grab a drill, saw, level, wrench, and measuring tape. You probably have these already. Get some stainless steel screws and bolts. These don’t rust like regular metal ones.
Extra supplies: Caulk and sealant keep water from leaking. Gravel or stone helps with drainage around the sink. Sandpaper smooths rough wood. Wood stain or paint protects your wood.
Preparing the Ground
Before you build anything, you need to prep your chosen spot.
Start by clearing the area. Remove grass, rocks, and roots. You want bare ground. Use a shovel to dig out weeds. Level the ground as much as you can by hand. Fill low spots with dirt and tamp it down.
Now think about drainage. The area under your sink will get wet. You need a way for water to drain away fast. Dig a small hole under where the sink will sit. Make it about six inches deep and big enough for water to drain into. You can put gravel in this hole to help water soak into the ground faster.
Some people dig a small trench that slopes away from the sink. This guides water away from the sink area. Your water won’t sit and make mud. If you have a flower bed nearby, run the trench toward it. Your plants will love the extra water.
Compact the ground where your stand will sit. You want it solid so your sink doesn’t wobble. Walk over it a few times. Tamp it with a hand tool. Loose ground causes problems later.
If you’re worried about pests like mosquitoes, don’t let water pool anywhere. Stagnant water attracts them. Make sure your drainage system works well. This simple step saves you from bugs.
Building Your Sink Stand
Now comes the fun part. You’re going to build the structure that holds your sink.
If you’re using wood, start by cutting your pieces. You need four vertical posts about three feet tall. Cut cross pieces that connect them. Make a rectangle that’s big enough for your sink. Use a carpenter’s square to make sure corners are square.
Screw everything together. Use at least two screws at each joint. Stainless steel screws don’t rust and look better. Drill pilot holes first so the wood doesn’t split. Make sure everything is tight and solid.
Add a top surface now. You can build a simple wooden deck on top of the frame. Use pressure-treated lumber so it lasts longer outdoors. Leave a hole or opening where your sink will sit. Make it just a bit bigger than your sink so the sink rests on the wood around it.
If concrete blocks feel easier, stack them four high. Build your rectangle with blocks. Use construction adhesive to stick them together. This creates a simple but strong base. Place a piece of plywood on top as your work surface. Your sink will rest on the plywood.
For a metal frame, use galvanized or stainless steel pipes. You can buy these at home improvement stores. Threaded pipes screw together easily. Build your frame like a square. Weld connections if you can, or use pipe fittings that tighten with a wrench. Metal frames look modern and last forever.
Check that everything is level. Use your level on multiple sides. A wobbly sink is frustrating to use. Adjust your stand until it’s perfect.
Installing the Sink and Basin
You have your stand ready. Now you’re ready to set your sink on top.
Measure your sink opening carefully. Make sure your sink sits right on the wood or plywood. The sink should rest evenly on all sides. You want zero wobble. If needed, add shims (thin pieces of wood) under the sink to level it perfectly.
Seal around the edges where the sink meets the wood. Use a waterproof caulk. This stops water from dripping underneath and rotting your wood. Apply it generously. Smooth it with your finger or a caulk tool. Let it dry completely before using your sink.
If your sink has a drain hole in the bottom, you’re lucky. That’s what you want. If it doesn’t, you might need to drill one. Use a drill bit made for metal or ceramic, depending on your sink material. Be careful and go slow. Cracks are hard to fix.
Setting Up Your Water Supply
Getting water to your sink is easier than you think.
The easiest way is to run a hose from an existing outdoor spigot. Measure the distance from the spigot to your sink. Buy a hose that’s long enough. A fifty-foot hose is common and not too heavy.
If you don’t have an outdoor spigot, you can tie into your water line. This takes a bit more work but it’s doable. Find where your main water line comes into your house. You might need to dig a little. Use a T-fitting to connect a new line to the existing one. Run new hose or PVC pipe to your sink.
If you’re not comfortable doing this, hire a plumber. They can do it quickly and make sure everything is safe and legal.
At your sink, attach a faucet. An outdoor faucet is perfect. It’s made for weather and lasts longer. Use a wrench to tighten the connection. Make sure it doesn’t leak. If it drips, tighten it more.
Some people add a valve where the hose connects to the sink. This lets you shut off the water in winter or when you’re not using it. It’s a smart idea in cold climates. You can drain the line so it doesn’t freeze.
Creating Your Drainage System
Water has to go somewhere after you use it. A good drainage system is key.
The simplest way is to let water drain right out of the sink. Attach a hose or PVC pipe to the drain hole under your sink. Gravity does the work. The water flows down and out.
Run this drain pipe toward your low spot or drainage area. Keep it sloped downward. A steep slope is better than a shallow one. Water flows fast and doesn’t sit in the pipe.
You can bury the drain pipe if you want. Dig a trench from under your sink to a soakaway area. A soakaway is a hole dug about two feet deep and filled with gravel. Water drains into it and soaks into the ground. This keeps the area neat and tidy.
Use a drain trap under your sink. This is a curved pipe that stays full of water. It blocks smells from coming back up. P-traps are the most common type. They’re cheap and easy to install.
Add a strainer or drain cover to your sink. This catches food bits and other trash. You empty it into the trash can. This prevents clogs in your drain.
Finishing Touches
Your sink is almost ready to use. Let’s add some finishing touches.
If you used wood, now’s the time to treat it. Sand any rough spots smooth. Apply a wood stain or paint. Look for products made for outdoor wood. They protect against sun, rain, and cold. Dark colors hide dirt better. Reapply stain or paint every few years to keep your wood looking good.
Add a workspace around your sink. A small table beside it is great for setting things down. You can put gardening supplies on it. A shelf underneath holds soap, towels, and cleaning supplies.
Put a mat on the ground near the sink. It keeps grass from getting muddy. It also gives you better footing when the ground is wet. An outdoor rubber mat works great.
Think about a roof or canopy. A simple frame with a tarp or shade cloth keeps rain off. It also keeps the sun off, so water stays cooler. This is nice in summer.
Add a waste bucket under the drain. Your gray water (used water) can go into it. You can use this water on your plants. It’s good for the garden and saves water overall.
Using Your Backyard Sink
Your sink is built. Let’s talk about how to use it best.
Wash your hands before and after gardening. This keeps dirt out of your house. Wash vegetables right at the sink. You don’t have to carry them inside. Rinse tools and equipment right there.
Clean your hands before grilling. Food safety is important. Your hands stay clean, and your food is safer.
Prep ingredients outside. Peel vegetables at your sink. Rinse berries. Mix drinks. Everything happens outdoors. Your kitchen stays clean and cool.
Fill buckets for watering. Use your sink to fill watering cans. This saves trips to the house.
In summer, rinse off before coming inside. You stay cooler. You bring less dirt in. Everyone is happier.
Maintenance and Care
Keep your sink working well with basic maintenance.
In cold climates, drain your water system before winter. Turn off the water. Open the faucet and let any water inside drain out. This prevents frozen pipes that crack. When spring comes, turn the water back on slowly.
Check your drain regularly. Clear out leaves and debris. A clogged drain gets frustrating fast. Use a small screen to keep big stuff out.
Inspect your wood every season. Look for cracks or soft spots. Fix them right away. A small problem gets worse if you ignore it.
Tighten connections that might loosen. Use a wrench to make sure everything is snug. Vibration from use can loosen bolts over time.
Clean your sink regularly. Scrub it with a brush and mild soap. Stainless steel sinks wipe clean easily. Keep it looking nice and fresh.
Troubleshooting Common Problems
Sometimes sinks don’t work perfectly. Here’s how to fix common issues.
Water won’t drain: Check your drain hole for clogs. Use a plunger or snake to clear it. Make sure your drain pipe isn’t bent or blocked.
Sink wobbles: Tighten all bolts and screws. Check that your stand is level. Add shims if needed.
Leaks around the faucet: Tighten the connection. If it still leaks, the seal might be bad. Replace the washer inside the faucet.
Water leaks under the sink: Check your caulking. You might need to reapply it. Make sure the drain is connected tight.
Faucet doesn’t turn on: Check your water line connection. Make sure the valve is open. If you have a hose connection, check that the hose isn’t crimped.
Mold or algae grows in the drain: Pour a cup of vinegar down the drain. Let it sit for an hour. Flush with hot water. Sunlight helps too, so keep the area bright.
Budget-Friendly Ideas
Building a sink doesn’t have to cost a lot.
Use free or cheap materials. Old sinks from salvage yards are perfect. Concrete blocks are inexpensive. Wood from old pallets works if you’re careful.
Make your own stand instead of buying one. Scrap wood works fine. Paint it to make it look nice.
Use a regular garden hose instead of burying PVC pipe. It costs less and works just fine.
A basic faucet from any hardware store is all you need. Don’t overspend on fancy fixtures.
Build a small simple design instead of a big complex one. A small sink works great for most people.
More Advanced Options
Once you’ve built a basic sink, you might want to add more.
Install hot water. Run a line from your house if it’s close. An outdoor water heater adds cost but gives you hot water.
Add a greywater system. Collect water from your sink. Use it for your garden. This saves water and is great for the environment.
Build a rinse station with multiple stations. This handles high traffic well.
Add storage. Shelves hold supplies. A cabinet keeps things dry.
Install a roof or pergola. This looks great and protects you from rain and sun.
Legal and Safety Considerations
Before you build, check local rules.
Some areas require permits for outdoor plumbing. Call your city or county office. They’ll tell you what you need. Most simple sinks don’t need permits, but check to be sure.
Make sure your drainage doesn’t violate septic or sewer codes. Your drain water can’t go into storm drains in some places. Ask your local officials.
Keep your sink away from wells and water sources. You don’t want contamination.
Use appropriate electrical connections if you add lights or heaters. Follow all electrical codes.
Seasonal Tips
Different seasons need different care.
Spring: Clean off winter debris. Check for damage. Test everything works.
Summer: Keep the area draining well. Prevent mosquito breeding. Enjoy using your sink.
Fall: Clean out leaves. Prepare for colder weather. Check seals and connections.
Winter: In cold climates, drain your system. Don’t let water freeze in pipes. Cover exposed parts if needed.
Final Thoughts
Building a backyard water sink is a great project. You end up with something useful that makes your outdoor space better.
Don’t be scared to try this. The basics are simple. Even if something doesn’t go perfectly, you can fix it. Most problems are easy to solve.
Start with a basic design. Get it working. Then add upgrades later if you want.
Your sink will get tons of use. You’ll wonder why you didn’t build one sooner. Friends and family will love having it too.
Take your time. Enjoy the process. The result is worth it. You’ll have a functional outdoor space that makes your yard more usable and your life easier.
Go build that sink. Your backyard is waiting.

Hi, I’m Mary, the founder of GardenCure.com. I’m passionate about creating healthy, beautiful gardens and well-kept lawns. I share practical experience and trusted advice on garden and lawn gear that truly works. With the support of my dedicated research team, our writers produce honest, in-depth reviews using reliable, authentic sources—helping you choose the right tools with confidence for your outdoor space.