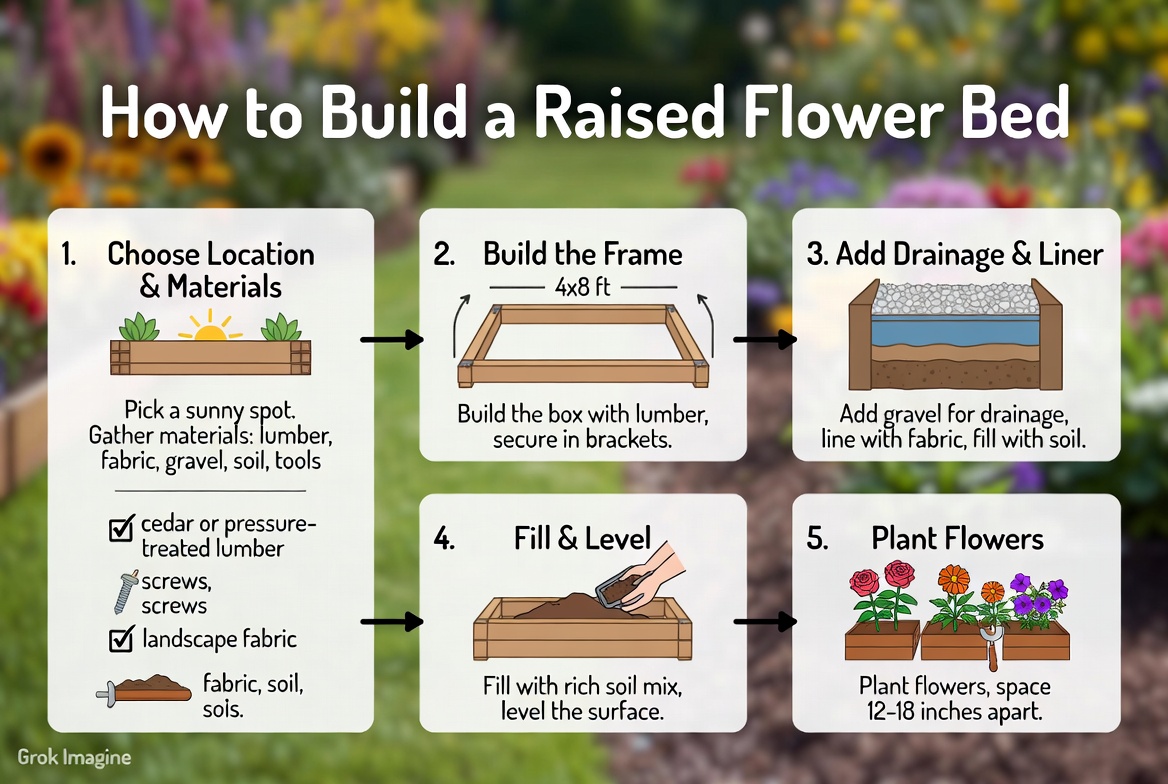
How to Build a Raised Flower Bed?
So you want to grow flowers, but your soil is terrible. Or maybe you just have a tiny yard and want to maximize your space. Either way, a raised flower bed is your answer. The best part? You can build one yourself in just a weekend. No special skills required.
In this article
Let me walk you through everything you need to know about building a raised flower bed from scratch.
Why Should You Build a Raised Flower Bed?
Before we get our hands dirty, let’s talk about why raised flower beds are so amazing.
Better soil control. When you build a raised bed, you get to fill it with exactly the soil you want. No more fighting with rocky, clay-heavy ground. You control everything.
Less weeding. Raised beds keep weeds away better than ground-level gardens. The soil stays contained and controlled. You won’t spend hours pulling out unwanted plants.
Better drainage. Flowers hate sitting in water. Raised beds let water drain away quickly. Your plants stay happy and healthy.
Less back pain. Working closer to waist height means no constant bending. Your back will thank you.
More growing room. You can stack soil higher in a raised bed than you can spread it wide on the ground. This means more space for your roots and more flowers for you.
Better protection. Raised beds keep pests down better than ground gardens. Slugs, snails, and crawling bugs struggle more to reach your flowers.
Looks really nice. Let’s be honest. A beautiful raised bed with flowers bursting out looks fantastic. Your yard suddenly looks more put-together.
How to Pick Your Spot
Location matters. A lot.
Check the sun. Most flowers need at least six hours of direct sunlight. Walk around your yard at different times of day. Notice which spots get the most sun. Those are your best options.
If you have an area that gets only three to four hours of sun, don’t worry. You can still grow shade-loving flowers there. Just know what you’re planting.
Watch the water. Does water pool up in certain spots after it rains? Avoid those places for your raised bed. You want decent drainage, not a swamp.
Keep it close. Place your bed somewhere you pass by often. You’ll water it more regularly. You’ll notice problems faster. You’ll enjoy your flowers more.
Stay away from roots. Big trees create lots of roots. These roots can work their way into your raised bed soil. Plant your bed at least six feet away from large trees.
Think about wind. Very windy spots can dry out your flowers fast. If your area gets strong winds, pick a spot with some protection.
What Materials Do You Need?
Here’s what you’ll gather to build a raised flower bed:
Lumber. This is your frame. Use untreated wood for best results. Treated wood can leach chemicals into your soil. Stick with cedar, redwood, or pine. These woods last longer than softer woods. Get boards that are one inch thick. Eight, ten, or twelve inches tall works fine for flowers.
Hardware. You need bolts, nuts, and washers. Steel is strongest. Stainless steel lasts the longest but costs more.
Optional: Landscape fabric. This stops weeds from growing up through the bottom. It’s not required but really helpful.
Soil. You’ll need lots of this. Calculate your bed size first. A four-by-eight-foot bed that’s ten inches deep needs around twenty-five cubic feet of soil. That’s roughly one to one and a half cubic yards.
Compost. Mix this with your soil for better nutrition. Use equal parts soil and compost for best results.
A level or level app. Making sure your bed is level matters. Water distributes evenly in a level bed.
Basic tools. You’ll use a shovel, a measuring tape, and maybe a drill. Most people already have these.
Building Your Raised Flower Bed: Step by Step
Ready to build? Let’s do this.
Step One: Gather Your Materials
Before you start, make sure you have everything. Nothing’s worse than getting halfway through and realizing you forgot something.
Write down your bed dimensions. Measure your space again. Double-check your math on soil amounts. Grab your lumber, hardware, tools, and soil.
Step Two: Prepare Your Ground
Clear the spot where your bed will sit. Remove grass, rocks, and anything else on top. Dig down about two inches to make the ground level.
You don’t have to dig up the existing soil. Just remove the surface stuff that would stick up through your bed.
Step Three: Cut Your Wood
Most people build rectangular beds. Standard sizes work great. Four by eight feet is huge but manageable. Four by four feet is more popular for small yards. Three by six feet works too.
For the lumber, cut two long pieces and two short pieces. They should fit together to form your rectangle.
Step Four: Connect the Corners
This is where you attach the boards together.
For bolted corners, drill holes through the boards. Position them about two inches from the edge. Use washers and bolts to hold everything tight. Bolts last super long and look clean.
You can also use screws. Screws are faster but may not last as many years. Either way works fine.
Step Five: Set Your Bed in Place
Put your frame in the right spot. Use your level to make sure it’s even. Uneven beds cause water to pool in one corner.
Adjust the ground underneath if needed. Add or remove soil to make everything level.
Step Six: Add the Landscape Fabric (Optional)
If you’re using landscape fabric, lay it down inside the frame. Tuck the edges up along the sides. This blocks weeds from coming up through the bottom.
Landscape fabric isn’t absolutely necessary. But it saves you major headaches down the road.
Step Seven: Fill Your Bed with Soil
Time for the heavy lifting.
Start with the bottom layer. Use cheaper bulk soil or fill dirt. You don’t need fancy stuff for the bottom. About four inches works great.
Add your second layer. Mix quality garden soil with compost. Fill to about three inches thick.
Top it off with another layer of quality soil and compost mix. This becomes your planting zone.
Pro tip: Pack it down lightly as you add each layer. Packed soil settles less later.
Step Eight: Water It Well
Water your bed thoroughly after filling it. This helps the soil settle. It also reveals low spots. You can top those off before planting.
The soil will settle more over time. That’s normal. You might add a bit more soil in a week or two.
Soil for Your Raised Flower Bed
Getting soil right makes or breaks your garden.
What’s the best soil? A mix of topsoil and compost works beautifully. Use equal parts of each. This gives you great nutrition plus good drainage.
Can you use garden soil? Yes, but mix it fifty-fifty with compost. Pure garden soil can compact too much.
What about coconut coir? This works but doesn’t add nutrients like compost does. Use it mixed with compost, not alone.
Is composted bark good? It helps with drainage but doesn’t feed your plants. Mix it with other materials.
Can you add peat moss? Some people do. It holds moisture well. But it’s not the most sustainable choice. Coconut coir works similarly.
The basic rule is simple: soil plus compost equals happy flowers. Get that balance right and everything else is easier.
Choosing Your Flowers
What flowers should you plant? That depends on your climate and sunlight.
For sunny spots: Zinnias are tough and bloom forever. Marigolds are practically impossible to kill. Sunflowers bring joy. Cosmos are delicate and beautiful. Tulips come back year after year.
For shady spots: Hostas handle shade like champs. Shade-tolerant impatiens flower constantly. Begonias add texture. Ferns create a woodland feel.
For color: Petunias come in wild colors. Pansies are cheerful. Dahlias make a statement. Snapdragons add height and interest.
Start small if you’re new to gardening. Pick three to five types of flowers. Mix different heights. Combine colors that make you happy. You can get fancy next year.
Planting Your Flowers
Once your soil is ready, plant your flowers.
Spacing matters. Don’t jam plants too close. Read the plant tag. Follow the spacing advice. Crowded plants get diseases.
Dig the hole. Make it just deep enough for the root ball. Not deeper, not shallower.
Water after planting. Soak the soil around each plant. This settles the soil and eliminates air pockets.
Add mulch. A thin layer of mulch keeps moisture in and weeds out. Use two to three inches of wood chips or bark.
Watering Your Raised Flower Bed
Flowers need water. The trick is giving them the right amount.
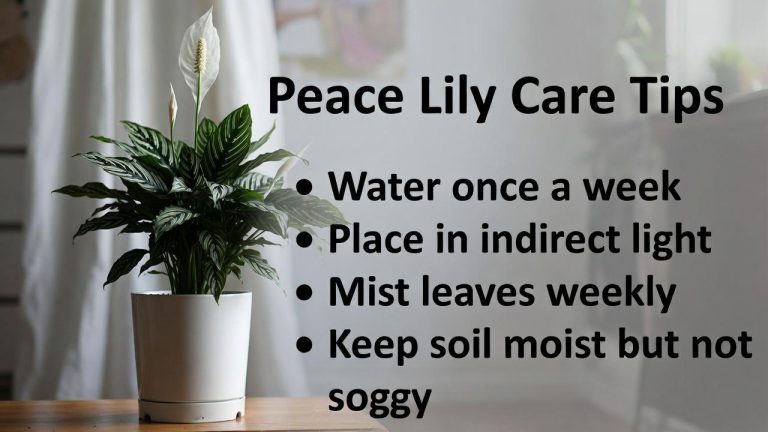
Water deeply but not daily. Most flowers want the soil moist but not soggy. Stick your finger in the soil. If it feels dry two inches down, water. If it still feels damp, wait.
Water early. Morning watering is best. Wet foliage can develop diseases. Water the soil, not the leaves.
Use soaker hoses or drip irrigation. These deliver water slowly right to the roots. They’re better than sprinklers that spray everywhere.
Check after rain. You might not need to water at all if it rained recently.
Watch in summer. Hot weather dries out raised beds faster. You might water every day in peak summer.
Maintaining Your Raised Flower Bed
Your bed needs regular care to look its best.
Deadhead spent flowers. Remove flowers as they fade. This makes the plant produce more blooms. It’s the single best trick for maximum flowers.
Pull weeds early. A small weed takes seconds to remove. A big weed takes forever. Do it the moment you spot one.
Add compost each year. Your soil gets depleted. Top it off with an inch or two of compost every spring. This keeps plants fed.
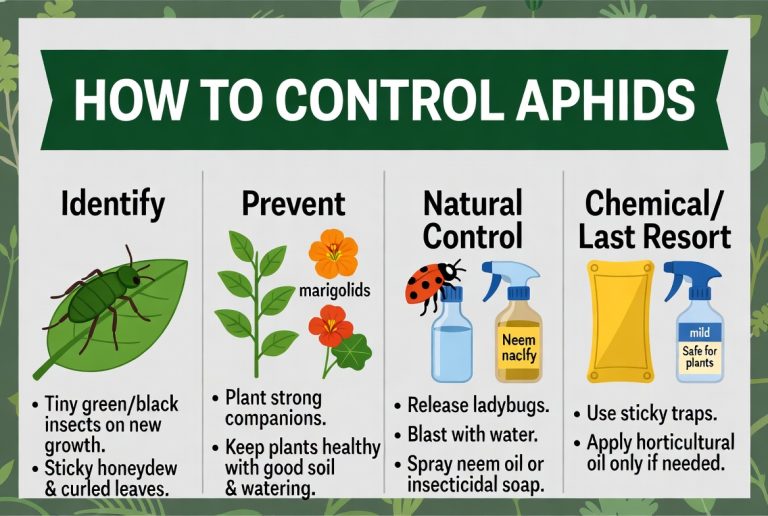
Watch for pests. Bugs sometimes attack. Spray with water first. If that doesn’t work, use organic pest spray.
Cut back dead stems. In fall, cut down dead plants. This keeps your bed looking tidy.
Add new plants. After flowers fade, pull them out and plant something new. Spring bloomers, then summer flowers, then fall plants. You can have blooms three seasons a year.
Seasonal Care Tips
Your raised bed changes with the seasons.
Spring: Plant annuals after the last frost. Deadhead spring bloomers regularly. Water as weather warms up.
Summer: This is peak watering time. Deadhead constantly. Watch for heat-stressed plants. Some flowers wilt in extreme heat even with water.
Fall: Plant cool-season flowers. Reduce watering. Clean up dead plants.
Winter: Let your bed rest. Some flowers handle cold fine. Others need protection. Research what you planted.
Common Mistakes to Avoid
Don’t fall into these traps.
Overfilling with soil. Leave at least two inches of space from the top of the frame to the soil surface. This keeps soil from washing out.
Poor drainage. Make sure your bed drains well. Soggy soil kills flowers fast.
Wrong location. Sun requirements matter. Shade-loving flowers suffer in full sun. Sun-lovers get weak and leggy in shade.
Too many plants. Crowded beds get diseases and bugs. Space things properly.
Inconsistent watering. Flowers want regular moisture. Swing between soaking and drying kills roots.
Cheap soil. Good soil makes everything else easier. Invest here.
Forgetting to water. This is the number one killer of flowers. Set a reminder on your phone.
How Long Does a Raised Bed Last?
Good question. It depends on your materials.
Cedar and redwood: Eight to ten years is typical. Some last longer if treated well.
Pine: Three to five years. Pine is cheaper but doesn’t last as long.
Composite materials: Ten to fifteen years or more. They cost more upfront but last longer.
Galvanized metal: Fifteen to twenty years. Very durable but more expensive.
You can extend the life of wood by staining it. Don’t use pressure-treated wood stain though. Stick with natural stains.
When your bed starts rotting, you can replace just the sides. You don’t have to start over.
Raised Beds in Different Spaces
You can build raised flower beds almost anywhere.
Small yards: Go small. A two-by-four-foot bed fits in tiny spaces and looks great.
Patios and decks: Use shallow beds. Eight inches deep works fine for most flowers.
Balconies: Use plastic or composite beds. They’re lighter than wood. Less weight on your structure.
Rocky soil areas: This is where raised beds shine. You avoid terrible soil completely.
Wet yards: Raise your bed higher. Twelve to eighteen inches tall improves drainage dramatically.
Sloped yards: You can build beds at different heights to match the slope.
Budget for Your Project
How much does this cost?
Materials for a four-by-eight-foot bed:
- Lumber: 30 to 60 dollars
- Hardware: 5 to 10 dollars
- Landscape fabric: 10 to 15 dollars
- Soil and compost: 40 to 80 dollars
- Plants: 20 to 50 dollars
Total: 105 to 215 dollars
You can spend less by using cheaper wood. You can spend more by adding fancy edging or premium soil.
Smaller beds cost less. Bigger beds cost more. But any size beats putting in a big ground garden.
Before You Start: Final Checklist
Make sure you’re ready.
- Spot selected and prepared? Check.
- Lumber cut and hardware ready? Check.
- Level available? Check.
- Soil sourced? Check.
- Plants chosen? Check.
- Tools gathered? Check.
- Flowers researched for your climate? Check.
You’re good to go.
Building Your First Raised Flower Bed
Building a raised flower bed is totally doable for beginners. It takes a weekend. It costs less than you think. Your yard looks better instantly. Your flowers thrive faster.
Start small. Build one bed. Watch your flowers grow. Next year, build another. Before you know it, you’ve got a thriving flower garden that’s the envy of the neighborhood.
The hardest part isn’t the building. It’s deciding to start. But you’re reading this, so you’re already halfway there.
Get your materials. Pick your spot. Build your bed. Fill it with soil. Plant your flowers. Water regularly. Watch them bloom.
That’s it. That’s all there is to it.
Your raised flower bed journey starts now. Let’s go grow some beautiful flowers.
Raised Flower Bed Ideas to Inspire You
Want some ideas for designs and layouts?
The classic rectangle. Four by eight feet. Works for almost any yard. Looks professional and clean.
The square garden. Four by four feet. Perfect for small spaces. Easier to reach the center.
The tiered bed. Build two levels. Tall plants in back, short in front. Creates visual interest.
The L-shaped bed. Two rectangles joined. Fits around corners nicely.
The circular bed. More work to build but stunning. Builds conversation starters.
The keyhole garden. A circle with a path cut in. Great for accessibility.
Pick a shape that fits your space and style. The important part is that you enjoy it.
Troubleshooting Common Raised Bed Problems
Issues happen. Here’s how to fix them.
Soil level dropping. This is normal. Add more soil each year. It’s expected settling.
Uneven watering. Your bed isn’t level. Try adding a bit of soil to low spots.
Wood is rotting. Replace the affected board. You don’t need a whole new bed.
Pests everywhere. Use netting to protect plants. Row covers work great for young plants.
Flowers won’t bloom. Check your sunlight hours. Some flowers need more sun. Also check watering and soil nutrition.
Weeds taking over. Pull them as soon as they appear. Add mulch to prevent more.
Drainage too fast. Add more compost to your soil. It holds moisture better.
Drainage too slow. Add more perlite or sand to your soil mix. This improves drainage.
Learning More About Flowers
This is just the start. Flowers are endlessly fascinating.
Check local gardening groups. Join online communities. Read gardening books. Visit public gardens. Talk to people at nurseries. Every person adds something new to your knowledge.
Gardening isn’t complicated. But it’s always teaching you something new. That’s what makes it so much fun.
Your Raised Flower Bed Adventure Awaits
You now know everything you need to build a raised flower bed and fill it with beautiful flowers.
It’s truly one of the best projects you can tackle. The reward is massive. A tiny garden space that brings joy every single day.
Take action today. Commit to building your bed this weekend. Imagine walking out your door and seeing your flowers blooming in the sunshine.
That beautiful picture can become reality. And it starts with you taking the first step.
Now go build that raised flower bed. Your flowers are waiting.

Hi, I’m Mary, the founder of GardenCure.com. I’m passionate about creating healthy, beautiful gardens and well-kept lawns. I share practical experience and trusted advice on garden and lawn gear that truly works. With the support of my dedicated research team, our writers produce honest, in-depth reviews using reliable, authentic sources—helping you choose the right tools with confidence for your outdoor space.