How to Grow a Potato From a Potato?
If you’ve ever wondered if you could turn a single potato into a whole harvest of fresh potatoes right in your backyard, the answer is a big yes! Growing potatoes from potatoes is one of the easiest and most rewarding gardening projects you can do. Even if you’ve never gardened before, you can absolutely succeed.
In this article
In this guide, I’ll walk you through every single step to help you grow amazing potatoes at home. Let’s get started.
Why Grow Potatoes at Home?
Before we dive into the how, let’s talk about why you should grow potatoes in your own space.
Fresh potatoes taste incredible. The potatoes you buy from the store have been sitting around for weeks. Homegrown potatoes are dug up fresh and taste so much better. You can cook them the same day you harvest them.
You save money over time. Once you learn how to grow them, your cost per potato drops way down. A single seed potato can give you 5 to 10 pounds of fresh potatoes.
It’s a fun family activity. Kids love planting potatoes and digging them up at harvest time. It’s like hunting for treasure in your garden.
You know exactly what goes into your food. When you grow potatoes at home, you control what chemicals (if any) go on them. That peace of mind is valuable.
No special skills needed. Potatoes are forgiving plants. They don’t demand perfection. Even beginners succeed.
What You Need to Get Started
Let me break down the simple supplies you’ll need. This is not a long list.
Seed potatoes. This is your starting point. Seed potatoes are small potatoes grown specifically for planting. Don’t use regular potatoes from your kitchen. Seed potatoes are disease-free and bred to grow well. Buy them from a garden center or online farm supply store.
Garden soil. You need loose, well-draining soil. Potatoes don’t like sitting in wet soil. Mix regular garden soil with some compost if you have it.
A growing space. This can be a garden bed, raised bed, containers, or even a potato grow bag. Potatoes are flexible. They grow just about anywhere.
A shovel or spade. You’ll need this to dig holes and do the planting.
Water. Potatoes need consistent moisture during the growing season.
That’s really it! You don’t need expensive fertilizers or fancy equipment. Keep it simple and you’ll do fine.
Picking Your Seed Potatoes
Let’s talk about seed potatoes since this is your foundation for success.
A seed potato is typically a small potato or a piece of a larger potato. Each seed potato should be about the size of a golf ball or egg. If you have larger potatoes, you can cut them into pieces. Make sure each piece has at least two “eyes” on it. Eyes are the little bumps where new shoots will sprout.
Look for seed potatoes that look healthy and firm. Avoid any that feel mushy or smell bad. Your local garden center stocks seed potatoes in early spring, right before planting season starts.
There are many different varieties to try. Some popular beginner-friendly types include:
- Russets – Classic brown potatoes, great for baking and mashing
- Reds – Small waxy potatoes, perfect for boiling and potato salads
- Yukon Golds – Yellow flesh, buttery flavor, excellent all-purpose
- Purple potatoes – Fun colors, mild sweet taste, great for visual appeal
Start with whatever varieties appeal to you. You really can’t go wrong. Each type grows basically the same way.
Preparing Your Seed Potatoes
If you’re using whole seed potatoes that are about egg-sized, you can plant them as-is. But if you have larger potatoes or want to stretch your supply, you’ll cut them up.
Here’s how to cut seed potatoes properly. Get a clean knife and cut the potato into chunks. Each chunk needs at least two eyes. Make your cuts clean and swift. Let the cut pieces sit out for a few days before planting. This lets the cut surface dry and form a protective layer. The dried-over cut resists rot much better than a fresh cut.
Some gardeners dust the cut pieces with powdered sulfur or wood ash. This also helps prevent rot. You can skip this step if you want to keep things super simple.
Finding the Perfect Spot
Potatoes love sunlight. Find a spot that gets at least 6 to 8 hours of direct sun each day. More is even better. The more sun your potatoes get, the bigger your harvest will be.
Your growing space needs good drainage. If water sits on top of the soil after rain, you’ve got a drainage problem. Potatoes don’t like wet feet. They’ll rot if they sit in waterlogged soil.
Think about how much space you have. You can grow potatoes in a tiny space or a huge garden. A single seed potato can take up about 1 square foot of space when fully grown.
Container growing is great if you don’t have garden space. Use containers that are at least 5 gallons in size. Bigger is better. Fill them with a mix of soil and compost.
Raised beds are ideal because you control the soil quality completely. Build or buy a raised bed and fill it with loose, rich soil.
Grow bags are perfect for small spaces and renters. These bags are designed specifically for potatoes. You plant in them, then dump out your harvest when done.
Timing Your Planting
Potatoes are a cool-season crop. They grow best when temperatures are moderate – not too hot, not too cold.
Plant your seed potatoes in early spring, as soon as the soil can be worked and is no longer waterlogged. The soil temperature should be at least 45°F, but 50°F or higher is better for faster sprouting.
In most places, this means planting in March or April. If you’re in a warm climate, you might plant in fall or winter. The key is planting when the weather is cool.
Some gardeners plant seed potatoes in waves, spacing them a week or two apart. This spreads out your harvest instead of getting everything at once.
Planting Your Seed Potatoes
Now for the fun part – actually planting!
In a garden bed, dig a trench or individual holes about 4 inches deep. Space the holes about 12 inches apart. This gives each potato room to grow without competing for space.
Place your seed potato in the hole with the eye side up. Cover it with soil. The soil should completely cover the potato.
Water gently after planting. The soil should be moist but not dripping wet.
In containers or grow bags, fill with soil and plant your potatoes the same way – about 4 inches deep, eyes up.
Key tip: Don’t go too deep. Planting too deep makes the potato work harder to sprout. Four inches is the sweet spot.
After planting, water well and then let the soil dry out just a bit before watering again. You want moist soil, not a swamp.
The Waiting Game – Sprouting Phase
After you plant your seed potatoes, you’ll see nothing happening for a while. Be patient. This is normal.
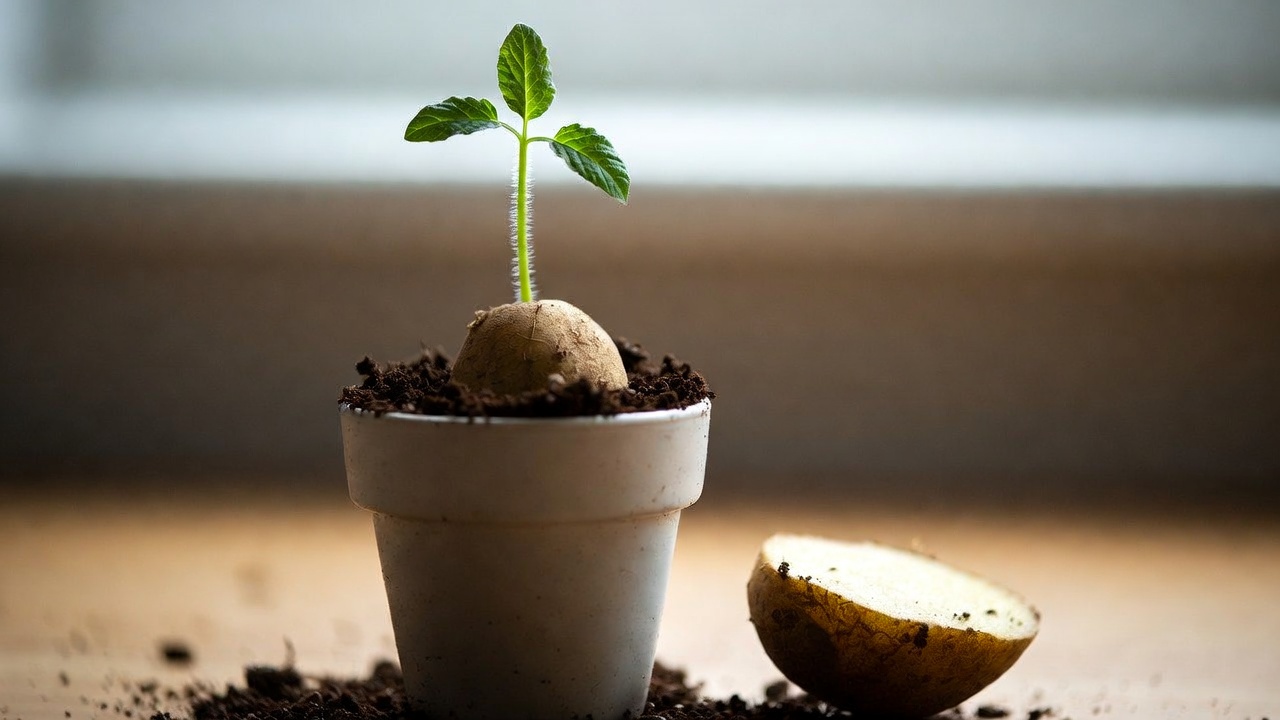
Under the soil, your potato is working. It’s sprouting eyes and sending out roots. This usually takes 1 to 3 weeks depending on soil temperature and moisture.
Once the sprout breaks through the soil surface, you’ll see a little green shoot. This is exciting! Growth will speed up from this point.
Keep the soil consistently moist during this phase. Not soggy. Just moist. If it dries out, your sprout might not establish well.
Watch for weeds popping up in your soil. Remove them as you see them. Weeds compete with your potato plant for water and nutrients.
Caring for Growing Potato Plants
Once your potato sprouts are about 5 to 6 inches tall, it’s time to hill them up.
Hilling is a simple but important step. It means you pull soil up around the stems of the plant. This covers some of the plant stem. New potatoes will form all along any part of the stem that’s buried in soil.
Hilling serves another purpose too. It keeps potato tubers covered. If potatoes are exposed to sunlight, they turn green. Green potatoes contain a mild toxin and shouldn’t be eaten.
Here’s how to hill your potatoes. Use a shovel or hoe to pull soil from between the plants up and around the stems. Create a mound of soil around each plant. Leave the top leaf growth sticking out.
Do this hilling process every 2 to 3 weeks as the plant grows. Each time you hill, you’re giving the potato plant more area to grow new potatoes in.
Watering is crucial. Potatoes need consistent moisture. Aim for about 1 to 2 inches of water per week. This can come from rain or your watering can. Stick your finger in the soil. If the top inch feels dry, it’s time to water.
Feeding your plants keeps them healthy. Once your plants are about 6 inches tall, you can give them a balanced fertilizer. Follow the package directions. If you mixed in compost when preparing your soil, you might not need extra fertilizer.
Watch for pests and diseases. The most common potato problem is the Colorado potato beetle. These yellow and black striped beetles eat potato leaves. Pick them off by hand if you see them. Some gardeners spray with neem oil or other organic pest control.
Other occasional issues include late blight (a fungal disease) and early blight. Both start as spots on leaves. Remove affected leaves and improve air flow by not crowding plants too closely.
Honestly, most home gardeners grow potatoes without serious pest problems. The plants are tougher than you might think.
The Growing Season Timeline
Let’s talk about what to expect as your potatoes grow.
Weeks 1-2: Your seed potato sprouts under the soil.
Weeks 3-4: Green shoots emerge from the soil. Exciting!
Weeks 5-8: The plant grows rapidly. It develops lots of leaves. Hill it up during this time. This is when flowers appear on some varieties. The flowers are a nice bonus but you can remove them if you want to focus plant energy on making tubers.
Weeks 9-12: The plant is full and bushy. Potatoes are forming underground. Keep watering and hilling.
Weeks 13+: The plant matures. Leaves start to yellow and die back. This signals that the potatoes are ready to harvest.
The whole process from planting to harvest usually takes 70 to 120 days depending on the variety and growing conditions. Check the seed potato package to see the maturity date for your variety.
Harvesting Your Potatoes
This is the moment you’ve been waiting for!
You can start harvesting potatoes once the plant flowers or about 70 days after planting. Gently dig into the soil around the plant. Feel for potatoes with your hands. Leave smaller ones in the soil to keep growing. Harvest the bigger ones.
Don’t dig too rough. You don’t want to stab your potatoes with the shovel. Take your time and be gentle.
Full harvest time comes when the plant’s leaves have mostly died back. At this point, the potatoes have stopped growing. They’ve developed tough skins that store well.
To harvest everything, carefully dig around the plant. Use a garden fork or shovel. Work from the outside in, going deeper as you go. The potatoes should come loose from the soil.
Gently brush soil off the potatoes but don’t wash them. Let them dry for a few hours.
Count your harvest! A single seed potato often yields 5 to 10 pounds of fresh potatoes. It’s incredible and makes you feel like a real farmer.
Storing Your Homegrown Potatoes
Fresh potatoes from your garden won’t last as long as store-bought potatoes, but they’ll keep for several weeks with proper storage.
Store potatoes in a cool, dark, well-ventilated place. A basement, garage, or cool closet works great. Don’t refrigerate them. Cold temperatures turn starch into sugar and give potatoes a strange taste.
Keep potatoes away from light. Light causes that green tint we talked about.
Store them in a burlap bag or cardboard box, not in plastic. They need air circulation.
If you have a lot of potatoes, store them in a cool root cellar if you have one. Temperatures around 40-50°F are ideal. They’ll last 2 to 3 months in the right conditions.
Troubleshooting Common Problems
My potatoes are small. Small potatoes usually mean they didn’t have enough growing time or nutrients. Plant earlier so they have longer to grow. Add more compost to your soil.
The plants won’t grow. If growth is slow, check your soil temperature. Potatoes grow slowly in cold soil. Also check watering. Too much or too little water both cause problems.
Leaves are yellowing early. This could be a watering issue or a nutrient problem. Check soil moisture. Add a balanced fertilizer if soil is poor.
I see white powder on the leaves. This is powdery mildew, a fungal issue. Improve air circulation. Remove affected leaves. Spray with sulfur if needed.
The tubers look lumpy or odd shaped. This is usually just a growth quirk. The potatoes are still fine to eat. Odd shapes often come from rocky soil or being crowded.
Green potato tubers. You exposed them to sunlight. Hill more soil over them. Harvest and eat them quickly since they’ve been exposed.
Saving Seed Potatoes for Next Year
Want to grow your own seed potatoes? You can!
Save some of your smallest potatoes from your harvest. Store them in cool, dark conditions just like your regular potatoes. In spring, plant them again.
After a few seasons of doing this, your seed potatoes might accumulate diseases. Every 3 to 4 seasons, buy fresh certified seed potatoes to refresh your stock.
This practice saves money and gives you full control over your potato supply.
Growing Potatoes in Different Climates
Warm climates: If you live somewhere hot, you have a short window in cool seasons. Plant in fall and harvest in early spring. You might even get two crops per year.
Cold climates: You have a nice long growing season. Plant as soon as the soil can be worked in spring. Harvest in late summer or fall before frost.
Humid climates: Watch for fungal diseases since moisture in the air encourages them. Space plants wider apart to improve air flow. Remove lower leaves as the plant gets bigger. This helps air move through the plant better.
Dry climates: Your challenge is consistent watering. Check soil often. You might need to water more frequently than gardeners in other areas. Mulch around your plants to hold moisture in the soil.
Growing Potatoes in Containers and Bags
Not everyone has garden space. The good news? Potatoes grow great in containers!
Container size matters. Use containers at least 5 gallons in size. A 10-gallon container is even better. Bigger containers mean more room for tubers to grow and bigger harvests.
Fill with quality soil. Use a mix of regular garden soil and compost. Potatoes need loose soil to develop properly.
Planting is the same. Put your seed potato in the container about 4 inches deep. Cover it with soil.
As your plant grows, add more soil. This is different from in-ground growing. Every 2 to 3 weeks, add another few inches of soil on top of the plant. This gives it more room to grow tubers.
By harvest time, your container will be filled with soil and the plant will be growing out the top.
Watering is easier in containers. You can see when the soil is dry more easily. Just poke your finger in the soil. If the top inch is dry, water.
Harvesting is the best part. Simply dump the container over and sift through the soil. Your potatoes are right there! It’s like opening a surprise present. Kids especially love this harvest method.
Year-round growing is possible. In warm climates, you can grow potatoes in containers multiple times per year. Just cycle through plantings.
Building Potato Growing Mounds
Some gardeners use a method called mounding or hilling with straw or compost instead of soil.
In this method, you plant your seed potato on top of prepared soil. Then you mound up straw, compost, or shredded leaves over the plant. As it grows, you keep adding more material around it.
This method has benefits. The loose material makes harvesting easy. You just pull back the straw and grab your potatoes. No digging needed.
It also keeps the planting area cool and the potatoes covered from light automatically.
The downside? Your pile needs to be in a contained space or the loose material spreads everywhere.
This is worth trying if you’re willing to experiment.
Vertical Potato Growing
Want to grow more potatoes in less space? Try vertical growing!
You can build a simple tower from a wire cylinder or wooden crate. Line it with landscape fabric. Fill the bottom with soil about 6 inches deep.
Place seed potatoes on top of this soil layer. Cover them with more soil and compost. As your potatoes grow, keep adding more layers of soil and compost. Build your tower as the plant grows taller.
By harvest time, you have a tall tower. Dump it over and collect potatoes from each layer.
Some gardeners build towers 3 to 4 feet tall. These produce surprising amounts of potatoes in tiny spaces.
This method takes a little planning but it’s fun and very productive for small spaces.
The Science Behind Growing Potatoes
Knowing what’s happening underneath helps you be a better potato grower.
A potato is a tuber. It’s an underground stem that stores energy. When you plant a seed potato, you’re planting a piece of potato with dormant eyes ready to sprout.
The potato plant’s roots don’t actually grow the new potatoes. The plant grows underground stems called stolons. These stolons eventually swell up and become tubers – your new potatoes!
The more of the plant stem you bury in soil through hilling, the more stolons you get and the bigger your harvest.
This is why hilling is so important. It literally creates more growing space for tubers.
Potatoes are surprisingly efficient at turning plant growth into food. They convert sunlight into tubers through photosynthesis. That’s why sunlight matters for good yields.
The plant feeds the developing potatoes through its stem. That’s why consistent watering and nutrient availability matter. A stressed plant makes smaller potatoes.
Common Potato Varieties Explained
Let’s dive deeper into specific varieties you might grow.
Russet Potatoes have tan skin and white flesh. They’re the classic baking potato. They’re reliable growers and store well. They take about 80 to 100 days to mature. Perfect for baking, fries, and mashing.
Red Potatoes have thin red skin and white flesh. They’re waxy potatoes, meaning they hold their shape when cooked. They mature in 60 to 80 days. Great for boiling, potato salads, and soups.
Yukon Gold Potatoes have thin yellow skin and golden flesh. They’re buttery and delicious. They mature in 70 to 90 days. These work for everything – mashing, baking, boiling, frying.
Purple Potatoes come in shades of dark purple. They’re visually striking. They have a slightly nutty flavor. They mature in 70 to 90 days. Fun for adding color to meals.
Fingerling Potatoes are small and elongated like little fingers. They’re waxy with creamy texture. They mature in 60 to 80 days. Perfect for roasting whole.
All Blue Potatoes have blue skin and blue flesh. They’re striking on a plate. They mature in 90 to 110 days. Firm texture, good for boiling.
No variety is hard to grow. Pick based on how you like to eat potatoes.
Fertilizing for Maximum Yield
Good soil is the foundation, but feeding your plants helps them produce better.
Balanced fertilizers work well. These have equal parts nitrogen, phosphorus, and potassium, shown as three numbers on the package like 10-10-10.
Apply fertilizer when the plant is about 6 inches tall. Follow package directions for how much. Too much fertilizer can actually hurt your harvest. It encourages leafy growth over tuber development.
Organic options include:
- Compost mixed into soil before planting
- Aged manure from herbivorous animals
- Fish emulsion sprayed on leaves
- Bone meal for phosphorus
- Kelp seaweed for trace minerals
If you mixed in good compost when preparing your soil, you might not need extra fertilizer at all.
Watering Strategies That Work
Consistent moisture is critical for potato success.
The goal is soil that’s moist but not soggy. Imagine a wrung-out sponge. That’s the texture you want.
Early in the growing season (first month), potatoes don’t need as much water. They’re a small plant. Water when the top inch of soil feels dry.
During active growth (months 2 and 3), water needs increase. The plant is bigger and evaporation is higher. Water about 1 to 2 inches per week. In hot weather, you might need more.
Late season (as the plant dies back), you can let watering decrease naturally. The plant needs less as it matures.
Best time to water is early morning. This allows leaves to dry quickly, reducing disease. If you water in the evening, wet foliage sitting overnight encourages fungal problems.
Mulching helps by keeping soil cool and moist. Spread 2 to 3 inches of mulch around plants (not touching the stems). This reduces watering needs.
Common Mistakes Beginners Make
Learning from others’ mistakes helps you avoid them.
Planting too deep. The seed potato struggles to push through deep soil. Plant 4 inches deep, not 8 inches. That’s the magic number.
Not hilling up. This is the #1 mistake. Potatoes need soil mounded around them to produce well. Don’t skip this step.
Overcrowding plants. Too close together and they compete. Space them 12 inches apart. Give them room to breathe.
Using regular grocery store potatoes. These often carry disease. Always use certified seed potatoes. They’re disease-free and bred for growing.
Overwatering. Soggy soil causes rot. Potatoes want moist soil, not waterlogged. Let it dry out just a bit between waterings.
Harvesting too early. Early potatoes are fine for eating fresh, but if you want to store them, wait until the plant dies back. That’s when skins harden.
Planting at the wrong time. Cold soil means slow growth. Wait until soil is at least 45°F. Earlier doesn’t mean better. Patient planting beats rushed planting.
Extending Your Potato Season
With some planning, you can harvest fresh potatoes for months.
Succession planting means planting new crops every few weeks. If you plant seed potatoes on April 1st, they’ll harvest around late June. If you plant again on April 15th, you harvest early July. Keep staggering plantings and you get fresh potatoes continuously.
Spring and fall plantings work in many climates. Plant in early spring for early summer harvest. Plant in midsummer for fall harvest. This doubles your crop.
Cold storage keeps fresh potatoes for months. Properly stored potatoes in cool conditions can last until the next spring’s planting.
Combine staggered plantings with good storage and you eat homegrown potatoes year-round.
Seeds vs. Scraps: What Beginners Ask
Can you grow potatoes from regular potatoes lying around your kitchen? Technically yes, but it’s not a good idea.
Store-bought potatoes are often treated to prevent sprouting. They might carry diseases. They vary in quality.
Seed potatoes are specifically grown and selected for high yield and disease resistance. They cost a bit more, but your success rate skyrockets.
If you want to experiment with kitchen potato scraps, go ahead. Just don’t expect the same success as using certified seed potatoes.
For your best results, invest in quality seed potatoes. The difference in cost is minimal and the improvement in results is huge.
Harvesting Tips for the Best Outcome
Proper harvesting technique ensures you get all your potatoes and they store well.
Use the right tools. A garden fork is ideal because the tines don’t puncture potatoes like a spade might. If you use a spade, work carefully and slow.
Loosen the soil first. Push your tool in the ground around the plant and wiggle it to loosen the soil before lifting. This reduces the chance of speared potatoes.
Work from the outside in. Start at the outer edges of where the plant was. Go deeper as you work toward the center.
Brush off soil gently. Don’t wash newly harvested potatoes. Just brush loose soil away.
Let them cure. Spread harvested potatoes in a cool, dark place for a week. This toughens their skins and they’ll store much longer.
Handle with care. Bruised potatoes don’t store well. Treat them gently and they’ll reward you with months of storage life.
Growing Potatoes Year After Year
Once you’ve grown one successful crop, you’ll probably want to do it again.
Keep notes about what worked. Record planting dates, varieties, watering schedule, and harvest dates. Your notes become valuable for planning next season.
Crop rotation is healthy for your soil. Don’t plant potatoes in the same spot year after year. Rotate to a different bed or area. This reduces soil disease buildup.
Refresh your soil by mixing in fresh compost each year. Potatoes are hungry plants that deplete soil nutrients.
Try new varieties each season. Once you’ve grown one type successfully, branch out and experiment.
Growing potatoes becomes easier each time you do it. You learn what works in your climate and space. You develop a rhythm. It becomes enjoyable routine rather than mysterious process.
The Joy of Potato Gardening
At the end of the day, growing potatoes is about more than food production.
It’s about connecting with the process of growing food. It’s about the satisfaction of eating something you planted and nurtured. It’s about learning where food comes from.
It’s about family time when kids dig for potatoes. It’s about sharing your harvest with friends and neighbors. It’s about developing confidence as a gardener.
Potatoes are forgiving. They don’t punish small mistakes. They grow when conditions aren’t perfect. They reward effort with abundance.
Starting with potatoes is how many people fall in love with gardening. One successful crop leads to trying tomatoes, beans, and other vegetables.
But potatoes will always be special. They were your first success. You grew them from a simple potato and turned it into food for your table.
Final Thoughts: Get Started Today
Everything you need to grow potatoes is within reach. You don’t need fancy equipment. You don’t need perfect conditions. You just need a seed potato, some soil, water, and sunlight.
Start small if you’re nervous. Plant just 5 or 10 seed potatoes. See how it goes. Once you taste your first homegrown potato and you’ll be hooked.
Potato growing opens a door to self-sufficiency. It proves that you can produce food. That confidence spreads to other areas of gardening and life.
The best time to plant potatoes was last season. The second best time is right now.
Get your seed potatoes. Find your growing space. Get your soil ready. There’s never been a better time to start than today.
Welcome to the community of potato growers. Your harvest adventure is about to begin.

Hi, I’m Mary, the founder of GardenCure.com. I’m passionate about creating healthy, beautiful gardens and well-kept lawns. I share practical experience and trusted advice on garden and lawn gear that truly works. With the support of my dedicated research team, our writers produce honest, in-depth reviews using reliable, authentic sources—helping you choose the right tools with confidence for your outdoor space.