How to Begin Composting?
Composting sounds fancy and complicated. It’s not. You’re basically letting organic stuff rot in a pile and turning it into black gold for your garden. Sounds gross? It’s actually pretty cool.
In this article
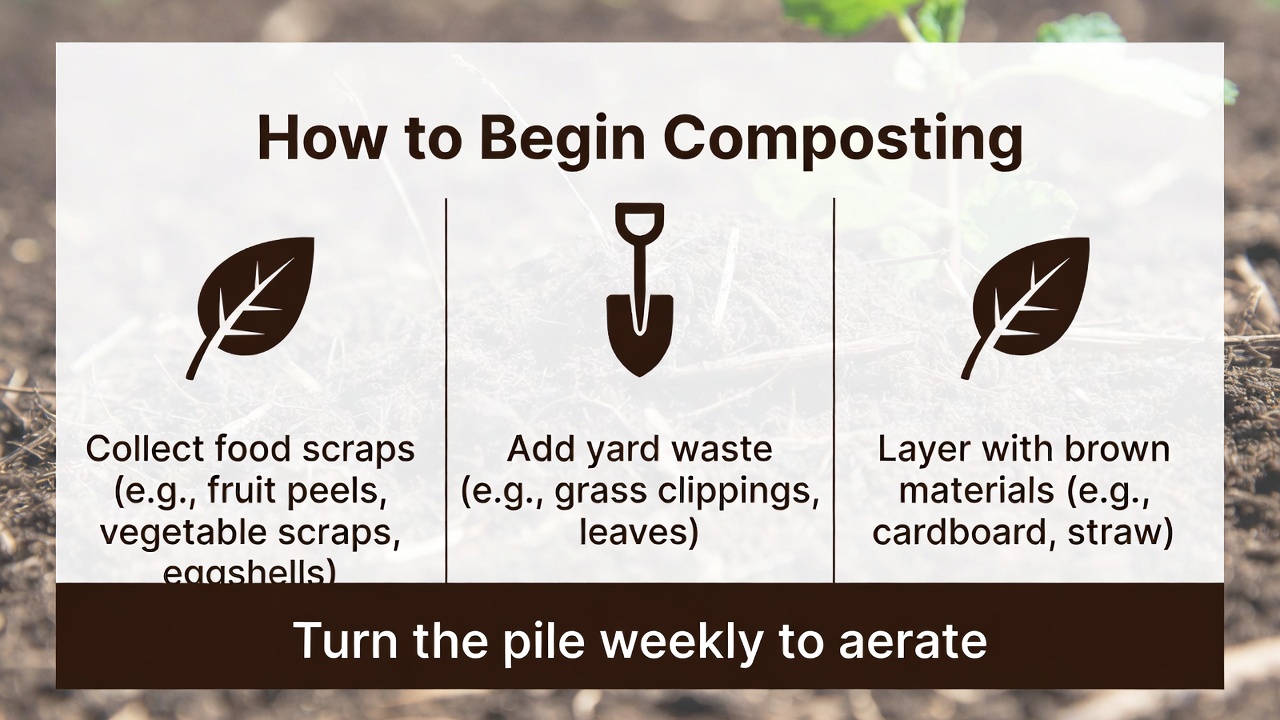
Think of composting as nature’s recycling program. Instead of throwing banana peels, grass clippings, and leaves into the trash, you pile them up. Tiny creatures and bacteria go to work breaking everything down. A few weeks or months later, you’ve got rich, dark soil that makes plants super happy. No special equipment required. No experience needed. Just some scraps and patience.
This guide walks you through everything you need to know to start composting at home right now.
Why Should You Compost?
Composting helps you in three big ways.
First, it cuts down on trash. About one-third of what we throw away could become compost. That’s a lot of stuff heading to the landfill for no reason. When food and yard waste pile up in landfills, they create methane, a gas that hurts our planet. Composting stops that problem.
Second, it saves you money. Compost is expensive to buy. A bag costs $5 to $15 depending on where you shop. Make your own, and you get it free. Lots of bags add up fast if you have a garden.
Third, it makes your soil richer. Store-bought fertilizer helps plants, but compost does more. It feeds soil with nutrients, holds water better, and brings in helpful bugs and microbes that keep soil alive. Plants in compost-rich soil grow bigger and stronger than plants in plain dirt.
Home composting also works great for the environment. You reduce trash. You cut methane. You stop buying bags of fertilizer that cost energy to make and ship. All of that helps the planet while helping your plants.
What Can You Compost?
Not everything breaks down the same way. Knowing what goes in your compost pile keeps things working right.
Greens are the wet, nitrogen-rich stuff:
- Fruit and vegetable scraps (apple cores, carrot tops, lettuce leaves)
- Coffee grounds and tea bags
- Grass clippings
- Plant trimmings
- Crushed eggshells
- Fresh manure from livestock
Browns are the dry, carbon-rich stuff:
- Dry leaves
- Straw or hay
- Shredded paper or cardboard
- Wood chips
- Sawdust from untreated wood
- Twigs and branches
For best results, keep a mix of about three parts brown to one part green. Too much green and your pile gets stinky and wet. Too much brown and nothing happens—it just sits there.
Avoid these items:
- Meat, fish, or bones (they attract rats and smell awful)
- Oil or grease
- Dairy products
- Diseased plants
- Pet feces
- Glossy paper
- Treated wood
- Coal or charcoal ash (wood ash is fine)
- Plants sprayed with pesticides
If you’re not sure about something, leave it out. Your compost pile will thank you.
Composting Methods for Beginners
You have options for how to compost. Some ways cost nothing. Others require gear. Pick what works for your space and budget.
Cold Composting (The Lazy Way)
Cold composting is the easiest. You dump everything in a pile and wait. There’s no turning. No fussing. No equipment.
How it works: Collect your scraps and yard waste in a corner of your yard. Stack them up. Leave them alone. In six months to two years, the bottom becomes dark, crumbly compost. The stuff on top is still breaking down.
Best for: People with space, patience, and no yard waste to get rid of soon. This works great for small households that don’t fill a bin quickly.
Time to compost: 6 to 24 months depending on conditions.
Hot Composting (The Fast Way)
Hot composting breaks stuff down fast. You need more work, but results come quicker.
How it works: Layer your greens and browns in the right ratio. Keep the pile moist like a wrung-out sponge. Turn it every week or two. The pile heats up from all that action. Bacteria and organisms go wild breaking things down. In 4 to 8 weeks, you’ve got compost.
Best for: People who want fast results and don’t mind a bit of work. This method handles more waste faster than cold composting.
Time to compost: 4 to 8 weeks.
Bin Composting (The Tidy Way)
A bin keeps everything contained and looks neater. Bins range from simple to fancy.
DIY bin: Build one from wood pallets. Stack four pallets into a square. Nail them together. Done. Cost is zero if you find free pallets.
Store-bought bin: Buy a plastic or wood bin from a garden center. These cost $50 to $300. They look tidy and keep critters out better than open piles.
How it works: Add layers of greens and browns just like an open pile. Turn it once a week for hot composting or leave it alone for cold composting. When it’s full and broken down, harvest your compost from the bottom.
Best for: Anyone with limited space or who wants a neat appearance. Bins work in yards, patios, or balconies.
Time to compost: 4 to 8 weeks (with turning) or 6 to 12 months (without turning).
Tumbler Composting (The Convenient Way)
A tumbler is a barrel on a stand that you turn by spinning a handle. Each turn mixes everything up.
How it works: Add your layers, then spin it daily or every few days. The spinning mixes everything and speeds up breakdown. Results come super fast.
Best for: People who want convenience and fast compost. These work great for balconies and small patios since everything is contained.
Cost: $100 to $400 for a decent tumbler.
Time to compost: 2 to 4 weeks with daily spinning.
Vermicomposting (The Apartment Way)
This method uses worms to break down scraps. A worm bin sits anywhere—under your kitchen sink, in a closet, or on a balcony.
How it works: Buy red worms (not earthworms). Put them in a bin with bedding and food scraps. They eat the scraps and create worm castings, which is amazing fertilizer. No smell if done right. No mess.
Best for: Apartment dwellers or people with no yard. Worm bins work indoors and produce zero odor.
Cost: $50 to $200 for a decent worm bin, plus $30 to $50 for worms.
Time to compost: 3 to 6 months.
Setting Up Your Composting System
Here’s how to start your compost pile or bin today.
Step 1: Find Your Location
Compost works best with a bit of sun and shade mixed together. Full sun dries things out fast. Shade slows everything down. A spot that gets morning sun and afternoon shade is perfect.
Make sure water can drain away. Your pile should sit on soil, not concrete, so organisms from the earth can join the party. If you must use concrete, add drainage holes or put a tarp under with gaps around the edges.
Step 2: Gather Your Materials
For cold composting, grab whatever you have—leaves, grass clippings, kitchen scraps. No special materials needed.
For a simple bin, collect four wooden pallets or build a wood frame. Attach chicken wire or hardware cloth to keep critters out if needed.
For a purchased bin, follow the instructions that come with it. Most just need assembly.
Step 3: Start Layering
Begin with a layer of brown material about 4 to 6 inches thick. This creates air pockets.
Add a layer of green material about 2 to 3 inches thick.
Repeat until your bin is full or your pile is a good size. Water each layer lightly—it should feel like a wrung-out sponge, not soaking wet.
The more layers you add at once, the hotter your pile gets if you’re going for hot composting.
Step 4: Cover It
Cover your pile with brown material, a tarp, or a lid. This keeps rain from washing nitrogen away and keeps critters from digging in. It also helps keep smell down.
Step 5: Wait and Watch
For cold composting, just let it sit. Check it every month or so to see how it’s progressing.
For hot composting, turn it with a garden fork or shovel every week. Move material from the outside to the inside to mix it all up.
Troubleshooting Common Problems
My Pile Smells Like Rotten Eggs
This means too much green stuff or too much moisture. Add brown material like dry leaves or shredded paper. Turn the pile to get air flowing through it. In a day or two, the smell goes away.
My Pile Isn’t Heating Up
Your pile needs enough mass and the right mix of greens and browns. A pile under 3 feet on each side doesn’t get hot. Also check your green to brown ratio—it should be around 1:3. If both are good and it’s still cold, turn the pile and add more greens.
Bugs Are Living in My Compost
Good news: most bugs are helping! Flies, beetles, and worms break down organic matter. But if you see rats, ants taking over, or way too many flies, you have a problem.
Don’t add meat, dairy, or oil to your pile. These attract pests like crazy. Keep your pile covered. Turn hot piles regularly—pests don’t like it when you mess with their home. If rats are an issue, use a bin or tumbler instead of an open pile.
My Compost Isn’t Finished
Composting takes time. If you’re not seeing finished compost after the expected timeframe, your pile may be too dry, too wet, or too cold. Make sure it’s staying moist and has the right mix of greens and browns. A cold pile might just need more time—give it a few more months.
There Are Weeds Growing in My Compost
This happens when you add seeds to your pile. Hot composting kills seeds, but cold composting doesn’t get hot enough. Remove visible weeds before they spread. Going forward, skip adding weeds with seeds, and make sure your pile gets hot enough if you use hot composting.
What Finished Compost Looks Like
When your compost is done, it looks nothing like what went in. It’s dark brown or black, crumbly, and smells earthy and fresh. You should barely recognize the stuff you threw in.
You can sift it through a screen to separate coarse pieces that need more time from finished compost. The fine stuff is ready to use.
Finished compost should:
- Be dark brown or black
- Smell earthy, not rotten
- Feel crumbly, not sticky
- Have no recognizable food scraps or leaves
- Be cool (if it’s still steaming hot, it needs more time)
Using Your Finished Compost
Now for the fun part—using your hard work.
In the Garden
Mix compost into garden beds before planting. Use about 2 to 4 inches mixed into the top 6 to 8 inches of soil. This feeds plants all season and improves soil structure.
For Potted Plants
Mix finished compost with potting soil for a lighter, richer blend. Use about 25% compost to 75% potting soil.
For Lawns
Spread a thin layer (half an inch or so) of finished compost over your lawn in spring. Rake it in. Grass will love it and grow thick and green.
For Seeds and Seedlings
Use finished compost as a seed-starting mix by combining it with peat moss or coconut coir and perlite. Seeds sprout great in compost-based mixes.
For Potting Soil
Blend finished compost with peat moss or coconut coir, perlite, and bark to make custom potting soil that works perfect for containers.
Tips for Success
Keep these ideas in mind as you compost.
Start small. You don’t need a huge pile. A bin 3 feet by 3 feet works fine. As you get comfortable, expand.
Keep a scrap bucket. Put a small container in your kitchen for scraps. When it’s full, take it to your compost pile. This beats making trips for every banana peel.
Shred large materials. Big leaves and cardboard break down slower. Run a lawn mower over leaves or tear cardboard into pieces. Smaller pieces compost faster.
Layer as you go. Don’t dump all your greens at once. Alternate greens and browns for better results.
Keep notes. Track what you add and when. In a few weeks, you’ll learn what works best for your setup.
Turn when you can. Even if you’re doing cold composting, turning your pile every few weeks speeds things up. It doesn’t have to be perfect—just mix it up.
Don’t get hung up on ratios. The 3:1 brown-to-green ratio is a guideline, not a law. If your pile gets too wet or smells, add more brown. If nothing’s happening, add more green. You’ll find the balance.
Keep it moist. Compost breaks down fast in moist conditions. It should feel like a wrung-out sponge. Too dry and everything stops. Too wet and it smells.
Making Composting Part of Your Routine
The best composting system is one you’ll actually use. Make it part of your life.
Save your scraps in a container by the sink. When you cook dinner, toss the scraps in. When the container is full, walk it out to your pile. Takes 30 seconds. Do this every time you cook, and you’re feeding your compost pile daily without thinking about it.
Keep your pile in a spot you see often. The more you see it, the more you’ll think about composting. This helps you remember to add materials and turn it.
Invite friends and family to your compost pile. Yeah, that sounds weird. But showing people how cool composting is spreads the idea. Before long, they might start their own piles.
Composting in Apartments and Small Spaces
Don’t have a yard? You can still compost.
Worm bins work great in apartments. They’re small, odor-free, and sit under a sink or in a closet. You get finished compost every few months.
Bokashi bins ferment food scraps (including meat and dairy) in about two weeks. Then you bury the fermented stuff in a garden bed or outdoor compost pile. Great for apartments with no outdoor space.
Countertop composters use heat and chopping to break down scraps quickly. Results aren’t quite as rich as outdoor compost, but they work.
Community gardens often have shared compost piles. Check if one is nearby. You can add your scraps and take finished compost home.
Local drop-off programs let you bring scraps to a collection point. Workers compost them, and you get finished compost back. Check your city’s website.
Common Beginner Mistakes to Avoid
Mistake: Not enough brown material. This is the #1 problem. A wet, stinky pile usually means too much green. Keep plenty of dry leaves, cardboard, and sawdust around. You’ll use them.
Mistake: Too much moisture. Your pile should feel moist, not waterlogged. If water squeezes out, it’s too wet. Turn it and add brown material to dry it out.
Mistake: Pile too small. A pile needs at least 3 feet on each side to heat up. If you’re doing cold composting, size doesn’t matter, but small piles take forever. Build bigger piles.
Mistake: Adding meat or dairy. These attract rats, raccoons, and flies. Just skip them. Your compost doesn’t need them anyway.
Mistake: Not turning hot piles. If you’re going for hot composting, turn it regularly. Without turning, you’re basically doing cold composting and wasting all that potential heat.
Mistake: Giving up too soon. Compost takes time. Don’t expect finished compost in two weeks. Give it at least a month or two. Patience pays off.
Quick Reference: Composting Timelines
| Method | Time to Compost | Best For | Effort |
|---|---|---|---|
| Cold Pile | 6-24 months | Patient beginners | Low |
| Hot Pile | 4-8 weeks | Fast results | Medium |
| Bin Composting | 6-12 months | Small spaces | Low |
| Tumbler | 2-4 weeks | Convenience | Medium |
| Worm Bin | 3-6 months | Apartments | Low |
Getting Started Today
Composting isn’t hard. You already have most of what you need. Start with your scraps and yard waste. Pick a spot in your yard or grab a worm bin for an apartment. Layer your greens and browns. Keep it moist. Wait.
In a few weeks or months, you’ll have rich, dark compost that makes plants thrive. You’ll feel good about cutting trash. Your plants will look amazing. Your soil will be healthier.
Best part? You did it yourself with stuff that would have ended up in a landfill.
Composting is one of the easiest ways to help the planet while helping your garden. No special skills. No fancy gear. Just the willingness to try something new.
Start today. Your plants will thank you. The planet will thank you. You’ll thank yourself when you see what composting can do.
Conclusion
Composting is simpler than you think. It’s recycling that actually works. It cuts trash, saves money, and builds better soil. Whether you go with cold composting, hot composting, a bin, a tumbler, or a worm bin, you’re doing something great.
Start small. Keep it simple. Let nature do the work. In a few weeks or months, you’ll be spreading homemade compost in your garden and wondering why you didn’t start sooner.
The best time to start composting was yesterday. The second-best time is today. Grab your scraps. Build your pile. Let’s get started.
Ready to compost? Start with one method that fits your space and schedule. Most beginners find cold piling or bin composting easiest. Within a few weeks, you’ll see decomposition happening. Keep adding materials, keep it moist, and let nature work its magic. Happy composting!

Hi, I’m Mary, the founder of GardenCure.com. I’m passionate about creating healthy, beautiful gardens and well-kept lawns. I share practical experience and trusted advice on garden and lawn gear that truly works. With the support of my dedicated research team, our writers produce honest, in-depth reviews using reliable, authentic sources—helping you choose the right tools with confidence for your outdoor space.