How to Use a Pump Sprayer?
Pump sprayers are handy tools that make applying liquids easier than you’d think. Whether you’re dealing with pesticides in your garden, cleaning products around your house, or fertilizers for your plants, a pump sprayer can save you time and effort. If you’ve never used one before, don’t worry. They’re simple to operate once you know the basics.
In this article
This guide walks you through everything you need to know about pump sprayers. You’ll learn how to fill them, use them properly, and keep them in good working condition. By the end, you’ll feel confident using a pump sprayer for any task.
What Exactly Is a Pump Sprayer?
A pump sprayer is a portable container that holds liquid and releases it as a fine mist or stream. The basic design is straightforward: you pour your liquid into the tank, pump air into the container to build pressure, and then squeeze the trigger to spray.
Most pump sprayers have the same core parts. The tank holds your liquid. The pump handle sits on top and pulls air into the container. A pressure relief valve stops pressure from building up too much. The spray wand lets you control where the liquid goes. A trigger releases the spray when you pull it. Inside the tank, there’s a tube that draws liquid up and out through the wand.
Pump sprayers come in different sizes. Small ones hold one or two liters and work great for indoor cleaning jobs. Medium sprayers might hold four to five liters and suit most garden tasks. Large sprayers can hold ten liters or more, which works well if you have a big garden or commercial work to do.
Types of Pump Sprayers
Not all pump sprayers are the same. Different types work better for different jobs.
The manual pump sprayer is the most common type. You pump the handle up and down to build air pressure inside the tank. These work well for most household and garden jobs. They’re affordable and don’t need electricity or batteries.
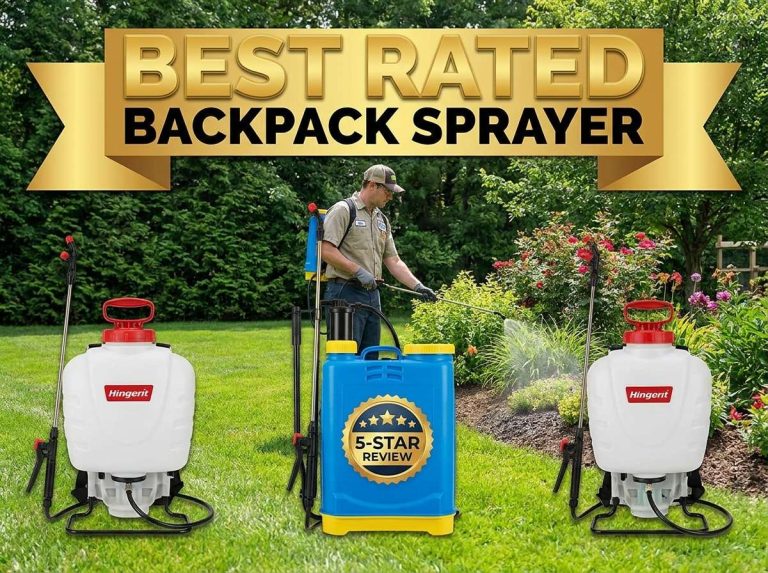
Backpack sprayers have a larger tank and sit on your back with shoulder straps. This design lets you walk around easily while keeping your hands free to operate the sprayer. Farmers and gardeners use these for bigger areas.
Handheld trigger sprayers are the simplest type. You just pull a trigger and the liquid sprays out. These don’t build pressure because they work by squeezing. They’re good for quick tasks but cover less area with each pump.
Pressurized pump sprayers stay pressurized even when you’re not pumping. Once you build enough pressure, you can take breaks without losing the spray. These are great if you have a lot of spraying to do.
Electric pump sprayers use batteries or electricity to pump air automatically. You don’t have to work the pump by hand. These save effort on large jobs.
Getting Your Pump Sprayer Ready to Use
Before you use your pump sprayer for the first time, take a few minutes to prepare it. This makes the whole job easier and helps your sprayer work better.
Start by reading the instructions that came with your pump sprayer. Different brands might have slightly different setups. Check for any parts you need to assemble. Some sprayers arrive with the pump already attached, while others need you to screw the pump handle into the tank yourself.
Look for the fill cap. This is usually on top of the tank. Unscrew or unclip it to open the top. Some caps twist off, while others pop off with a button. Take a moment to find where the fill cap connects so you can remove and replace it easily.
Before filling your sprayer, make sure it’s clean inside. If this is a brand-new sprayer, rinse the inside with plain water to remove any dust or debris from manufacturing. If you’re reusing an old sprayer, wash it thoroughly with soap and water, then rinse it completely. Let it dry before moving on.
Now you’re ready to fill it. This is the easiest part of the whole process.
Filling Your Pump Sprayer with Liquid
Filling a pump sprayer takes just a few minutes and requires almost no skill.
Place your sprayer on a flat, stable surface. You don’t want it to tip over while you’re filling it. A table, workbench, or the ground all work fine. Just make sure the surface is level and you have good light so you can see what you’re doing.
Open the fill cap by twisting or unclipping it, depending on your model. Set the cap somewhere safe where you won’t lose it. Some people place it upside down on the tank itself so they know right where it is.
Pour your liquid slowly into the opening. Don’t fill it all the way to the very top. Leave about an inch of space at the top. This empty space lets air get trapped inside when you pump, which is what builds pressure. If you fill it completely to the brim, you won’t have room for air and the sprayer won’t work properly.
If you’re mixing a concentrated product with water, do this mixing in a separate container first. For example, if you’re making a pesticide solution, mix it in a bucket or large container using the measurements on the product label. Then pour your mixed solution into the sprayer tank.
Once you’ve filled the tank to the right level, replace the fill cap. Twist it on or snap it into place, making sure it’s tight. A loose cap can let air escape when you pump, which wastes your effort.
Wipe the outside of the tank with a cloth if any liquid spilled. This keeps your hands clean and prevents slipping when you grip the sprayer.
Building Pressure in Your Pump Sprayer
This is the magic step that makes pump sprayers work. Building pressure is simple, but doing it right makes a real difference.
Hold the sprayer with one hand on the tank and the other on the pump handle. Find a comfortable, stable position. Many people hold the tank against their body or rest it on a table while pumping.
Start pumping the handle up and down in a smooth, steady rhythm. Push the handle down and pull it back up. One full up-and-down motion counts as one pump. Some people call this “priming” the sprayer.
You’ll notice the handle gets harder to push as you pump more. This is exactly what should happen. The air inside is building pressure, which means your pump is doing its job.
For most manual pump sprayers, you need anywhere from ten to twenty pumps to build enough pressure. Smaller sprayers might need fewer pumps. Larger ones might need more. You’ll get a feel for this after a few uses.
A good way to know when you have enough pressure is to watch for the resistance. Once the pump handle becomes quite hard to push, you probably have enough. You can also squeeze the trigger slightly to test the spray. If you get a nice mist or stream, you’re ready. If the spray is weak or comes out as drips, pump a few more times.
With pressurized sprayers, you pump until you hear a click or feel the pump lock into place. This means the pressure is high enough and you can stop pumping.
Keep in mind that as you spray, the pressure inside drops. If the spray becomes weak during your job, pump again to build pressure back up. This is normal and expected.
How to Spray Correctly
Now that your sprayer is filled and pressurized, it’s time to actually use it.
Point the spray wand where you want the liquid to go. Make sure nobody is in the spray path, especially their face or eyes. Even though you might be spraying harmless water or cleaning solution, you still want to be safe.
Squeeze the trigger gently. Start with light pressure. A gentle pull often works better than a hard squeeze. You’ll get better control and can adjust the spray pattern more easily.
Keep the wand pointed at your target as you spray. Move slowly and steadily so you cover the area evenly. Don’t spray in jerky, quick movements. Slow and steady spraying gives better coverage.
For garden jobs, spray both the top and bottom of plant leaves if needed. Pests and diseases often hide on the undersides of leaves. Tilt your wand accordingly to reach these spots.
When spraying vertical surfaces like walls or fences, start at the top and work your way down. Gravity helps the liquid run down naturally. This gives you even coverage with less effort.
Stay at a reasonable distance from what you’re spraying. Most pump sprayers work best from about one to three feet away. Too close and the spray might be too concentrated. Too far away and the mist spreads too much before reaching the target.
If you’re spraying multiple plants or a large area, work systematically. Go left to right, or top to bottom. This helps you avoid missing spots or spraying the same area twice by accident.
For fine mist applications, many sprayers have an adjustment on the nozzle. You might be able to twist it or move a slider to change the spray pattern from a wide mist to a narrow stream. Experiment to find what works best for your job.
Maintaining Pressure While You Work
As you spray, the pressure inside the tank gradually drops. This is normal because you’re releasing pressurized air along with the liquid.
When you notice the spray becoming weaker, it’s time to pump again. You don’t have to stop your job. Just pump a few times to bring the pressure back up, then continue spraying. Most jobs require a couple of repumping sessions, depending on how much you’re spraying.
If you stop working for a few minutes, the pressure won’t drop much. You might not need to pump again right away. Just give the trigger a squeeze to start spraying again.
Some sprayers have a pressure gauge that shows you the current pressure level. This takes the guesswork out of knowing when to pump. If your sprayer has one, check it occasionally and pump when it drops.
If your sprayer stops spraying even though you’ve pumped plenty, check a few things. Make sure the liquid level in the tank is still adequate. The intake tube inside draws from the bottom of the tank, so if you’re almost empty, you might just be out of product. Also check that the spray wand is pointing downward or at an angle, not straight up, which can cause air to spray instead of liquid.
When to Stop and Empty Your Sprayer
Once your job is done, it’s time to clean up your sprayer properly.
First, release all the pressure inside. Most sprayers have a pressure relief button or valve. Press it to let air out. You should hear a hiss as the air escapes. This makes the sprayer safe to handle and easier to open.
Next, remove whatever liquid is left in the tank. You have a few options depending on what you sprayed. If you sprayed water, you can pour the leftover water out. If you sprayed pesticides or other chemicals, check the label for proper disposal instructions. Never pour pesticides down the drain or into the ground. Your local waste disposal facility usually has a place to drop off hazardous chemicals.
Once you’ve emptied the tank, rinse it thoroughly with clean water. Fill the tank halfway with water, close the cap, shake it well for a minute, and pour the water out. Repeat this two or three times until the water runs clear and doesn’t smell like the product you sprayed.
Fill the tank with clean water one more time and spray it all out. This flushes the interior tube and spray wand to remove any leftover product. Your sprayer is now clean and ready for next time.
Troubleshooting Common Pump Sprayer Problems
Even simple tools can have issues sometimes. Here are solutions to the most common problems people run into.
Sprayer won’t build pressure. This usually means air is leaking out somewhere. Check that the fill cap is tight. Check the pump handle connection to make sure it’s seated properly. If you have a pressure relief valve, make sure it’s closed. Sometimes these valves can get stuck open slightly.
Spray is very weak or comes out as drips. Low pressure causes this. Pump more to increase pressure. If the spray stays weak even after pumping, the intake tube might be blocked. Try filling the tank with clean water, closing it up, and spraying the water out. If a blockage exists, the water should clear it.
Pump handle is stuck or won’t move. This sometimes happens if the sprayer sits unused for a long time with product inside. Don’t force the pump. Fill a bucket with warm water and let the sprayer soak for an hour. The water helps soften any dried product. Then try gently working the pump back and forth.
Liquid leaks from the bottom or sides of the tank. Check the seal under the pump. This rubber gasket can wear out over time. You can usually replace it yourself by unscrewing the pump and swapping in a new gasket. Most hardware stores sell replacement gaskets.
Spray wand leaks or drips. The trigger seal might be worn. Soak the sprayer in warm water to clean it out, then try again. If it still leaks, you may need to replace the trigger valve.
The tank gets pressurized too easily and pressure spikes. This could mean the pressure relief valve isn’t working correctly. Check the valve opening on top of the tank. If it’s clogged with dried product, soak it in water to clean it.
Tips for Getting the Most Out of Your Pump Sprayer
A few smart practices make using a pump sprayer easier and longer-lasting.
Always clean your sprayer immediately after you finish using it. Don’t let product dry inside. Dried product can block tubes, clog the nozzle, and damage seals. Cleaning right away prevents all these problems.
Store your sprayer in a cool, dry place away from direct sunlight. Extreme heat or cold can damage the tank and seals. A basement, garage, or shed works well.
Keep the spray wand clean. Sometimes liquid can dry around the nozzle opening and reduce spray quality. A small cloth or soft brush cleans it easily.
If you store your sprayer for a long time between uses, fill it with water, pump it up, and spray all the water out before storing. This keeps the seals moist and flexible.
Replace worn gaskets and seals before they completely fail. These inexpensive parts are easy to change and keep your sprayer working like new.
Check the intake tube for cracks or damage. If you see any, you should replace it. A damaged tube can let air leak in during pressurization.
If your spray wand has an adjustable nozzle, learn how to use it. Being able to switch between mist and stream patterns makes you faster and more accurate.
Spray Safety Matters
Before we wrap up, let’s talk about safety. Using a pump sprayer correctly means protecting yourself and others.
Always read the label on whatever product you’re spraying. The label tells you important information about safety, how much to mix, and where you can use it.
Wear appropriate protection. For water-based projects, you might just need to avoid splashing your face. For pesticides or harsh chemicals, wear gloves, long sleeves, pants, and sometimes a mask or eye protection. The product label will tell you what protection you need.
Never spray toward people, pets, or their faces. Keep children and animals away from where you’re spraying.
Don’t eat, drink, or smoke while using a pump sprayer. Wash your hands thoroughly after you finish.
If you’re spraying indoors, make sure the area is well-ventilated. Open windows and doors to let air flow through.
If product gets in your eyes or on your skin, rinse immediately with plenty of water and seek medical attention if needed.
Store your sprayer out of reach of children and pets when it’s not in use.
Final Thoughts
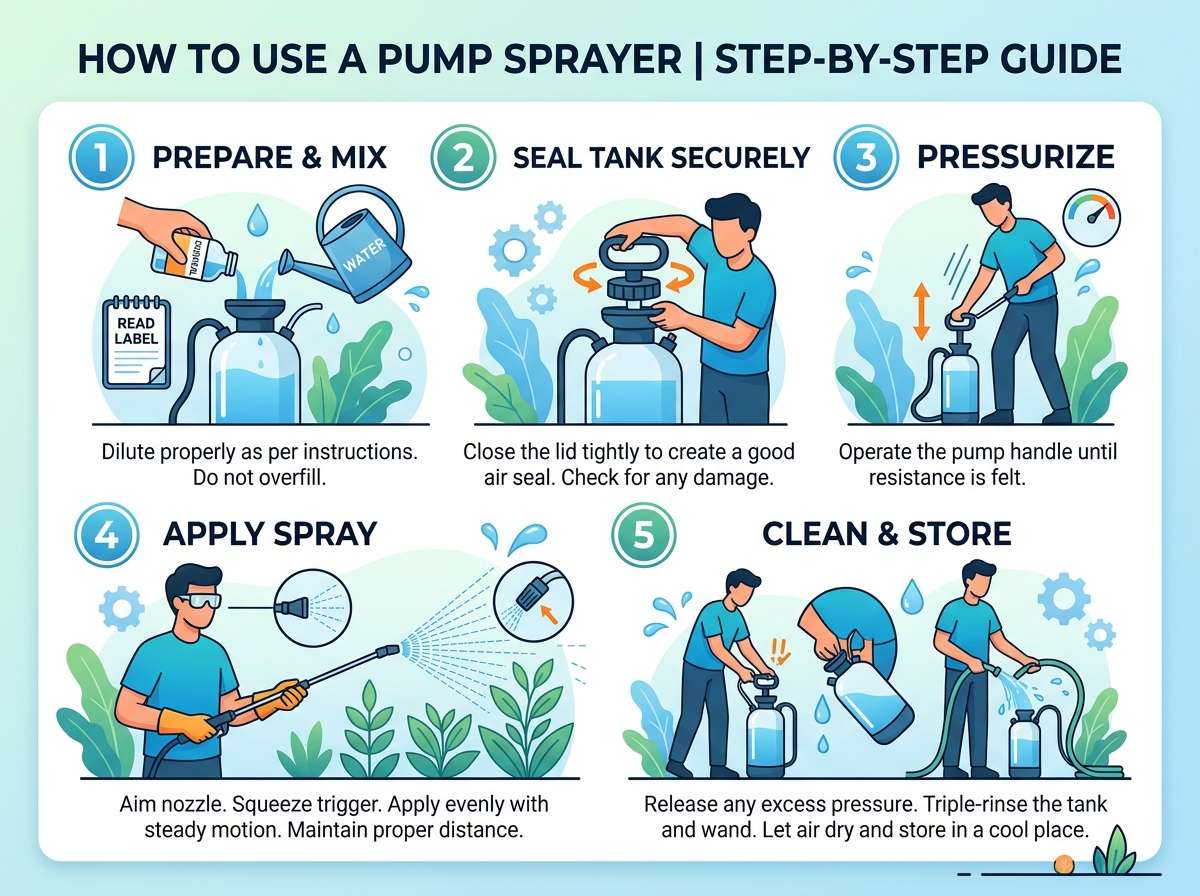
A pump sprayer is a simple but useful tool once you understand how it works. The steps are easy to remember: fill with liquid, pump to build pressure, spray by squeezing the trigger, and clean thoroughly when done.
With a pump sprayer in your hands, you can handle garden pesticide applications, apply fertilizer solutions, clean large areas with cleaning products, or spray other liquids quickly and evenly. The key to success is reading your sprayer’s instructions, following the product label guidelines, and maintaining your equipment.
After you’ve used a pump sprayer a few times, the whole process becomes automatic. You’ll know how many pumps you need, how far to stand away, and how to get smooth, even coverage. Before long, you’ll wonder how you ever completed these tasks without one.
Start with a basic manual pump sprayer if you’re new to these tools. They’re affordable, reliable, and easy to learn on. Once you’ve mastered the basics, you can explore other types like backpack sprayers or pressurized models if your needs grow.
Keep your sprayer clean and stored properly between uses, and it will serve you well for years to come. Happy spraying, and enjoy getting your tasks done faster and more efficiently.

Hi, I’m Mary, the founder of GardenCure.com. I’m passionate about creating healthy, beautiful gardens and well-kept lawns. I share practical experience and trusted advice on garden and lawn gear that truly works. With the support of my dedicated research team, our writers produce honest, in-depth reviews using reliable, authentic sources—helping you choose the right tools with confidence for your outdoor space.