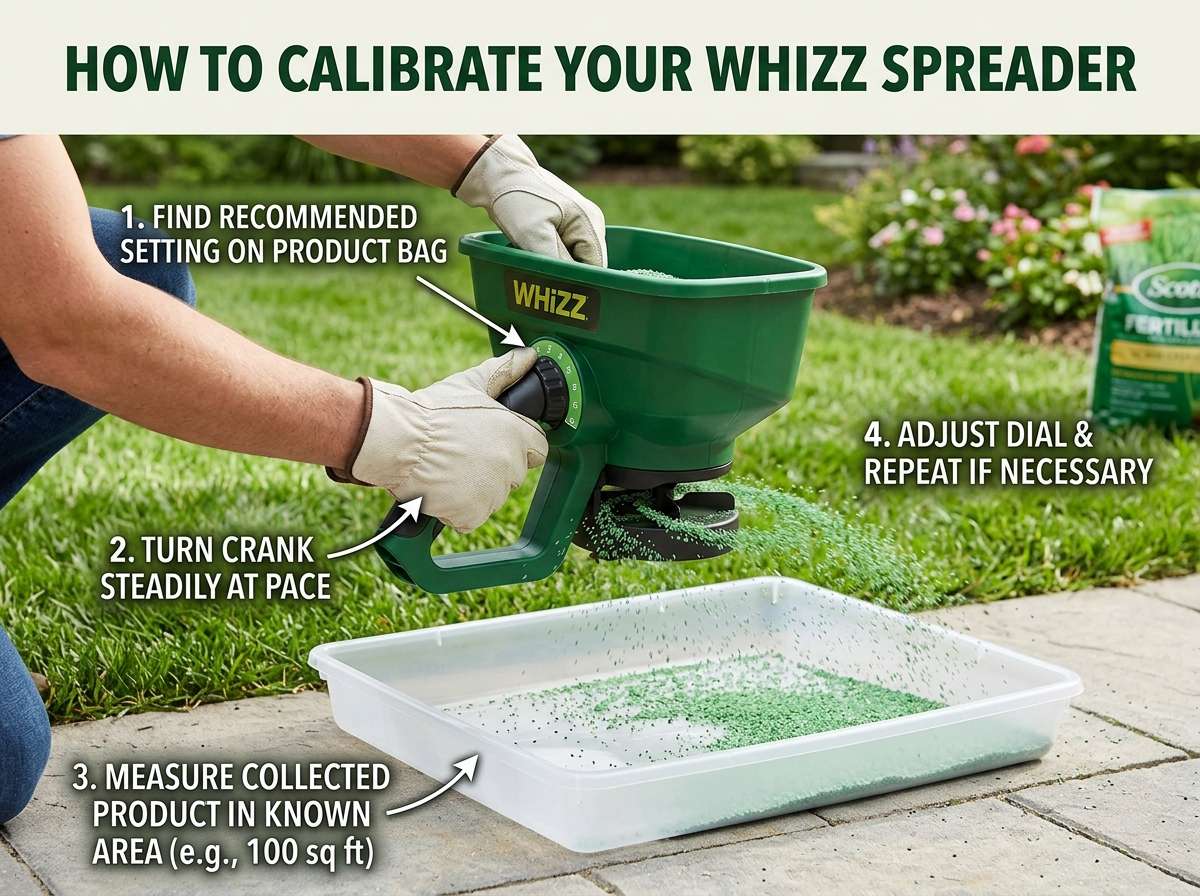
How to Calibrate Your Whizz Spreader?
If you’re looking to get your fertilizer spreader working like a well-oiled machine, you’ve come to the right place. Calibrating your Whizz spreader doesn’t have to be complicated or scary. In fact, once you know the basics, you’ll wonder why you didn’t do it sooner. Let me walk you through the entire process step by step, so you can feel confident doing this yourself.
In this article
Why Calibrate Your Whizz Spreader Anyway?
Before we jump into the how, let’s talk about the why. Your Whizz broadcast spreader is designed to distribute materials evenly across your lawn. But if you don’t take the time to calibrate it, you might end up with uneven coverage. Some spots will get too much product, and other spots won’t get enough. This wastes money and can harm your lawn.
Think about it this way: calibration is like tuning a guitar. Even if the guitar looks great, if it’s not in tune, it’s going to sound awful. Your spreader needs the same kind of attention. When you calibrate your spreader correctly, every part of your lawn gets exactly what it needs. No waste, no burned-out patches, just beautiful, even results.
What You’ll Need to Get Started
Let’s gather your tools before we begin. You don’t need much, which is great news. Here’s what you should have on hand:
A measuring tape or ruler will help you mark out your test area. Grab a broom or rake to help you move the material around during testing. You’ll want a collection container to catch the spread material, and a kitchen scale works perfectly for weighing what you collect. Some people use a large trash can or bucket with a drop cloth inside. A clipboard and pencil help you keep track of your measurements. Wear comfortable clothing and safety glasses if you’re sensitive to dust.
Most importantly, you’ll need your Whizz spreader filled with the exact material you plan to use on your lawn. Don’t use sand or anything else as a substitute. The density and size of particles matter, so use your actual fertilizer, seed, or whatever product you’re spreading.
Understanding Your Whizz Spreader Settings
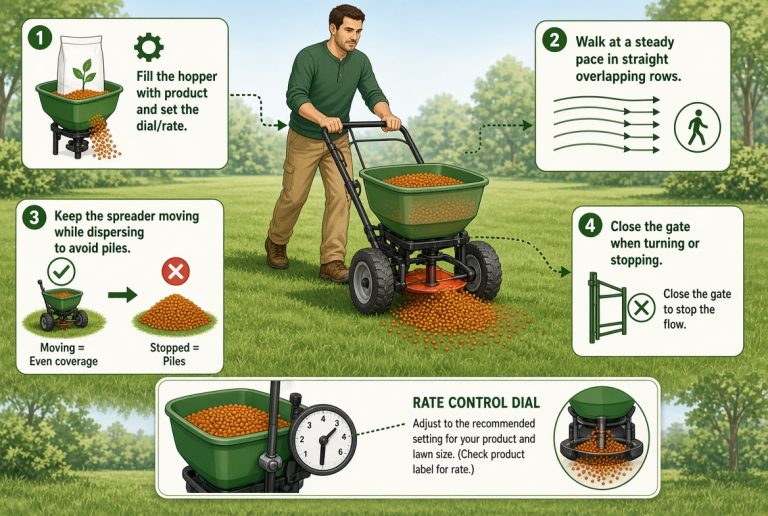
Your Whizz spreader has a control dial that opens and closes the gate. This gate sits between the hopper and the spinning disc below. The wider the gate opens, the more material falls onto the disc. The disc then flings that material out across your lawn at high speed.
Most Whizz spreaders have settings numbered from one to ten, though some models differ. Each number represents a different gate opening size. Settings one through three usually deliver light amounts of material. Settings four through seven are considered medium. Settings eight through ten dump heavy amounts. You’ll find the exact settings for your specific product printed right on the hopper or in your manual.
The rotation speed of the disc also matters. Some models let you adjust this. A faster-spinning disc throws material farther and wider. A slower disc keeps the material closer to the spreader. For most homeowners, you won’t need to mess with this. The default setting works just fine.
The Calibration Process: Step by Step
Now let’s get down to business. Follow these steps in order, and you’ll nail your calibration.
Step One: Prepare Your Test Area
Find a flat, level part of your yard or driveway. This is crucial because hills and slopes will affect how material spreads. Ideally, you want a hard, smooth surface like concrete or asphalt because it’s easier to see where the material lands and easier to collect it afterward.
Mark out a square area that’s exactly 10 feet by 10 feet. This gives you 100 square feet to work with. Use chalk, tape, or even spray paint to mark the corners. Make sure your corners are actually square by using a measuring tape to check the diagonals. If both diagonals are the same length, your square is true.
If you don’t have a driveway or patio to work with, you can use a tarp. Lay down a large tarp on your lawn and mark out your square on that. It’s a little messier, but it works.
Step Two: Fill Your Spreader
Fill your hopper with your actual product. Don’t skimp on this step. Use the exact fertilizer, seed, or material you plan to apply to your lawn. The particle size and weight matter when it comes to how the spreader throws material.
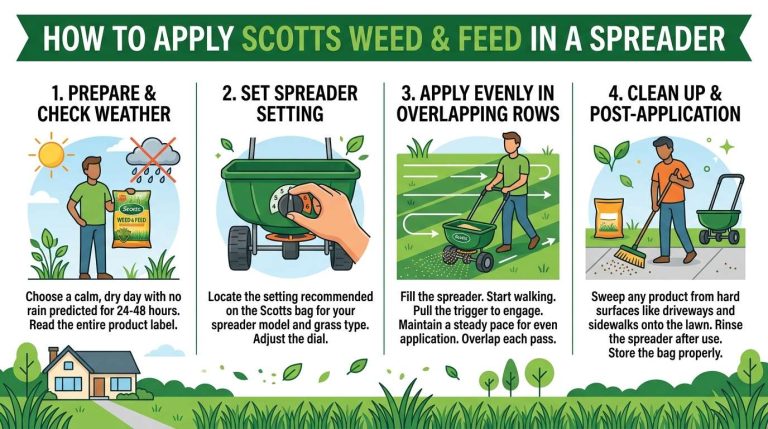
Set the control dial to the setting recommended on the product bag or in your manual. If the manual says “use setting six for standard lawn fertilizer,” then start at setting six.
Step Three: Walk Your Test Area
Stand just outside one corner of your marked square. Turn on the spreader and start walking. Walk at a steady pace, about three miles per hour. That’s roughly a normal walking speed. Try to keep your pace consistent. Wobbly, jerky walking creates uneven distribution.
Walk straight across your marked square in one direction. When you reach the far side, stop the spreader, turn around, and walk back. This creates two parallel lines of coverage.
Once you’ve walked your lines and stopped the spreader, let it sit for a minute. Some of the material clinging to the inside of the hopper will fall loose. This gives you a more complete picture.
Step Four: Collect and Weigh Your Material
Now comes the fun part. Grab your collection container and start gathering the material that landed in your test square. Sweep and scrape carefully to get everything. Place all the material you collected into your container and weigh it on your kitchen scale.
Write this number down. Let’s say you collected three pounds. Now here’s the math: multiply that weight by nine.
Why nine? Because your test square is 100 square feet, but most lawn applications are measured per 1,000 square feet. So three pounds times nine gives you 27 pounds per 1,000 square feet.
Check your product bag to see how much material you should apply per 1,000 square feet. If it says “apply 20 pounds per 1,000 square feet,” your current setting is delivering too much. If it says “apply 30 pounds per 1,000 square feet,” you’re pretty close.
Step Five: Adjust Your Settings
Did your test show too much material? Close the gate a bit by lowering your dial number. Try dropping down one or two settings and repeat the test. Did your test show too little material? Open the gate wider by raising your dial number. Test again with a higher setting.
Each time you change the setting, repeat the entire process. Walk your test area again, collect the material, weigh it, do the math. This sounds tedious, but you only need to do this once per product. After you’ve dialed in the perfect setting, you can write it down and remember it forever.
Step Six: Fine-Tune Until You’re Perfect
Keep adjusting and testing until your numbers match what the product recommends. You don’t need to be exact to the ounce, but try to get within a pound or so. Once you’ve hit your target, you’re done with calibration.
Write down your perfect setting somewhere you’ll find it. Many people tape a note right to their spreader. Some write it on their phone. Whatever works for you.
Testing Different Products Requires Recalibration
Here’s something important: every product needs its own calibration test. If you’re applying a spring fertilizer, test and record that setting. If you’re applying a fall fertilizer, test that too. If you’re spreading grass seed, test that as well.
Different products have different particle sizes and densities. A bag of granular fertilizer spreads differently than a bag of weed and feed. A bag of grass seed spreads differently than either of those. So whenever you switch products, you need to recalibrate. The good news is you get faster at the process after the first time.
Common Calibration Mistakes to Avoid
People make the same errors over and over. Let me help you skip those headaches.
Don’t rush your walking pace. If you walk too fast, the spreader doesn’t have time to distribute material evenly, and your test results will be wrong. If you walk too slow, the same problem happens. Aim for that nice, steady three miles per hour pace. If you’re not sure how fast you’re walking, have someone clock you with their phone’s speedometer app.
Don’t calibrate on a slope. Always use flat, level ground. Gravity will pull your material downhill, which throws off your test results.
Don’t assume one test is enough. Run at least two or three tests at each setting before you move on. You want consistency. If one test gives you three pounds and the next test gives you five pounds, something’s wrong. Your walking pace might be changing, or the spreader might have a mechanical issue.
Don’t guess at your measurements. Use an actual measuring tape, not your eyeballs. Mark your square carefully and measure those diagonals.
Don’t use the wrong material for your test. If your spreader manual says to calibrate with the material you’ll be spreading, follow that advice. Using something else will give you wrong results.
Don’t forget to write down your settings. You’re going to forget this information in a few weeks, I promise. Write it down while it’s fresh in your mind.
Different Spreader Models and Their Quirks
Not all Whizz spreaders are identical. Some models have slightly different designs. Most differences don’t affect calibration much, but a few things to keep in mind.
Older Whizz models sometimes have slower disc speeds. If you’ve got an older spreader, your material might not fly quite as far. That’s okay. Calibrate according to your specific model, and you’ll be fine.
Some Whizz spreaders have a baffle plate that you can adjust. This plate sits behind the spinning disc and helps direct the material. If your spreader has one, you might need to adjust it for the coverage pattern you want. The manual that came with your spreader explains this adjustment.
Professional-grade Whizz spreaders sometimes have slightly different control mechanisms. But the basic calibration process stays the same. Test your spreader, collect your material, weigh it, and adjust until you hit your target.
Getting a Perfect Coverage Pattern
Calibration isn’t just about spreading the right amount of material. It’s also about spreading it evenly across your lawn.
After you’ve calibrated your spreader, take a closer look at your test area. Did the material spread in a nice, even rectangle? Good. Did the edges get less material than the middle? That’s normal with a broadcast spreader, and that’s why you walk overlapping lines when you’re actually spreading your whole lawn.
When you’re spreading your actual lawn, always walk parallel lines that overlap slightly. Overlap the coverage by about two feet on each pass. This ensures that the edges, which get less material, will still get adequate coverage because of the overlap from the next pass.
If you notice that one side of your test area got much more material than the other side, you might have a bent vane on your disc or some other mechanical issue. Check your spreader for damage.
Seasonal Spreader Maintenance Improves Calibration
Keeping your spreader in good shape helps maintain accurate calibration over time.
Before each season, clean out your spreader hopper completely. Dust and old product bits can interfere with the gate mechanism and affect your spread rate. Use a brush and a shop vacuum to clean inside the hopper.
Check your disc and vanes for damage. If you see cracks or bends, you might need to replace them. A damaged disc throws material unevenly.
Make sure the gate slides smoothly when you adjust your dial. If it sticks or squeaks, a little lubricant helps. Use a silicone spray, not an oil-based spray. Oil attracts dirt.
Keep your spreader stored in a dry place during the off-season. Moisture can cause the control dial to stick and rust.
Using Your Calibrated Spreader on Your Lawn
Once you’ve done your calibration and written down your settings, you’re ready to spread.
Fill your hopper with your product. Set the dial to your tested setting. Walk straight lines across your lawn, overlapping your coverage by about two feet on each pass.
Walk at that steady three miles per hour pace. Don’t speed up or slow down based on thick or thin spots. Your spreader will handle variations in your lawn naturally.
If your lawn is really large, you might want to fill your hopper midway through the job. Keep your spreader settings the same as you continue walking your lines.
What If Your Lawn Is Uneven or Sloped?
Some lawns have hills, dips, and slopes. Does that mean you can’t calibrate your spreader? Not at all.
Do your calibration test on a flat area, exactly as described above. But keep in mind that your actual lawn might behave a little differently in sloped areas.
On a downhill slope, material will travel a little farther. On an uphill slope, it won’t travel quite as far. If your lawn has significant slopes, you might need to adjust your walking speed slightly to account for this. Walk a bit slower going uphill, which gives the material more time to spread. Walk a bit faster going downhill to compensate for the extra distance gravity adds.
This isn’t a huge adjustment. We’re talking about small changes, maybe a quarter mile per hour slower or faster. But it helps you get more even coverage on uneven terrain.
Troubleshooting Your Calibration Results
What if something seems off? Here are the most common issues and what they mean.
If your test results are all over the place, varying wildly from test to test, your walking pace is probably inconsistent. Slow down and focus on maintaining that steady speed.
If every test delivers way too much material, close your gate more. Lower your dial setting by several numbers and test again.
If every test delivers way too little material, open your gate more. Raise your dial setting and test again.
If your material distribution is uneven across your test area but the total amount is correct, check your disc for damage or bent vanes. You might have a mechanical issue.
If the left side of your test area gets way more material than the right side, you could have a bent baffle plate or a disc that’s not spinning at the right speed. Check your spreader’s mechanical components.
If your test results are inconsistent in a way you can’t explain, try calibrating with a different batch of the same product. Different batches sometimes have slight variations in size or density that affect spread rates.
Recording Your Calibration Data
I recommend creating a simple chart where you record your calibration information. Include the product name, the dial setting that worked, the test date, and any notes about conditions. Keep this chart in a folder with your spreader manual and warranty information.
Your chart might look like this:
Product: Spring Lawn Fertilizer (Brand Name) Dial Setting: 6 Target Rate: 20 pounds per 1,000 square feet Actual Rate: 19.5 pounds per 1,000 square feet Date: [Date] Notes: Worked perfectly on first test
Having this information makes your life so much easier in the future. You won’t have to recalibrate every time you apply the same product.
Pro Tips From Experienced Spreader Users
Let me share some wisdom from people who spread material regularly.
Always calibrate before your first application of the season. Don’t assume your settings from last time are still accurate. Mechanical things wear and settle over time. A quick recalibration takes maybe 30 minutes total and saves you from wasting money on a bad application.
Calibrate in the morning or evening when temperatures are cool. Hot days sometimes affect how granules behave as they dry out.
If you’re spreading really early in the season when the ground might be wet, remember that moisture affects how material disperses. You might want to do a quick test application on a small area before you do your whole lawn.
Never spread material when it’s extremely windy. Even a calibrated spreader struggles in heavy wind because the material gets blown off course.
Document your settings in multiple places. Write them on your spreader, in your phone, and in a notebook. This way, you won’t lose the information even if one source gets damaged or lost.
Final Thoughts on Spreader Calibration
Calibrating your Whizz spreader might seem like a lot of work upfront, but it’s absolutely worth it. Once you’ve done it, you’ve got reliable information that you can use for years. Your lawn will look better because it gets even coverage. You’ll waste less product, which saves money. You’ll feel confident using your spreader instead of just guessing and hoping for the best.
The process breaks down to simple steps: mark your area, fill your spreader, walk your lines, collect the material, weigh it, do some math, and adjust. Repeat until you hit your target. That’s it.
Take your time with the first few tests. Get comfortable with the process. After you’ve calibrated two or three products, you’ll be a pro. You’ll be able to walk into your shed, grab your spreader, set it to your recorded number, and spread perfectly every single time.
Your lawn deserves that level of care and attention. Your wallet will thank you for the efficiency. And you’ll get the satisfaction of knowing you did the job right. Happy spreading!

Hi, I’m Mary, the founder of GardenCure.com. I’m passionate about creating healthy, beautiful gardens and well-kept lawns. I share practical experience and trusted advice on garden and lawn gear that truly works. With the support of my dedicated research team, our writers produce honest, in-depth reviews using reliable, authentic sources—helping you choose the right tools with confidence for your outdoor space.