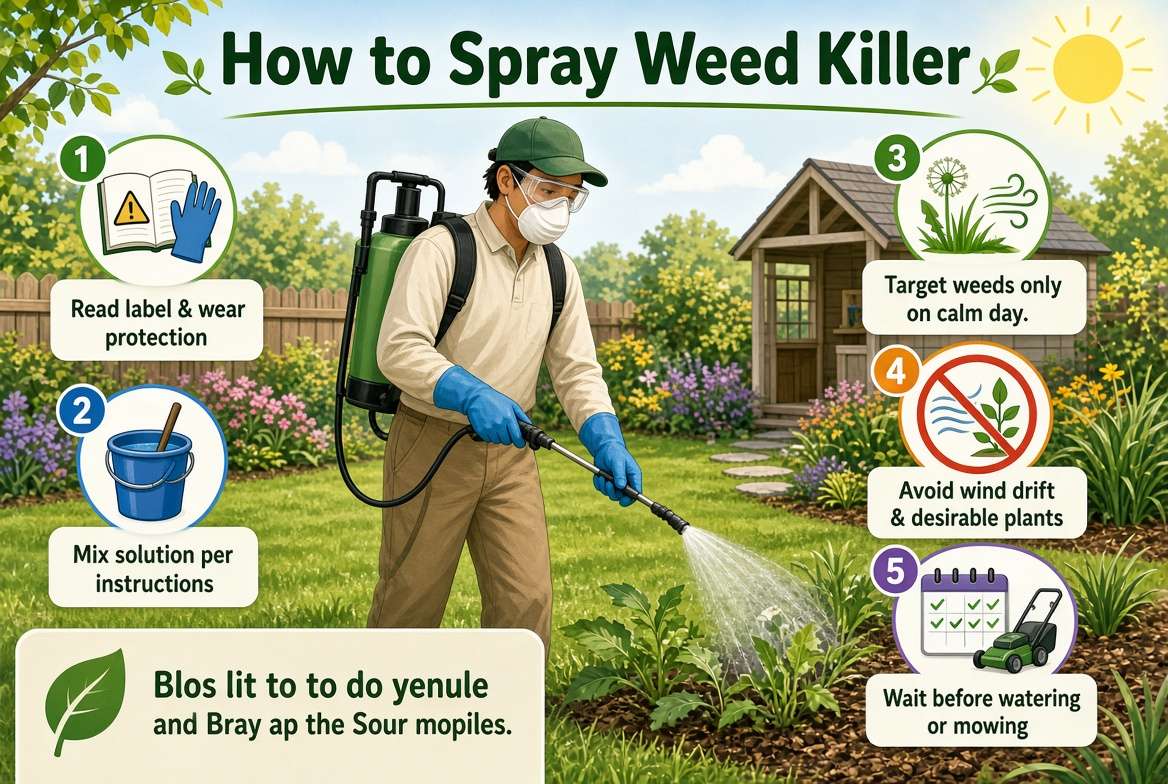
How to Spray Weed Killer?
Weeds are sneaky little plants. One day your lawn looks clean, and the next day dandelions, crabgrass, and clover pop up everywhere. If you want your yard back, you need to know how to spray weed killer the right way. This guide walks you through every step, from picking the right herbicide to cleaning your sprayer when you’re done. It’s written in plain, easy words so even a first-time gardener can follow along without any stress.
In this article
By the end of this article, you’ll know how to mix weed killer, when to spray it, how to protect your plants and pets, and how to get rid of tough weeds for good.
Why Weeds Keep Coming Back
Before we jump into spraying tips, it helps to know why weeds grow so fast in the first place. Weeds spread through seeds, roots, and runners. A single dandelion can drop hundreds of seeds that float away in the wind and land in your neighbor’s yard too. Some weeds, like crabgrass, grow from seeds every year. Others, like bindweed or ground ivy, grow from roots that spread underground and pop up in new spots.
This is why one spray session often isn’t enough. You need a plan that covers the weeds you see today and stops new ones from showing up later.
Types of Weed Killer You Can Use
There are two main types of weed killer: pre-emergent and post-emergent. Knowing the difference makes a big impact on how well your spray works.
Pre-emergent Herbicide
This type stops weed seeds from sprouting. You spray it on the soil before weeds show up, usually in early spring or early fall. It creates a thin barrier in the top layer of soil. When a weed seed tries to grow, the barrier stops the root from forming. Pre-emergent spray does nothing to weeds that already exist, so timing matters a lot here.
Post-emergent Herbicide
This type kills weeds that are already growing. It’s what most people think of when they hear the words “weed killer.” Post-emergent sprays come in two forms:
- Selective herbicide — kills certain weeds but leaves your lawn grass alone. Great for treating dandelions or clover in a grassy yard.
- Non-selective herbicide — kills almost any plant it touches, grass included. Good for driveways, gravel paths, or spots where you want nothing growing at all.
Glyphosate is one of the most common non-selective weed killers on the market. It works by soaking into the leaves and traveling down to the roots, killing the whole plant instead of just the top part.
What You Need Before You Start
Gather your supplies before you head outside. Having everything ready saves time and keeps the job smooth.
- A bottle or jug of weed killer (liquid concentrate or ready-to-use spray)
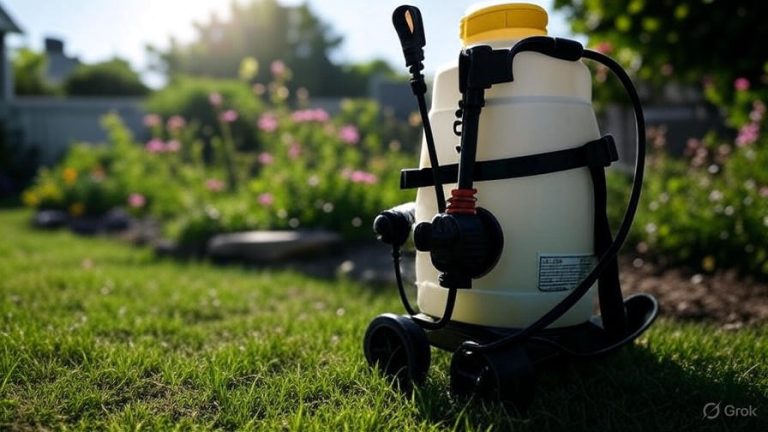
- A sprayer (pump sprayer, backpack sprayer, or a hose-end sprayer)
- Rubber gloves
- Safety goggles or glasses
- Long sleeves and pants
- Closed-toe shoes or boots
- A face mask, especially if you’re spraying a large area
- Measuring cup, if you’re mixing concentrate
- A bucket of water for rinsing tools afterward
Most garden stores sell affordable sprayers that work fine for home use. If you only have a small patch of weeds, a hose-end sprayer or a spray bottle will do the job just fine.
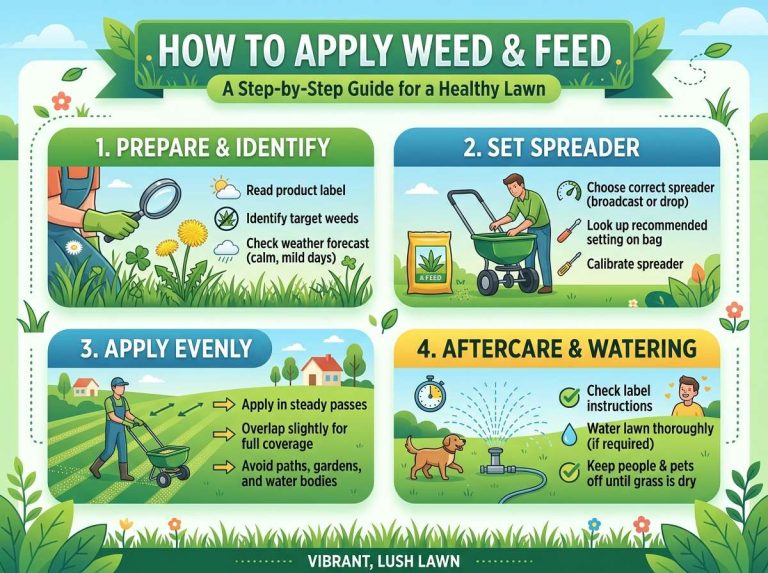
Step-by-Step: How to Spray Weed Killer
Step 1: Check the Weather First
Wind and rain can ruin your spray session. Spray on a calm day with little to no wind, so the chemical lands only where you aim it. Wind can carry droplets onto flowers, vegetables, or your neighbor’s yard, and that’s the last thing you want.
Rain is another problem. If rain is coming within a few hours, skip the spray day. Water will wash the herbicide off the leaves before it has time to soak in. Most labels tell you how many rain-free hours you need, so read that part carefully.
The best time to spray is usually early morning or late afternoon, when the sun isn’t too strong and the air is cooler. Spraying in the middle of a hot day can cause the liquid to evaporate too fast, and it can also stress your grass.
Step 2: Read the Label Carefully
This step sounds boring, but skipping it causes most spray mistakes. Every weed killer has a label with the mixing ratio, safety warnings, and the list of plants it’s meant for. Some products need to be diluted with water, while others come ready to spray straight from the bottle.
The label also tells you how close you can spray near vegetables, flowers, or water sources like ponds and streams. Herbicide runoff can hurt fish and other wildlife, so this part really matters.
Step 3: Mix the Solution (If Needed)
If your product is a concentrate, mix it with water using the ratio listed on the label. Pour the water into your sprayer first, then add the herbicide. This order stops the chemical from foaming too much and keeps the mix even.
Use a measuring cup instead of guessing. Too much herbicide can burn your grass or nearby plants, and too little might not kill the weeds at all. Stir gently or shake the sprayer to mix everything well before you start.
Step 4: Put on Your Safety Gear
Slip on your gloves, goggles, and long sleeves before you touch the sprayer. Skin contact with herbicide can cause irritation, and breathing it in isn’t great either. A mask adds extra protection, especially if you’re spraying a big lawn or working in a closed space like a greenhouse.
Keep kids and pets indoors while you spray, and don’t let them back outside until the spray has fully dried, which usually takes a few hours. Some labels ask for a longer wait time, so double check.
Step 5: Spray in a Steady, Sweeping Motion
Hold the sprayer nozzle about a foot away from the weed leaves. Move your arm in a slow, steady, back-and-forth motion, just like you’re painting a fence. Try to cover the whole leaf surface, since that’s where the plant absorbs the chemical.
Don’t soak the weed until it’s dripping. A light, even coating works better than a heavy dose. Extra liquid just drips onto the soil and gets wasted, and it can also spread to nearby plants you didn’t mean to hit.
For spot treatment on a few weeds in your lawn, aim directly at the weed and try to avoid the grass around it, especially if you’re using a non-selective spray.
Step 6: Work in Sections
If you’re treating a large yard, break it into sections instead of trying to spray everything at once. This keeps your coverage even and stops you from missing spots or double-spraying the same area. Start from one corner and work your way across in straight lines, similar to mowing a lawn.
Step 7: Let It Dry and Stay Off the Area
Once you’ve sprayed, leave the area alone for a few hours. Walking on freshly sprayed grass can spread the chemical to your shoes and then track it into your house. Most labels suggest waiting anywhere from a few hours to a full day before letting people or pets back on the lawn.
Step 8: Clean Your Sprayer
After you finish, rinse your sprayer with clean water. Leftover herbicide inside the tank can damage the sprayer over time, and it can also mix badly with other chemicals if you use the same sprayer for something else later, like fertilizer or pest spray. Some gardeners keep a separate sprayer just for herbicide to avoid any mix-ups.
Store the leftover herbicide in its original container, in a cool, dry spot away from sunlight and out of reach of kids and pets.
Tips for Spraying Weeds in Different Spots
Lawn Weeds
Use a selective herbicide so your grass stays green and healthy while the weeds die off. Spot treat single weeds instead of spraying the whole lawn if the weed problem is small. This saves product and keeps your lawn looking natural.
Garden Beds
Be extra careful around flowers, herbs, and vegetables. A little drift can hurt or kill plants you actually want to grow. Some gardeners use a piece of cardboard as a shield, holding it around the weed while spraying to block the mist from reaching nearby plants.
Driveways, Patios, and Gravel Paths
These spots are perfect for non-selective herbicide since nothing needs to survive there. Spray on a dry, calm day and keep the nozzle low to avoid drift onto grass or plants at the edge.
Cracks in Sidewalks
Weeds love growing in tiny cracks in concrete. A targeted spray works well here since you’re not trying to protect any nearby grass. Just be careful about runoff into storm drains, since many areas have rules about herbicide reaching water systems.
Natural and Homemade Weed Killer Options
If you’d rather skip store-bought chemicals, a few home remedies can work on small weed patches, though they’re usually less powerful than commercial products.
- Vinegar spray: Mix white vinegar with a few drops of dish soap. The acid burns the leaves, though it often only kills the top of the plant, not the roots.
- Boiling water: Pour it directly onto weeds growing in cracks or gravel. It’s simple, cheap, and works fast on small weeds.
- Salt water: A strong salt solution kills weeds but can also harm the soil, so use it only in spots where you don’t plan to grow anything else later.
These natural methods work best for weeds growing in patios, driveways, or gravel, not lawns, since they can also damage grass.
Common Mistakes to Avoid
- Spraying on a windy day — this causes drift and wastes product.
- Ignoring the label — every herbicide has different rules for mixing and spacing.
- Ignoring the weather forecast — rain right after spraying washes the chemical away.
- Using too much herbicide — more isn’t always better and can damage nearby plants.
- Spraying during extreme heat — this stresses your lawn and can cause the chemical to evaporate before it works.
- Skipping safety gear — gloves and goggles protect your skin and eyes from irritation.
- Spraying too close to water — herbicide runoff can hurt fish, frogs, and other wildlife.
How Long Does It Take for Weed Killer to Work
Most post-emergent sprays start working within a few hours, but full results can take one to two weeks. You’ll notice the weed leaves turning yellow, then brown, as the plant dies from the inside out. Tougher weeds with deep roots, like dandelions or bindweed, sometimes need a second spray a couple of weeks later if the first round doesn’t fully kill the root system.
Pre-emergent herbicide works differently since it stops seeds from sprouting in the first place, so you won’t see visible results the same way. Instead, you’ll just notice fewer new weeds popping up over the following weeks.
How Often Should You Spray
For most lawns, spraying twice a year covers the basics — once for pre-emergent control before weed season starts, and once for post-emergent spot treatment as weeds show up. Heavier weed problems might need spot treatment every few weeks until the yard is under control.
Try not to over-spray the same spot too often, since this can build up chemical residue in the soil and harm the grass roots nearby.
Staying Safe Around Kids, Pets, and the Environment
Herbicide safety isn’t just about protecting yourself — it protects your family, your pets, and the local wildlife too. Keep these tips in mind:
- Store herbicide out of reach, in a locked cabinet if possible.
- Never pour leftover herbicide down a drain or storm sewer.
- Avoid spraying near ponds, streams, or wells.
- Wash your hands and clothes after spraying, even with gloves on.
- Choose a product labeled safe for pets once dry, if you have dogs or cats that spend time outside.
Final Thoughts
Spraying weed killer isn’t complicated once you know the basic steps. Pick the right type of herbicide for your job, read the label, gear up for safety, and spray on a calm, dry day. Cover the weeds evenly without soaking them, keep people and pets away until it dries, and clean your sprayer when you’re done.
With a bit of patience and the right timing, your yard can go from weed-covered to clean and healthy in just a few weeks. Stick to a regular spray schedule, watch out for common mistakes, and your lawn will thank you for it.

Hi, I’m Mary, the founder of GardenCure.com. I’m passionate about creating healthy, beautiful gardens and well-kept lawns. I share practical experience and trusted advice on garden and lawn gear that truly works. With the support of my dedicated research team, our writers produce honest, in-depth reviews using reliable, authentic sources—helping you choose the right tools with confidence for your outdoor space.