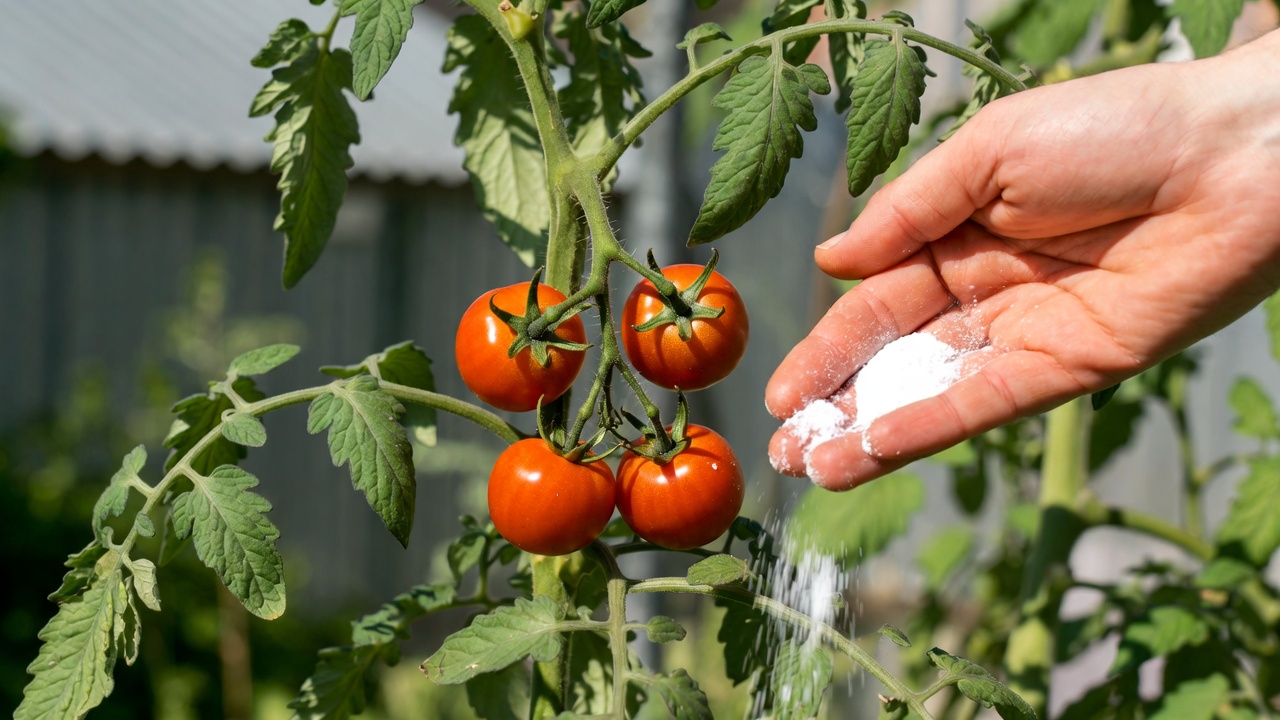
How to Add Calcium to Tomato Plants?
If you grow tomatoes in your garden, you know how frustrating it is when something goes wrong. Brown spots appear at the bottom of your fruit. Your plants look weak and stressed. Your harvest disappoints you. Often, the problem isn’t pests or disease. It’s calcium deficiency. This common issue affects tomato plants everywhere. The good news? It’s easy to fix. You just need to know what to do.
In this article
This guide walks you through everything about calcium and your tomato plants. You’ll learn why calcium matters. You’ll discover what happens when plants don’t get enough. Best of all, you’ll get practical steps to fix the problem and prevent it from coming back.
Why Tomato Plants Need Calcium
Tomato plants are hungry for calcium. This mineral does more than just sit in the soil. It actually builds strong cell walls throughout the plant. Think of calcium as the building material for plant structure. Without it, plants can’t stand tall or hold heavy fruit.
Calcium helps with more than just structure. It affects how plants absorb water and nutrients. It keeps disease away. It helps the plant move sugars from the leaves down to the fruit. When calcium runs low, everything suffers.
Tomatoes need calcium more than many other garden plants. This is especially true for growing fruit. The fruit itself needs lots of calcium to develop properly. Without enough, you get fruit with defects and problems.
The amount of calcium your plants need depends on a few things. Soil type matters. The weather plays a role. How much water you give them affects calcium absorption. All of these things work together. The good news is that you have control over most of them.
Understanding Blossom End Rot: The Main Problem
Blossom end rot is the most common sign of calcium deficiency in tomatoes. This isn’t a disease. Insects don’t cause it. It’s a nutritional problem with a visible result.
Blossom end rot shows up as brown, sunken spots on the bottom of the fruit. These spots look dark and mushy. They start small but grow over time. Eventually, the entire bottom of the fruit can rot. The fruit becomes unusable for eating or cooking.
Here’s what happens inside the plant. The bottom of the fruit develops a few days after the flower blooms. At this time, calcium is still moving into the fruit. If the plant doesn’t have enough calcium, the cells at the bottom can’t develop properly. The tissue collapses. This creates the rot.
The tricky part is that this problem isn’t always about low calcium in the soil. Sometimes the soil has plenty of calcium. The plant just can’t absorb it properly. This happens when watering is inconsistent. Too much water or too little water both cause problems.
Other signs of calcium issues include poor leaf development. New leaves might look distorted or crinkled. Growth slows down. The entire plant looks weak. Some growers notice that their tomatoes don’t grow as large as they should.
The Connection Between Water and Calcium
Here’s something many gardeners don’t realize. Calcium absorption depends heavily on water. When soil is too dry, roots can’t pick up calcium. When soil is too wet, the same thing happens. The calcium is there, but the plant can’t use it.
Tomato plants need consistent moisture. Not soggy. Not dry. Just right. This means watering deeply and regularly. Aim for one to two inches of water per week. Adjust based on rain and temperature.
The best time to water is early in the morning. This gives plants time to absorb water before the heat of the day. Water at the soil level, not on the leaves. This helps the whole root system drink.
During hot spells, you might need to water more often. Check the soil with your finger. If it’s dry an inch down, it’s time to water. If it’s wet, wait another day.
Inconsistent watering is the biggest cause of blossom end rot. Even if you add calcium, poor watering practices will defeat your efforts. Fix your watering routine first. Then add calcium as needed.
Testing Your Soil for Calcium Levels
Before you start adding calcium, find out what you’re working with. A soil test tells you exactly what your soil contains. It takes the guesswork out of gardening.
Soil tests are affordable. They cost between fifteen and fifty dollars. Your local extension office can help you order one. Some garden centers offer simple tests. Labs can do more detailed testing.
The test tells you the pH level of your soil. It shows calcium, magnesium, potassium, and other nutrients. It also gives recommendations for what to add. This is invaluable information for your garden.
Most plants, including tomatoes, like slightly acidic to neutral soil. A pH between 6.0 and 7.0 works well. When soil is too acidic, calcium becomes less available. Raising the pH helps calcium become available to plants.
If your soil test comes back low in calcium, you know what to do. If it’s adequate but you still see problems, the issue is likely watering or pH. Addressing all three areas gives you the best results.
Eggshells: Free Calcium for Your Garden
Eggshells are a fantastic source of calcium. They’re free. You probably throw them away already. Start saving them instead.
Eggshells contain about 95% calcium. This is the same type of calcium that plants can use. One eggshell has about 750 to 800 milligrams of calcium. That might not sound like much. But if you use multiple shells, it adds up fast.
How do you use eggshells? Rinse them thoroughly to remove any egg residue. Dry them completely. This prevents mold and smell. Crush them into small pieces. You don’t need powder. Just break them into fragments about half an inch in size.
Add crushed eggshells to your soil when you plant tomatoes. Work them into the top few inches. The shells will break down slowly over the season. They’ll release calcium steadily. This gives plants a long-term supply.
You can also add crushed eggshells as a top dressing during the growing season. Sprinkle them around the base of your plants. Water well after applying. This helps the calcium move down to the roots.
Some gardeners make an eggshell tea. Boil eggshells in water for several minutes. Let them soak overnight. The water absorbs some calcium. Strain out the shells. Use this liquid to water your plants. This method works faster than using whole shells.
One note: eggshells take time to break down. Plan ahead. If your plants are already showing signs of deficiency, eggshells alone might not fix it quickly. Combine them with faster-acting calcium sources.
Lime: Raising pH and Adding Calcium
Lime does two things at once. It adds calcium and raises soil pH. This makes it a powerful tool for growing better tomatoes.
Lime comes in different forms. Calcitic lime adds calcium. Dolomitic lime adds both calcium and magnesium. For tomatoes, either works well.
When soil is acidic, calcium becomes locked up. Plants can’t reach it even if it’s there. Lime solves this by raising the pH. Now calcium becomes available again.
How much lime do you need? Your soil test tells you. It will recommend a rate based on your soil type and current pH. Follow these recommendations. Using too much lime causes problems too.
Application is simple. Spread lime evenly over the soil. Work it in the top few inches. Water well. Lime needs time to work. It takes weeks or months to raise pH significantly. Plan to apply it before planting season starts.
Pelletized lime works faster than powdered lime. It’s easier to spread and incorporates faster. Ground limestone powder is cheaper but takes longer. Choose based on your timeline and budget.
Don’t apply lime and acidifying materials in the same season. This causes problems. If you need to adjust pH, do it all at once. Let it settle before the next season.
Gypsum: Adding Calcium Without Raising pH
Sometimes you need calcium but your pH is already right. Gypsum is your answer. It adds calcium without changing soil pH. This makes it perfect for soils that are already neutral or slightly alkaline.
Gypsum provides a form of calcium that plants absorb easily. It works faster than lime in most cases. You’ll see results within weeks rather than months.
How to apply gypsum is straightforward. Spread it over the soil surface. Water it in. You can also dissolve it in water and apply it as a liquid. The rates are usually one to two pounds per one hundred square feet.
Gypsum also improves soil structure. It helps heavy clay soils drain better. It helps sandy soils hold more water. This benefit goes alongside the calcium addition. Better soil structure means better water retention. Better water retention means better calcium absorption.
Many gardeners alternate between gypsum and lime. They use gypsum during the season when adjusting pH isn’t needed. They apply lime before planting to set the right pH. This two-step approach covers all the bases.
Crushed Oyster Shells: A Slow-Release Option
Oyster shells contain calcium just like eggshells do. They’re a byproduct from seafood processing. Sourcing them helps reduce waste.
Crushed oyster shells work slower than lime or gypsum. They release calcium gradually throughout the season. This means your plants get steady nutrition. There’s less risk of oversupply.
The shells are coarser than lime. They don’t incorporate into soil as easily. Mix them thoroughly when you add them. Break them into smaller pieces if possible. Finer fragments work better.
Crushed oyster shells suit long-term soil building. Use them when you’re improving your garden over multiple seasons. They fit well into a sustainable approach to gardening.
Sources matter. Make sure the oyster shells came from a reputable supplier. They should be clean and free of contaminants. They shouldn’t contain any remaining animal material.
Bone Meal: Calcium Plus Phosphorus
Bone meal is another organic option. It contains calcium and phosphorus. Both nutrients help tomato plants.
Phosphorus supports root development and flower formation. Combined with calcium, bone meal gives your plants a boost for strong roots and plenty of flowers.
Bone meal breaks down slowly. It’s best applied at planting time. Work it into the soil several inches down where roots will grow. This helps new roots encounter the nutrition as they develop.
The downside is the slow breakdown. If you need quick results, bone meal alone won’t help. Combine it with faster-acting options like gypsum.
Bone meal has a slight smell. Some gardeners don’t notice it. Others find it noticeable. This rarely bothers plants. Just use your preference for how strong a smell you want in your garden.
Foliar Sprays: Quick Calcium Boost
Foliar sprays deliver calcium directly to the leaves. Plants absorb it through the leaf surface. This works faster than soil applications. It helps when plants are already stressed.
Calcium chloride and calcium nitrate are common choices. You mix them with water and spray the foliage. Plants start absorbing it immediately.
Early morning or late evening is the best time to spray. Avoid hot, sunny days. The heat can damage leaves. Wet foliage in strong sun can cause burn spots.
Spray enough to coat all the leaves. Front and back. Make sure the spray covers new growth. Young leaves need the calcium most.
Repeat applications every two weeks during the growing season. This keeps a steady supply moving in. Stop spraying once fruit starts developing heavy. At that point, focus on soil calcium.
Commercial Calcium Products
Garden centers sell many calcium products. They have different names and forms. They all do similar things with different timing.
Calcium nitrate dissolves in water. It works fast. Use it for quick fixes when plants show obvious signs of deficiency.
Calcium carbonate is another option. It stays in soil longer. It works slower but provides longer benefits.
Read the label to understand what you’re getting. Different products have different rates of application. Follow the directions closely. More isn’t better. Using too much calcium can cause other nutrient problems.
Look for products made for vegetables if possible. They have ratios designed for food crops. Products formulated for general plants might not fit tomato needs as well.
Building Calcium Into Your Planting Mix
The best approach is preventing problems before they start. Build calcium into your soil before planting tomatoes. This gives plants a strong foundation.
Start with a quality compost. Good compost contains balanced nutrition including calcium. Mix it deeply into your planting area. Work it into the top eight to twelve inches.
Add crushed eggshells or oyster shells as you prepare the bed. Sprinkle them evenly. Work them in thoroughly. They’ll break down slowly all season.
If your soil test shows low calcium, add lime or gypsum as recommended. Do this several weeks before planting. This gives materials time to integrate into the soil.
Choose a compost or potting mix designed for vegetables. These typically include calcium already. Avoid pure sand-based mixes. They drain too fast and don’t hold nutrients.
Create raised beds with quality soil if you’re starting fresh. Fill them with a mixture of compost, good garden soil, and sand. This provides excellent drainage and nutrition. It also lets you control the starting composition.
The Role of Magnesium and Other Minerals
Calcium doesn’t work alone. Magnesium helps calcium function in plants. When one is low, problems show even if the other is adequate.
Magnesium helps plants absorb and use calcium. A ratio of about three to four parts calcium to one part magnesium works well.
Your soil test shows magnesium levels. If it’s low, consider dolomitic lime. This form contains both calcium and magnesium. One application addresses both needs.
Potassium and nitrogen also matter for tomato health. These minerals work together with calcium. A balanced approach to nutrition gives the best results.
Don’t obsess over perfection. Tomatoes are resilient. They can handle small variations. Focus on consistent watering, moderate nutrition, and calcium availability. This foundation covers most needs.
Organic Matter: The Foundation for Everything
Adding organic matter improves everything about your soil. This is the single best thing you can do for long-term soil health.
Organic matter helps soil hold water. It helps with nutrient availability. It improves drainage in clay soils and water retention in sandy soils. It feeds beneficial microbes that break down minerals and make them available.
Add compost, aged manure, or shredded leaves every year. Work them into the top few inches. Over time, your soil transforms. Nutrition becomes more balanced. Water movement improves. Plants grow healthier.
This approach prevents many problems before they start. Plants with good soil, consistent water, and balanced nutrition rarely develop severe calcium deficiency.
Mulching: Protecting Your Investment
Mulch does more than look nice. It regulates soil temperature. It keeps soil moisture consistent. It breaks down and adds organic matter. All of this supports better calcium availability.
Use a two to three inch layer of mulch around tomato plants. Keep it a few inches away from the stem. This prevents rot and disease issues.
Organic mulches work best. Wood chips, straw, shredded leaves, or aged bark all work. They break down over time and improve soil. Avoid fresh wood chips. They can lock up nitrogen as they break down.
Refresh mulch as needed through the season. It compresses and breaks down. Maintaining consistent depth keeps benefits consistent.
Common Mistakes to Avoid
New gardeners make predictable mistakes with calcium. Learning from them saves frustration.
The biggest mistake is inconsistent watering. Calcium only reaches plants when water carries it. Erratic watering defeats your best efforts. Commit to a regular schedule. Use a drip system or soaker hose if possible. This delivers water consistently.
Another mistake is adding too much calcium too fast. This can cause nutrient imbalance. Follow recommended rates. Resist the urge to use double applications thinking it’s better. It’s not.
Many people ignore soil pH. Low pH ties up calcium. You can add all the calcium you want. If pH is wrong, plants can’t use it. Test your soil. Adjust pH if needed. This single step helps everything else work better.
Planting tomatoes in the same spot every year depletes soil. Rotate crops. Let soil rebuild between seasons. Or improve it heavily with amendments each year.
Ignoring earlysigns of problems costs time. Watch your plants. At the first sign of brown spots or twisted leaves, take action. Early intervention beats dealing with widespread problems later.
Troubleshooting Persistent Problems
Sometimes you do everything right and problems continue. Don’t give up. Dig deeper to find what’s happening.
Check watering honestly. Most gardeners think they’re watering well when they’re not. Really commit to deep, consistent watering. Use a gauge if you’re uncertain about amounts.
Have another soil test done. Your first test is valuable. A second test later in the season shows if your additions worked. It also reveals any new issues.
Look at the whole plant. Is new growth twisted? Are older leaves yellowing? Different symptoms point to different problems. Calcium deficiency has specific signs. Other issues can look similar.
Check for pests that weaken plants. Sometimes mineral problems are secondary to pest damage. Fix the primary problem. Secondary issues often resolve themselves.
Consider your variety. Some tomato varieties are more prone to blossom end rot than others. Check what you planted. Some varieties need extra calcium. This is valuable information for next season.
Planning for Next Season
The best time to fix tomato problems is before they happen. Use what you learned this season to improve next season.
Did you have blossom end rot? Plan to add calcium amendments before planting. Did you have watering problems? Invest in a drip system. Did you discover pH issues? Schedule lime application early.
Keep notes about what worked and what didn’t. These records guide future decisions. After a few seasons, you’ll have a system that works perfectly for your specific garden.
Rotate where you plant tomatoes. This prevents mineral depletion in one spot. It also interrupts disease cycles. Two to three year rotation works well.
Experiment with different calcium sources. What works great in one garden might work less well in another. Your soil, water, and climate are unique. Finding your best approach takes time.
Quick Tips for Healthy Tomato Plants
Growing healthy tomatoes gets simpler with a few consistent practices.
Water deeply and regularly. This beats any other single factor. Inconsistent water causes more problems than anything else.
Test your soil once every few years. This takes guesswork out of what your soil needs. Recommendations based on actual testing work better than general advice.
Add compost every season. This builds soil gradually. Over time, your soil improves dramatically. Rich soil with good structure grows healthy plants.
Use mulch. It looks nice and protects your investment. The benefits compound over seasons.
Watch your plants regularly. Early detection of problems makes them easy to fix.
Choose disease-resistant varieties when possible. This prevents many issues before they start.
Final Thoughts
Growing great tomatoes isn’t complicated. Calcium is just one piece of the puzzle. But it’s an important piece. When you understand what your plants need and provide it consistently, success follows.
Start with the basics. Water consistently. Test your soil. Add calcium as needed. Build organic matter over time. Do these things and your tomatoes will thrive.
Don’t expect perfection. Some plants will still have small problems. Some fruit will develop minor issues. That’s gardening. The goal is better results, not perfect results.
Each season teaches you something new about your specific garden. Use that knowledge. Adjust your approach. Share what you learn with other gardeners. Together we all grow better at this.
Your tomato plants are counting on you. They don’t ask for much. Consistent water, decent soil, and a little calcium when needed. Provide these things and they’ll reward you with delicious fruit all season long.
Happy growing!

Hi, I’m Mary, the founder of GardenCure.com. I’m passionate about creating healthy, beautiful gardens and well-kept lawns. I share practical experience and trusted advice on garden and lawn gear that truly works. With the support of my dedicated research team, our writers produce honest, in-depth reviews using reliable, authentic sources—helping you choose the right tools with confidence for your outdoor space.