How Can I Get Rid of Mealybugs?
If you’ve noticed tiny white bugs on your houseplants, you might be dealing with mealybugs. These small insects can quickly destroy your plants and spread to other ones in your home. The good news? Getting rid of mealybugs is totally possible, and you don’t need fancy equipment or expensive treatments to do it. This guide walks you through everything you need to know to save your plants and keep them healthy.
In this article
What Are Mealybugs and Why Should You Care?
Mealybugs are small insects that look like tiny cotton balls or white fuzz stuck to your plants. They’re usually about one-quarter inch long and covered in a waxy white coating that makes them look fuzzy. You’ll find them hanging out on leaves, stems, and in the corners where branches meet.
These pests feed on plant sap, which is basically the plant’s blood. When mealybugs suck out this sap, they weaken your plant over time. An infected plant loses its energy, stops growing, and can eventually die if you don’t take action. The worst part? They multiply fast. One bug can lay hundreds of eggs, so what starts as a small problem becomes a huge headache in just a few days.
Mealybugs aren’t picky eaters either. They attack indoor plants, outdoor plants, and even food crops. If you grow succulents, orchids, ferns, or any tropical houseplant, you’re at risk. The good news is that catching them early makes treatment way easier.
How to Spot a Mealybug Infestation
Catching mealybugs early is half the battle. Here’s what to look for when you inspect your plants.
Look for the white, fluffy stuff on your leaves and stems. It’s the easiest sign to spot. The fuzz is actually a protective coating that makes the bugs harder to kill. You might see it clustered in the leaf joints or along the main stem of the plant.
Check for sticky residue on leaves and soil below your plant. When mealybugs feed, they release a sugary waste called honeydew. This sticky substance builds up on leaves and can even drip onto your windowsill or furniture below. This honeydew also attracts other pests and can lead to black sooty mold growing on your plant.
Watch for yellowing leaves, stunted growth, and leaves that fall off for no reason. A plant infested with mealybugs often looks sick and droopy even if you’re watering it right. The plant might stop growing new leaves and buds, and existing leaves might turn yellow or curl up.
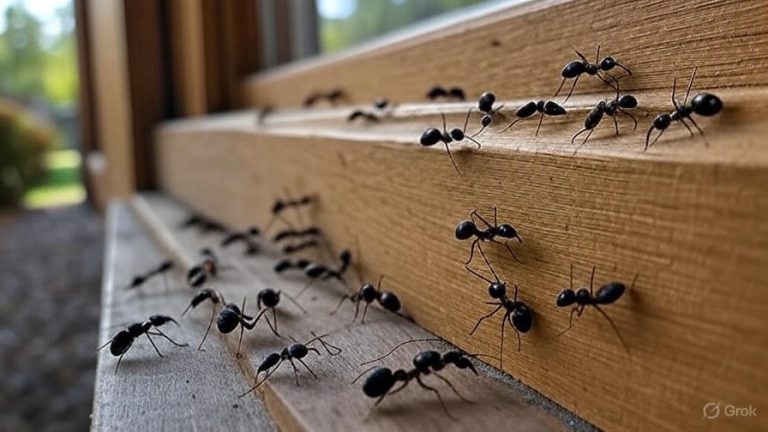
Look for ants on your plant. This seems weird, but ants and mealybugs have a partnership. Ants actually protect mealybugs because they want to eat the honeydew they produce. If you see ants crawling up your plant pot, there’s a good chance mealybugs are there too.
Get close with a magnifying glass or your phone camera zoomed in to see the tiny bugs moving around. They move slowly, but they do move. Young mealybugs are even smaller, so a close look helps you catch them before they spread.
The Natural Spray Method: Your First Line of Defense
The easiest way to fight mealybugs is with a simple spray you can make at home. This method works great for light to medium infestations and is safe for you, your pets, and your plant.
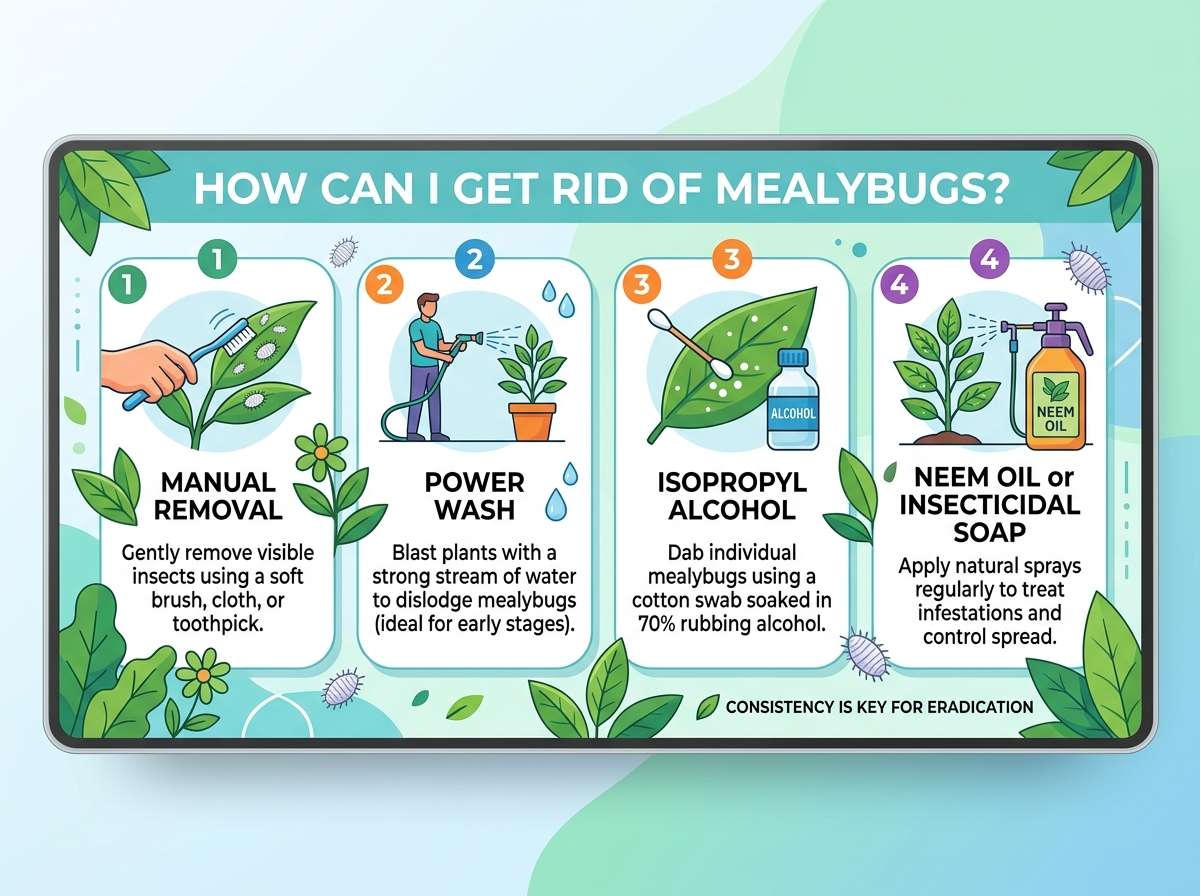
Mix rubbing alcohol with water in a spray bottle. Use one part rubbing alcohol to one part water. That’s it. You just made an effective mealybug killer. The alcohol dissolves the waxy coating on the bugs and dries them out, killing them without harsh chemicals.
Spray your plant thoroughly, making sure to hit every leaf, stem, and branch. Don’t be shy. Get the undersides of leaves, the soil line, and especially the spots where you see the white fuzz. The spray needs to make direct contact with the bugs to work.
Let the spray sit on the plant for a few hours, then rinse it off with clean water. You don’t have to rinse it, but many people do to prevent any alcohol smell from lingering and to wash away dead bugs and residue.
Repeat this spray every three to five days for about two weeks. Mealybugs lay eggs that hatch at different times, so one spray won’t get them all. Multiple applications ensure you kill the bugs at different life stages.
If you don’t have rubbing alcohol, you can mix water with a few drops of dish soap instead. Spray it on the same way. The soap works by coating the bugs and blocking their breathing holes. It’s not as strong as alcohol, but it still works, especially for smaller infestations.
The Manual Removal Approach: Old School and Effective
Sometimes the simplest solution is the best one. Physically removing mealybugs works surprisingly well and takes almost no time.
Grab a cotton swab or small paintbrush dipped in rubbing alcohol. Touch each mealybug you can see directly with the swab. The alcohol kills the bug on contact. This method works great if the infestation is small and you can reach all the bugs easily.
Use your fingers to wipe off the white fuzz from leaves and stems. Sounds gross, but it’s actually very effective. Once you squish them, they’re gone. Wash your hands right after. This manual removal gets rid of visible bugs in minutes and doesn’t require any spraying.
Trim off leaves that are heavily infested and throw them away. If a leaf is covered in mealybugs and the damage is already done, there’s no point trying to save it. Cutting it off removes the bugs and focuses your plant’s energy on healthy growth.
Combine manual removal with spray treatment for the best results. Start by removing all the visible bugs by hand, then spray the plant to catch any you missed and prevent new infestations.
Neem Oil: A Powerful Natural Treatment
Neem oil comes from the seeds of neem trees and has been used for thousands of years to treat plant pests. It’s organic, natural, and works well against mealybugs. You can buy it at most garden centers or online.
Mix neem oil with water following the bottle directions. Most bottles tell you to use one to two tablespoons per gallon of water. Some bottles have more concentrated versions, so always read the label first.
Spray your plant thoroughly, coating both sides of leaves and the stems. Apply neem oil in the evening or early morning, not in direct sunlight. The sun can damage the oil and reduce how well it works. Also, neem oil can harm some plants if applied in heat, so timing matters.
Repeat applications every seven to ten days until the infestation is gone. Neem oil kills mealybugs by coating their bodies and blocking breathing holes, similar to soap spray. It also disrupts their life cycle, so repeated applications work best.
Wear gloves and wash your hands after using neem oil. While it’s natural and safer than most pesticides, you still want to handle it carefully. Don’t apply it right before you plan to water your plant, as it can interfere with the water absorption.
Horticultural Oil Spray: Another Effective Option
Horticultural oil spray is another organic option that kills mealybugs fast. This spray is lighter than neem oil and doesn’t leave a strong smell behind.
Buy horticultural oil from your local garden store. It’s usually sold as a concentrated liquid you mix with water. Follow the mixing instructions on the bottle carefully.
Apply the spray to your entire plant, making sure to coat all surfaces. Like neem oil, apply it in cool temperatures, not in direct sun or extreme heat. The oil needs to coat the bugs completely to work, so thorough coverage is important.
Let the spray dry completely before moving your plant. The drying process is when the oil actually does its job of suffocating the pests. This usually takes a few hours.
Repeat every seven to ten days for two to three weeks. This gives you time to catch mealybugs at different life stages and completely clear the infestation.
Insecticidal Soap Spray: Gentle but Effective
Insecticidal soap is a mild pesticide made from potassium salts of fatty acids. Sounds technical, but it basically means it’s a safe soap spray that kills soft-bodied insects like mealybugs.
Buy insecticidal soap at any garden center. Mix it with water according to the bottle instructions and spray your plant thoroughly.
This option is gentler on your plant than some other treatments, making it perfect for delicate plants. It also breaks down quickly in the environment, so there’s no lingering residue.
Like other spray treatments, apply it every five to seven days until the mealybugs are gone. This usually takes two to three weeks.
Isolating Your Plant: Preventing Spread
Once you find mealybugs on one plant, stop them from spreading to others right away.
Move the infested plant away from your other plants. Put it in a separate room if possible, or at least move it far enough away so bugs can’t crawl or jump to nearby plants. Mealybugs can’t fly, but they can crawl from plant to plant, so distance matters.
Stop watering your other plants the same way you water the infested one. Wash your hands between handling plants. These small steps keep the bugs from spreading while you treat the infested plant.
After two to three weeks of treatment with no visible mealybugs, you can move the plant back to its normal spot. Just keep checking it for a few more days to make sure the infestation doesn’t come back.
Preventing Future Mealybug Problems
Once you get rid of mealybugs, the last thing you want is for them to come back. Prevention is easier than treatment.
Inspect new plants before bringing them home. Mealybugs often hitch rides on new plants from stores or friends. Spend five minutes looking at a new plant under good light before placing it with your other plants. Quarantine new plants in a separate area for a week or two if you’re worried.
Keep your plants clean. Dust leaves gently with a soft cloth every week or two. Healthy, clean plants are less attractive to pests and can fight off small infestations on their own.
Avoid overwatering your plants. Stressed plants are more vulnerable to pest damage. Water only when the soil is dry to the touch, and make sure your pots have drainage holes so water doesn’t sit around the roots.
Keep an eye on humidity levels. Mealybugs love dry air, so maintain moderate humidity for tropical plants. Misting leaves occasionally or using a humidifier helps.
Check your plants regularly. Spend a few minutes every week looking over your plants for signs of pests. Catching problems early makes treatment way easier.
Why Some Treatments Fail
Sometimes people treat mealybugs and the problem comes back. Here’s why that happens and how to avoid it.
Not treating long enough is the biggest reason. People spray once or twice and think they’re done, but mealybug eggs hatch at different times. You need to treat for at least two to three weeks to catch all of them at different life stages. Skip this step, and you’ll see them again in days.
Missing spots when you spray is another common problem. Those white fuzzy clusters hide in tight corners and leaf joints. If your spray doesn’t reach everywhere the bugs are hiding, they survive and rebuild the population. Spray thoroughly and don’t skip any part of the plant.
Not removing heavily infested leaves makes treatment harder. If a leaf is totally covered in bugs, the treatment has to work through a thick layer of fuzz and bugs to reach fresh ones. Trimming off the worst leaves first makes the remaining treatment more effective.
Stopping treatment too early is the final mistake. Even if you don’t see mealybugs for a few days, keep treating for the full two to three weeks. Eggs and very young bugs are hard to see. Keep going with your treatment schedule, and you’ll win.
What If The Problem Is Really Bad?
If your plant is super heavily infested and nothing seems to work, you have a few options.
Try a stronger pesticide made for mealybugs. Go to a garden center and ask for an insecticide labeled for mealybugs. Follow the directions exactly, and use it only if natural methods have failed. Wear gloves and follow all safety instructions on the label.
Cut back the plant severely, removing all affected branches. Sometimes you have to remove sixty, seventy, or even eighty percent of the plant to get rid of all the bugs. It looks sad at first, but the plant will grow back healthy and bug-free.
Throw away the plant if it’s completely ruined. Sometimes a plant is so infested and so damaged that it’s not worth saving. Remove the whole thing, throw it away in the trash, and start fresh with a healthy new plant. This also prevents any remaining bugs from infesting your other plants.
Getting Your Plant Back on Track
After you kill the mealybugs, your plant needs time to recover and start growing again.
Stop treating once the mealybugs are completely gone. Give your plant a break from sprays and treatments. Let it rest for a week or two.
Water normally and keep the plant in good light. Get back to your regular plant care routine. Good light, proper watering, and normal humidity help your plant bounce back.
Hold off on fertilizing for a month or so. Your plant is stressed from the infestation and treatment. New growth might look weak at first, but that’s normal. Give it time before adding fertilizer.
Trim off any dead leaves and branches once the plant starts putting out new growth. This helps the plant focus its energy on healthy new leaves instead of trying to keep damaged ones alive.
Final Thoughts: You’ve Got This
Mealybugs seem scary at first, but they’re totally manageable. With the right approach and a little patience, you can get rid of them and save your plants. Start with the simplest method that fits your situation, stay consistent with treatment, and don’t give up even if progress seems slow.
Remember that prevention is always easier than treatment. Check your plants regularly, keep them healthy, and watch for any signs of trouble. A few minutes of attention each week can save you hours of treatment later.
Your plants are counting on you, and you can do this. Start treating today, and in a few weeks, you’ll have healthy, mealybug-free plants again. Now get out there and save your green friends!

Hi, I’m Mary, the founder of GardenCure.com. I’m passionate about creating healthy, beautiful gardens and well-kept lawns. I share practical experience and trusted advice on garden and lawn gear that truly works. With the support of my dedicated research team, our writers produce honest, in-depth reviews using reliable, authentic sources—helping you choose the right tools with confidence for your outdoor space.