How to Use an Indoor Greenhouse?
An indoor greenhouse can transform your home into a lush green space, even if you live in an apartment with limited sunlight. Whether you want to grow vegetables, herbs, or ornamental plants, a home greenhouse provides the perfect environment for your garden dreams. In this guide, we’ll walk you through everything you need to know to start your indoor gardening journey.
In this article
What Is an Indoor Greenhouse?
An indoor greenhouse is a small enclosed space designed to protect plants while creating ideal growing conditions. It’s essentially a miniature version of those massive structures you see in botanical gardens, but sized for your living room, balcony, or basement.
Think of it as a protective box with transparent walls that trap heat and moisture. The clear panels let light in, and the enclosed space keeps temperature and humidity stable. This setup works great for starting seedlings, growing tender plants, or extending your growing season all year long.
Indoor greenhouses come in many sizes. Some are as small as a bookshelf, while others take up an entire corner of a room. They can sit on a table, hang from a ceiling, or stand freely on the floor. The size you get depends on how much space you have and how many plants you want to grow.
Why Use an Indoor Greenhouse?
Indoor plant houses give you several advantages over regular indoor gardening. Let’s explore the main benefits that make them worth the investment.
Better Light Control: Plants need light to grow. An indoor greenhouse lets you add grow lights easily, making sure your plants get the right amount of light every single day. You don’t have to depend on your windows anymore.
Humidity Management: Many houseplants love humid air. An enclosed greenhouse space makes it easy to keep moisture levels high without making your entire home feel damp. You can mist plants or add water trays without creating puddles on your floors.
Temperature Stability: Indoor plant houses keep temperatures steady. This protection means your plants don’t suffer from sudden temperature drops or hot air from heaters and air conditioners. Stable conditions help plants grow faster and healthier.
Space Efficiency: An indoor greenhouse lets you grow more plants in less space. You can stack shelves inside and maximize every inch. This is huge if you live in a small apartment or have limited garden area.
Year-Round Growing: You can grow food and flowers every single season. Tomatoes in winter? Absolutely. Lettuce in summer? Why not. An indoor setup gives you complete control over the growing season.
Pest Protection: Growing indoors means fewer problems with insects and outdoor pests. Your plants stay cleaner and healthier without constant pest battles.
Choosing the Right Indoor Greenhouse
When you start looking for an indoor plant house, you’ll find tons of options. Here’s what to consider.
Size Matters: Think about where you’ll place your greenhouse. Measure your space carefully. A greenhouse that’s too big will take over your room. One that’s too small will limit how many plants you can grow. Start smaller if you’re new to this. You can always upgrade later.
Material Quality: Most indoor greenhouses have PVC frames and clear plastic or polycarbonate panels. Check that the plastic is thick and won’t turn yellow after a few months of sun exposure. Better materials last longer and hold heat better.
Ventilation Features: Look for models with vents or openable panels. Good air flow stops mold and fungus problems. Stagnant air creates sick plants, so this matters more than you might think.
Shelving Options: Some greenhouses come with adjustable shelves. This is great because different plants need different heights. Adjustable shelves let you move things around as your plants grow.
Light Setup: Think about whether the greenhouse comes with grow lights or if you need to buy them separately. Built-in lights cost more upfront but save you money and hassle in the long run.
Budget Considerations: Indoor plant houses range from cheap to expensive. A basic model might cost thirty to fifty dollars. A nice greenhouse with lights and shelves could run several hundred. Start with your budget and buy the best quality you can afford.
Setting Up Your Indoor Greenhouse
Once you have your greenhouse, it’s time to set it up for success.
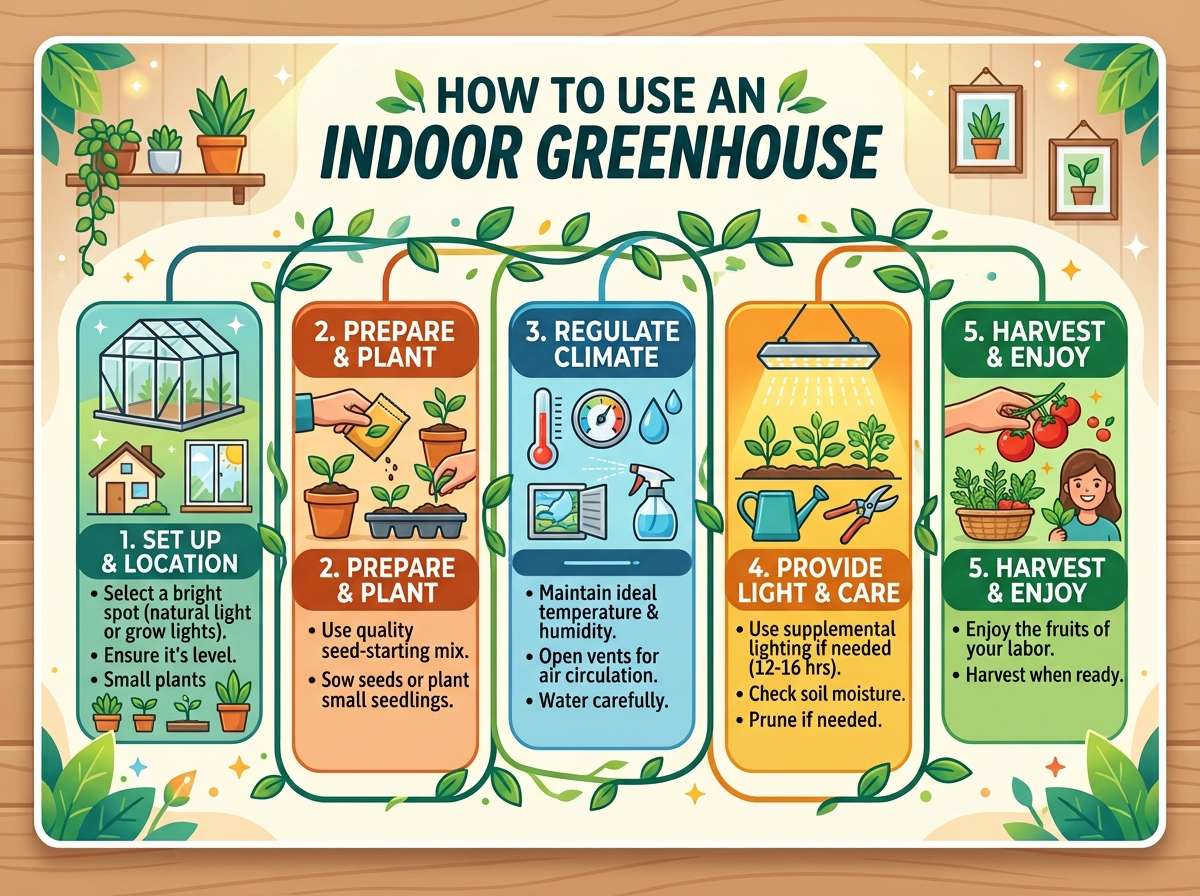
Location is Key: Pick a spot where you can keep an eye on your plants. Near a window works well if you’ll use natural light. Make sure the location stays stable. Don’t put your greenhouse near heating vents, air conditioner outlets, or drafty doors. These create temperature swings that stress plants.
Install Grow Lights: If your greenhouse didn’t come with lights, add them now. LED grow lights work great for indoor plants. They use less electricity than old bulbs and run cooler. Mount lights about six to twelve inches above your plants. Too high and they won’t get enough light. Too low and you’ll burn the leaves.
Set up a Timer: Your plants need consistent light schedules. A simple outlet timer lets you set lights to turn on and off automatically. Most plants do well with twelve to sixteen hours of light daily. Set it and forget it.
Add Humidity Trays: Fill shallow trays with pebbles and water. Set plant pots on the pebbles but not directly in the water. As water evaporates, it creates humidity around your plants. This trick works like magic for plants that love moisture.
Ensure Air Movement: Put a small fan inside pointing at your plants. It should run for a few hours daily. The gentle breeze strengthens plant stems and prevents fungal issues. Think of it as a workout for your plants.
Get a Thermometer: You need to know if your greenhouse stays warm enough. Invest in an inexpensive temperature gauge. Most plants like temperatures between sixty and seventy-five degrees.
Preparing Your Growing Medium
The soil you use matters a lot. Regular outdoor dirt doesn’t work well for indoor plant containers.
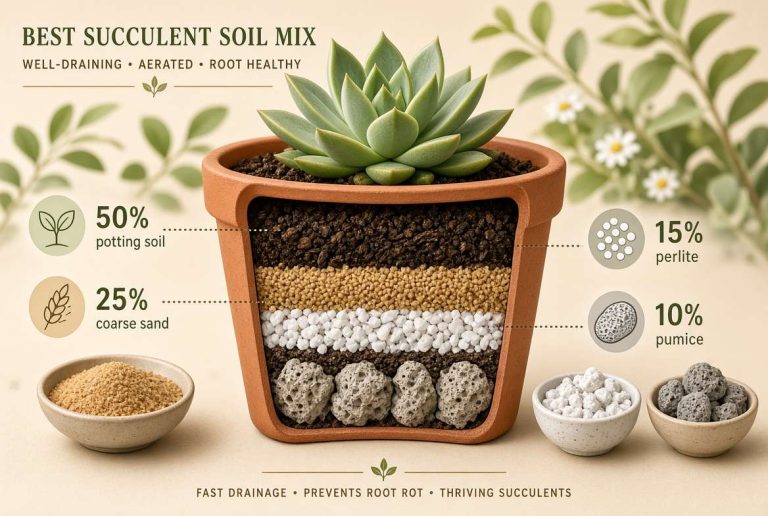
Use Quality Potting Mix: Buy a good potting soil from a garden store. It drains better than regular dirt and holds the right amount of moisture. Don’t use soil from your yard. It compacts in pots and causes root problems.
Consider Seed Starting Mix: If you’re starting plants from seeds, use seed-starting mix instead of regular potting soil. It’s lighter and fluffier, perfect for tiny roots. Once seedlings grow bigger, you can move them to regular potting mix.
Mix in Perlite: If your potting mix seems heavy, add perlite to improve drainage. Perlite is light, puffy volcanic glass that keeps soil from getting waterlogged.
Label Everything: Use markers to label pots with plant names and planting dates. It sounds silly, but you’ll thank yourself later when you have thirty seedlings and can’t remember which is which.
Watering and Feeding Your Indoor Plants
Watering indoors is different than watering an outdoor garden.
Check Soil Before Watering: Stick your finger into the soil up to your knuckle. If it feels dry, water. If it’s still moist, wait. Overwatering kills more indoor plants than underwatering. Remember that indoor pots have no drainage to a yard, so water stays put.
Water Thoroughly: When you do water, water until it drains from the bottom. This flushes out old salt buildup. Let the excess drain, then empty any standing water from trays.
Use Room Temperature Water: Cold water shocks plant roots. Let water sit in a can overnight so it reaches room temperature before you use it.
Feed on a Schedule: Indoor plants use nutrients faster than outdoor plants. Feed them every two weeks with diluted liquid fertilizer during growing season. Cut back to once a month in winter. Use half the strength recommended on the label to avoid burning roots.
Watch for Signs of Trouble: Yellow leaves might mean too much water. Brown tips usually mean the air is too dry. Slow growth could mean the plants need more light or food. Pay attention to these signals and adjust.
Starting Plants from Seeds
One of the best parts of indoor gardening is starting plants from scratch.
Get Quality Seeds: Buy seeds from reputable companies. Old seeds have low germination rates. If you save seeds from last year’s garden, store them in cool, dry places.
Follow Seed Packet Instructions: Each plant has different needs. Some seeds need soaking, some need light to germinate, and some need cold periods. Read the packet and follow it exactly.
Use Seed Trays: Seed trays with clear plastic domes create mini greenhouses perfect for germination. Fill them with seed-starting mix and moisten it before planting.
Keep Conditions Warm: Seeds germinate best in warmth. A heating mat under your seed tray speeds up germination. Most seeds love temperatures around seventy degrees.
Don’t Let Them Dry Out: Seeds need moist soil to sprout, but not waterlogged. Mist gently or water from below by setting trays in water for a few minutes.
Remove Humidity Cover When Sprouting: Once seedlings pop up, remove the plastic dome. This prevents mold and lets air circulate. Turn on your fan and keep grow lights on.
Thin Out Crowded Seedlings: When seedlings get two sets of true leaves, remove weak ones. Keep only the strongest plant per cell or area.
Growing Vegetables Indoors
Fresh vegetables from your living room sound amazing, and it’s totally doable.
Best Vegetables for Indoor Growing: Lettuce, spinach, herbs, and tomatoes grow great indoors. Peppers, cucumbers, and beans work too. Root crops like carrots and beets need more depth but still work in containers.
Light Requirements: Vegetables need more light than ornamental houseplants. Give them at least fourteen to sixteen hours daily. Your grow lights should be powerful enough to produce real heat.
Pollination Matters: Many vegetables need pollination to make fruit. Indoors, you become the bee. Use a small brush to tickle the inside of tomato and pepper flowers. Or use the fan trick—turn the fan on to shake pollen around.
Container Size: Vegetables need room for roots. Use at least a five-gallon pot for tomatoes and peppers. Lettuce and herbs do fine in smaller containers.
Support Structures: Tomatoes and cucumbers get tall. Install a small trellis or stake to keep plants from flopping over.
Harvest Regularly: The more you pick, the more your plants produce. This keeps plants bushy and productive. Don’t wait for everything to mature at once.
Growing Herbs Year-Round
Herbs are perfect for indoor greenhouses. Fresh basil in winter beats buying expensive packages at the store.
Easy Herbs to Grow: Basil, parsley, mint, chives, and oregano all thrive indoors. They’re forgiving and grow quickly.
Light Needs: Herbs need twelve to sixteen hours of light daily. They’ll survive with less, but growth slows down.
Frequent Harvesting: Pick leaves regularly from the tops. This encourages bushier growth instead of tall, leggy plants.
Humidity Preference: Most herbs like moderate humidity. They don’t need the tropical conditions that many houseplants love.
Pest Resistance: Indoor herbs rarely get pests. This means fresh herbs without worrying about pesticides. Perfect for cooking.
Constant Supply: Plant new herbs every few weeks. As some plants get old and woody, young plants replace them. This keeps you in fresh herbs forever.
Troubleshooting Common Problems
Even experienced gardeners run into problems. Here’s how to fix them.
Leggy Seedlings: Seedlings get tall and weak when light is too far away. Move lights closer or invest in stronger lights. Spindle-shaped seedlings usually won’t fix themselves.
Mold or Mildew: Improve air circulation with your fan. Mold loves stagnant, damp air. Better air flow fixes most fungal problems. Remove affected leaves if they’re covered.
Spider Mites: Tiny spider mites sometimes appear indoors. Increase humidity to create an environment they hate. Spray plants with water to wash mites off. Repeat every few days.
Yellow Leaves: This usually means too much water. Let soil dry out more between waterings. Make sure pots have drainage holes.
Slow Growth: Plants might need stronger light or more fertilizer. Check that temperatures stay in the right range. Move plants closer to lights and feed them more often.
Powdery Mildew: This white coating appears on leaves in damp conditions. Use a small fan to dry things out. Remove heavily affected leaves. Neem oil spray helps if problems persist.
Root Rot: If soil stays waterlogged, roots rot. This kills plants pretty fast. The only fix is to repot in fresh, dry soil immediately and change your watering habits.
Maintenance Tasks
Keeping your indoor greenhouse running smoothly requires regular care.
Clean Panels: Clear plastic panels get dusty. Wipe them down monthly so light penetrates better. Cloudy panels block light and reduce your grow lights’ effectiveness.
Check Equipment: Every week, make sure your lights still work and your fan spins freely. Replace light bulbs when they start fading.
Rotate Plants: Give all plants equal light exposure. Rotate pots weekly so every side gets direct light.
Repot When Needed: As plants grow, they need bigger homes. Repot into one-size-larger containers when roots start poking out of drainage holes.
Monitor Temperature: Check your thermometer weekly. If temperatures drop too low or spike too high, adjust your setup.
Prune Dead Leaves: Remove any yellowing or dead leaves immediately. They just waste the plant’s energy and look bad anyway.
Clean Tools: Wipe your watering can, scissors, and other tools with a damp cloth. This prevents spreading diseases between plants.
Seasonal Adjustments
Your greenhouse needs tweaks as seasons change.
Summer: Increase ventilation because greenhouses get hot. Run fans longer. You might need to shade plants from too much direct sun. Increase watering frequency because plants grow faster and moisture evaporates quicker.
Winter: Run lights longer because days are short. You might need a small heater to maintain temperature. Plants grow slower, so reduce fertilizer. Watering needs drop because evaporation slows down.
Spring and Fall: These seasons are usually sweet spots where everything balances nicely. Take advantage and do maintenance tasks like repotting.
Final Thoughts
An indoor greenhouse opens doors to year-round gardening. You can grow fresh vegetables in winter, start seedlings in spring, and keep herb gardens alive forever. The setup requires some thought and care, but it’s totally worth it.
Start small and simple. Don’t buy expensive equipment right away. Get a basic greenhouse, add lights, and start growing. As you learn what works, you’ll naturally improve your setup. Every gardener makes mistakes. That’s how you learn.
The joy of pulling a fresh tomato off a plant you grew from seed, or snipping basil for dinner, beats anything you’ll find at a store. Indoor greenhouses make all this possible, and honestly, it’s easier than you think. Get started today and watch your indoor garden thrive.

Hi, I’m Mary, the founder of GardenCure.com. I’m passionate about creating healthy, beautiful gardens and well-kept lawns. I share practical experience and trusted advice on garden and lawn gear that truly works. With the support of my dedicated research team, our writers produce honest, in-depth reviews using reliable, authentic sources—helping you choose the right tools with confidence for your outdoor space.